
Despite strong branding being at the heart of your company’s marketing, there are many ways it can get lost on your website. Featured images are one such example, and neglecting to set them up properly means a branding opportunity missed.
Featured images are visual representations of the posts and pages on your WordPress website. These images can be used within themes, and also tend to be chosen by social media sites when displaying your posts. However, without setting a specific featured image on every page, your WordPress website will simply show nothing in its place — unless you enable a default featured image.
In this article, we will first explain the importance and power of featured images for branding. Then, we will offer you three options to enable default featured images on your website. Let’s get started!
Why Using a Default Featured Image in WordPress Is Beneficial
Featured images, originally known as post thumbnails, are used as the primary images for WordPress posts and pages. They’re often integrated into themes, and are typically the first and largest images shown when posts are shared on social media.
How a featured image gets used varies depends on the WordPress theme, plugins, and any custom coding implemented. It’s important to understand that featured images must be specifically enabled on a website. By default, they’re only set manually.
Once enabled, it is entirely up to the configuration of the theme how they gets displayed to visitors — if at all! Additionally, plugins (such as Yoast SEO) can use them inside of widget areas, or even in meta data for use in social media sharing previews.
In short, featured images reinforce your branding by showing up throughout your WordPress website, as well as anywhere the link happens to be shared. However, if you don’t set one, your visitors and readers will see nothing. Setting a default featured image for all of your WordPress posts and pages means no opportunity is missed to show off your company.
Fortunately, while default featured images are not provided in WordPress out of the box, it is possible to work around that limitation. Let’s look at a few of your options.
How to Enable Default Featured Images in WordPress (3 Options)
Setting up default images may be as simple as installing a WordPress plugin, but you can also hand your developers a few lines of code to create the same effect. Keep in mind that adding default featured images is only the first step. You’ll need to also follow up with your web design team to ensure they are fully optimized within your WordPress theme.
Option 1: Use a Dedicated Plugin

Quick Featured Images is a robust plugin for managing your entire featured images library at once. This solution enables you to set, replace, and delete featured images in bulk, on top of letting you set default images for future posts.
After installing and activating the plugin, navigate to Featured Images > Preset Featured Images in your WordPress dashboard.
From here, you’ll be brought to the Preset Featured Images page. While there are a myriad of options here, you won’t need to access most of them now. Simply check the second option to automatically set images to the first image in a post, or the third option to choose a specific default featured image.
If you chose the latter option, it’s important to choose Post Type under the Taxonomy drop-down, and Post under the Value drop-down.
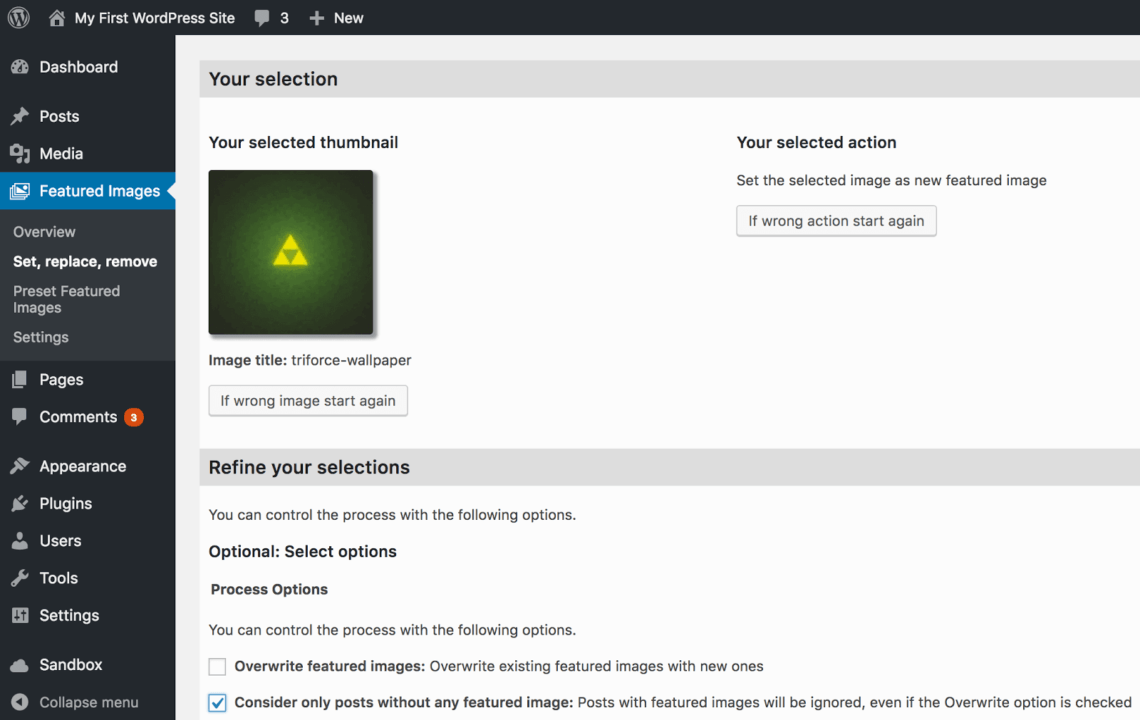
Next, you can update your existing posts to assign them featured images. Head to the Featured Images > Set, replace, remove page, which brings up another set of options. Again, there are many customizable elements, but we’re focusing on the first radio button. Leave this set to the default Set the selected image as new featured image option, choose a suitable image, then click Next.
On the next screen, scroll to the Process Options section, check the Consider only posts without any featured image option, then click Next once again:
Finally, you’ll need to review your new default featured images:
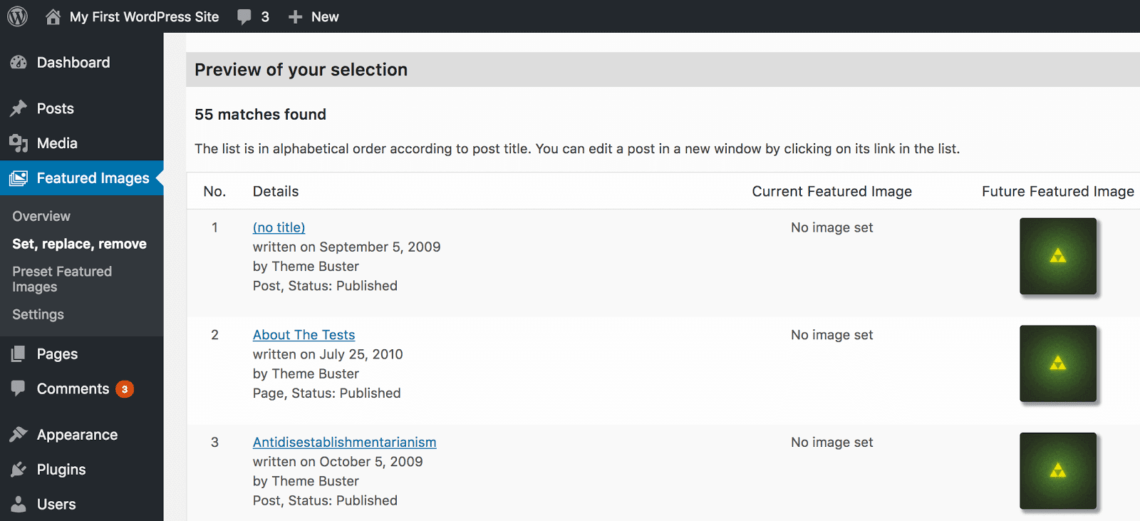
Once you’re happy, click Confirm Changes. Now, all of your posts and pages should have a default featured image.
It’s a simple process, but there are also manual options for setting default featured images. Let’s take a look at two options tailor-made for your development team.
Option 2: Manually Set a Fallback Image
It’s possible to manually set a preset fallback image within the code of your theme, rather than using a plugin. This is the simplest way to set featured images, although it is also the most limited version.
Your developers will need to add this snippet of code to your theme’s files wherever you’d like your image to display. It’s worth noting that this method wouldn’t let a plugin such as Yoast SEO automatically refer to it for social media, as it’s not stored anywhere within the WordPress database.
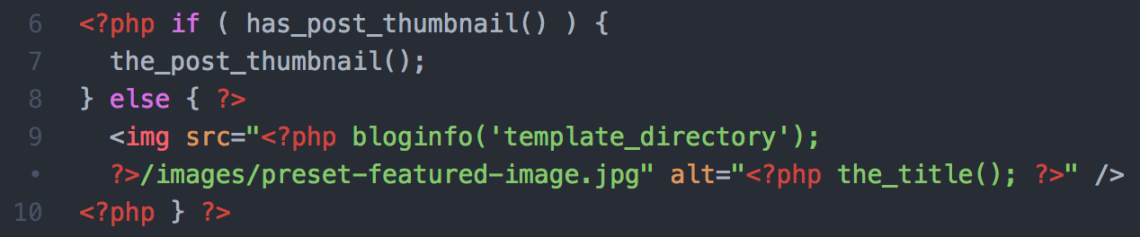
Here is the code snippet you can send to your developers:
<?php if ( has_post_thumbnail() ) {

the_post_thumbnail();

} else { ?>

<img src="<?php bloginfo('template_directory'); ?>/images/preset-featured-image.jpg" alt="<?php the_title(); ?>" />

<?php } ?>
The image (of course) will need to be added to your theme. Then, you’ll need to ensure the developers modify the specific image file name to match the chosen featured image file within the theme.
Option 3: Use the First Image of the Post
Finally, you can make the preset image within the theme a bit more dynamic. This would mean first checking the post for an image (using that as the featured image if it exists), before displaying a default featured image as a last resort.
This will involve asking your developers to script a function in the functions.php file of your theme. Here is a quick example of a function that works for us:
// Check for the first image in a post

function pagely_main_image() {

$files = get_children( 'post_parent='.get_the_ID().'&post_type=attachment

&post_mime_type=image&order=desc' );

if( $files ) :

$keys = array_reverse( array_keys( $files ) );

$j=0;

$num = $keys[$j];

$image=wp_get_attachment_image( $num, 'large', true );

$imagepieces = explode( '"', $image );

$imagepath = $imagepieces[1];

$main=wp_get_attachment_url( $num );

$template=get_template_directory();

$the_title=get_the_title();

print "<img src='$main' alt='$the_title' class='frame' />";

endif;

}
This function simply sorts through the content of your post to check for images. If one exists, it sets that as the featured image.
You’ll use this function in place of the static image HTML in the previous method. Here’s what that might look like:
<?php if ( has_post_thumbnail() ) {

the_post_thumbnail();

} else {

pagely_main_image();

} ?>
Once again, it’s important to instruct your developers to use this snippet wherever the featured image should appear on your site. This could include posts, pages, archives, or even your on-site search results templates.
Conclusion
Featured images are a powerful way to reinforce your branding, both within your theme and when posts are shared on social media. Setting up default featured images ensures this branding opportunity is never missed!
In this article, we’ve introduced you to featured images in WordPress. Then, we gave you three ways to add default featured images to your website:
- Use a dedicated plugin.
- Manually set a fallback image.
- Default to the first image in a post.
What questions do you have about setting default featured images in WordPress? Let us know in the comments section below!
Hello,
I wondering if I can display the post author avatar as the default featured image for posts, rather than a specific image.
Thank you.