Deploying from Version Control
Automatically deploying changes to your code from version control is the best way to maintain your WordPress site. Using version control ensures that you can track every change to your code and quickly revert them if necessary. At the same time, automatic deployments from version control will keep your environments up to date at all times.
Inside Atomic, we've created an interface that allows you to configure automatic deployments with ease. Here's how to set up automated deployments for your WordPress apps:
![Screenshot: atomic dashboard click integrations]()
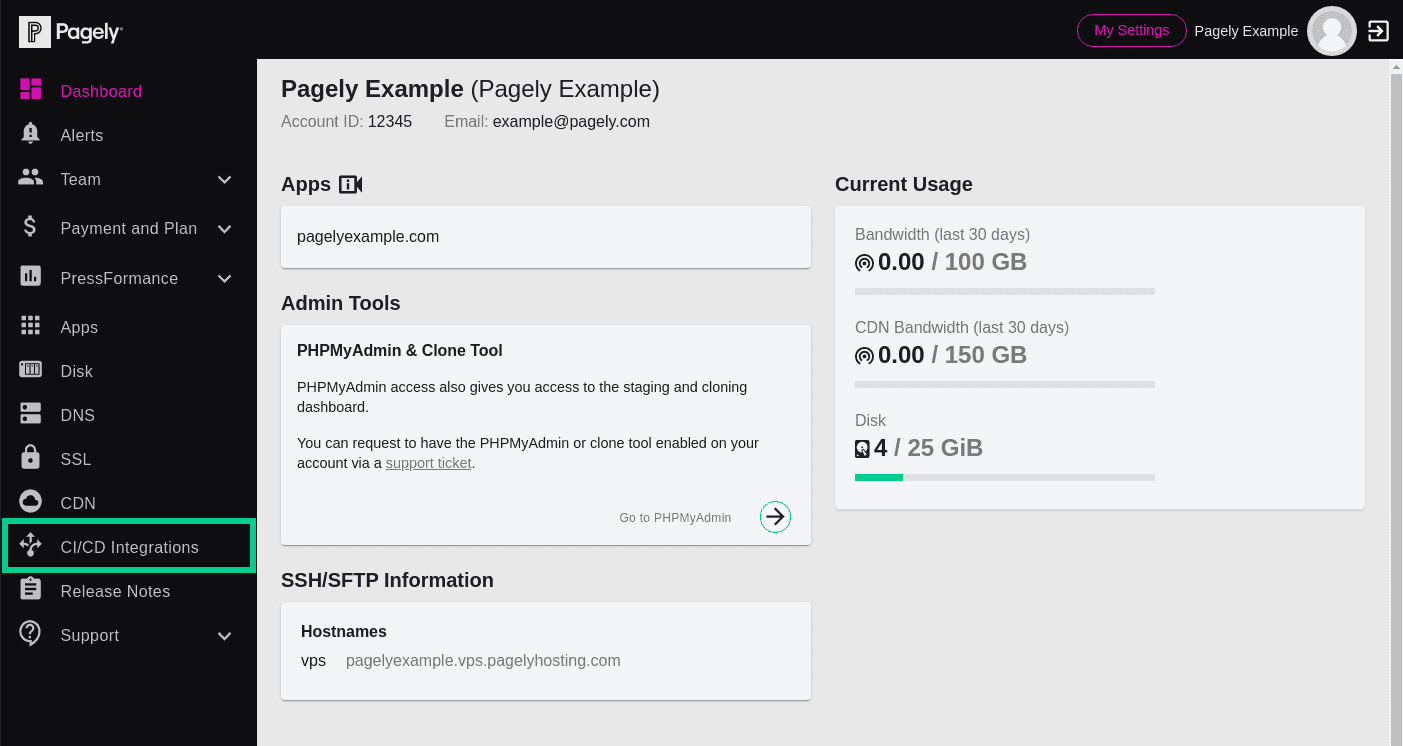
Log into Atomic, then click on CI/CD Integrations on the left side menu.
![Screenshot: click on the create new integration button]()
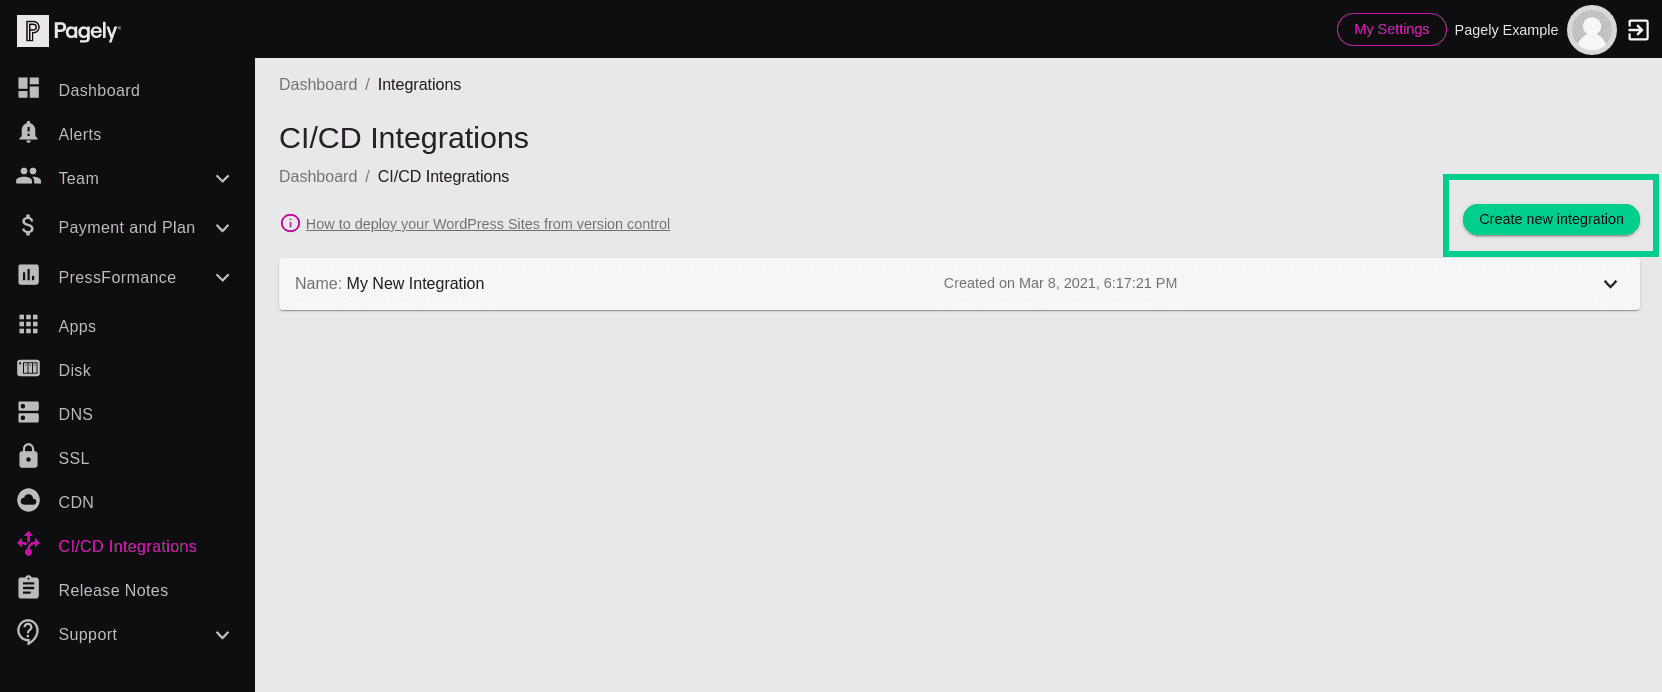
Next, we'll need to create a new integration. To do so, click on the Create New Integation button.
![Screenshot: fill in the integration name field]()
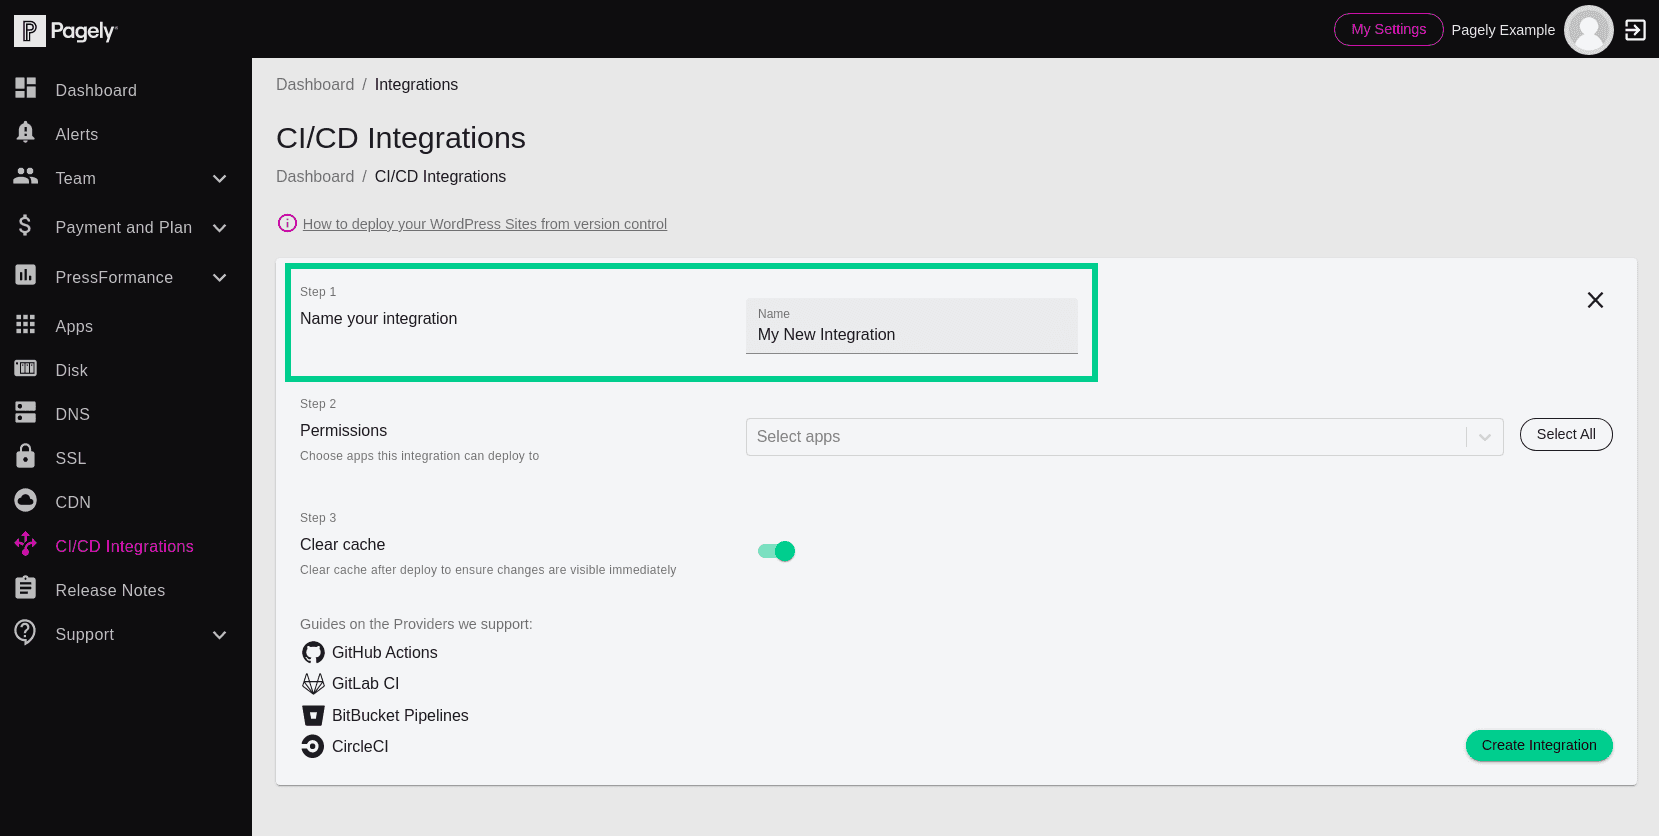
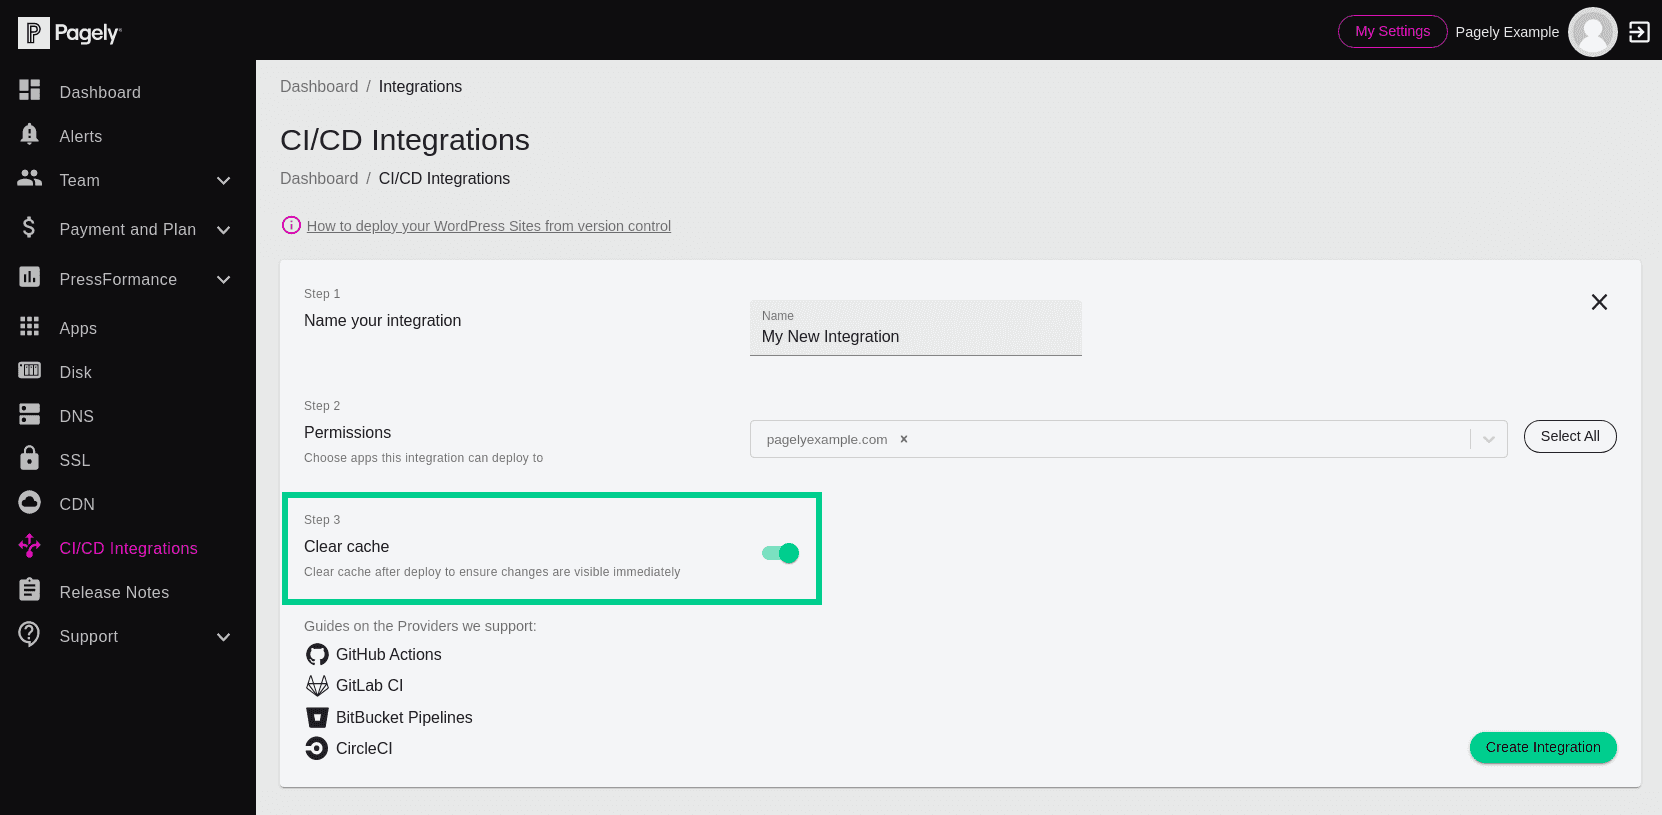
Let's get started by naming the integration. This can be anything you want it to be, but you'll want to make sure it describes the integration in case you need to reference it later.
![Screenshot: add apps to the permissions drop down]()
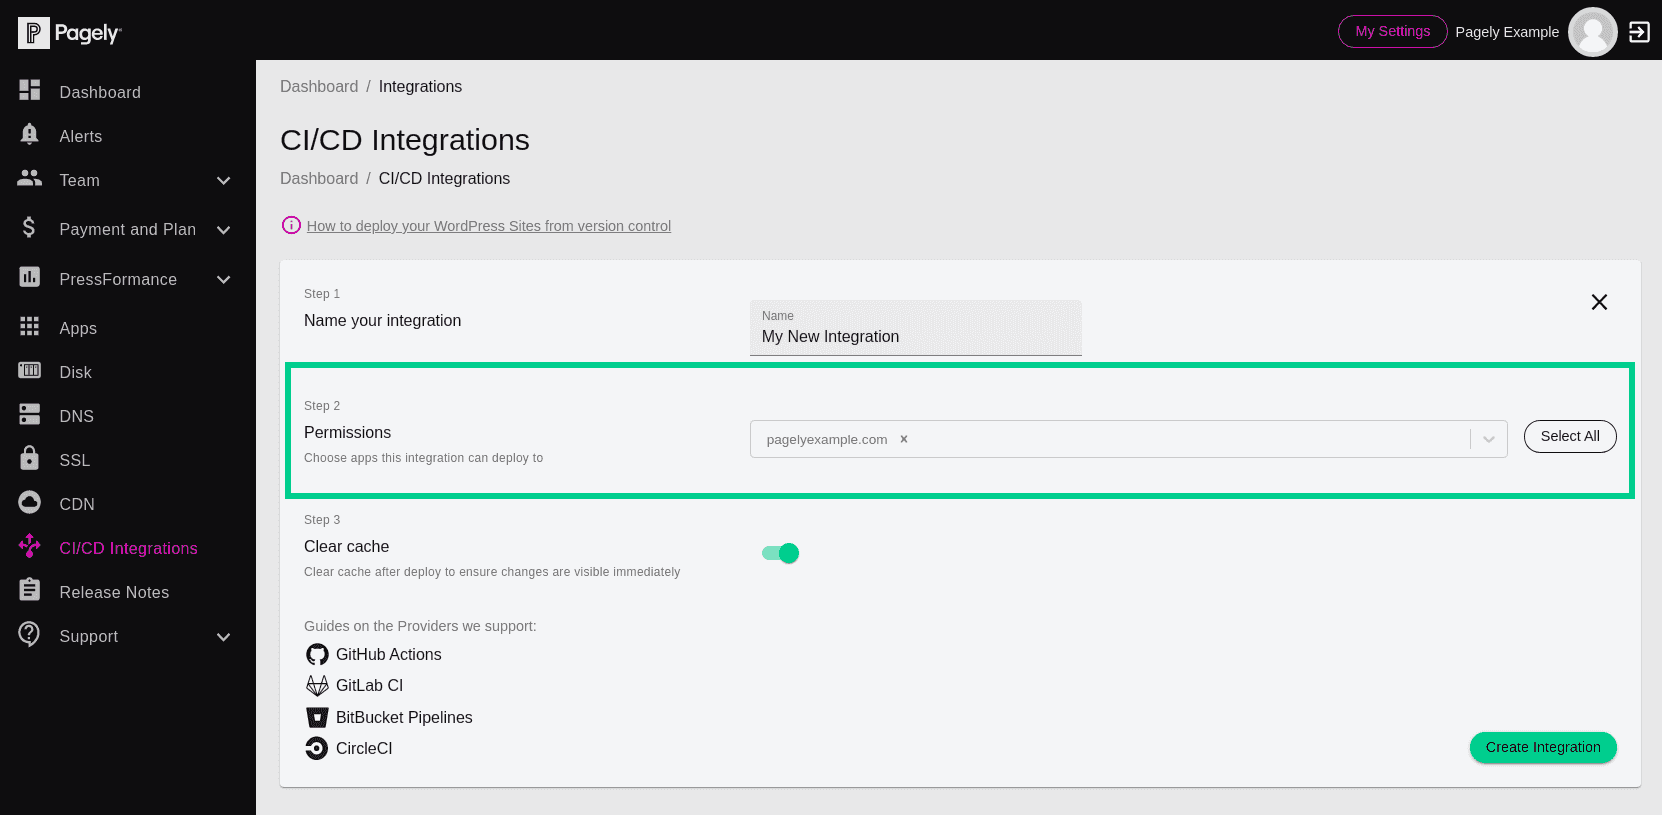
Now let's select the apps that this integration has access to. Click on the Permissions drop-down and select the app's that you'll be deploying to.
(Note: It's a good idea to limit access as much as possible. If you're deploying multiple apps, it's a good idea to create multiple integrations for them. This way, if one set of credentials were compromised, other apps wouldn't be affected)
![Screenshot: integrations clear cache option]()
You also have the option to automatically clear the cache after a deployment runs. In most scenarios, you'll want this enabled.
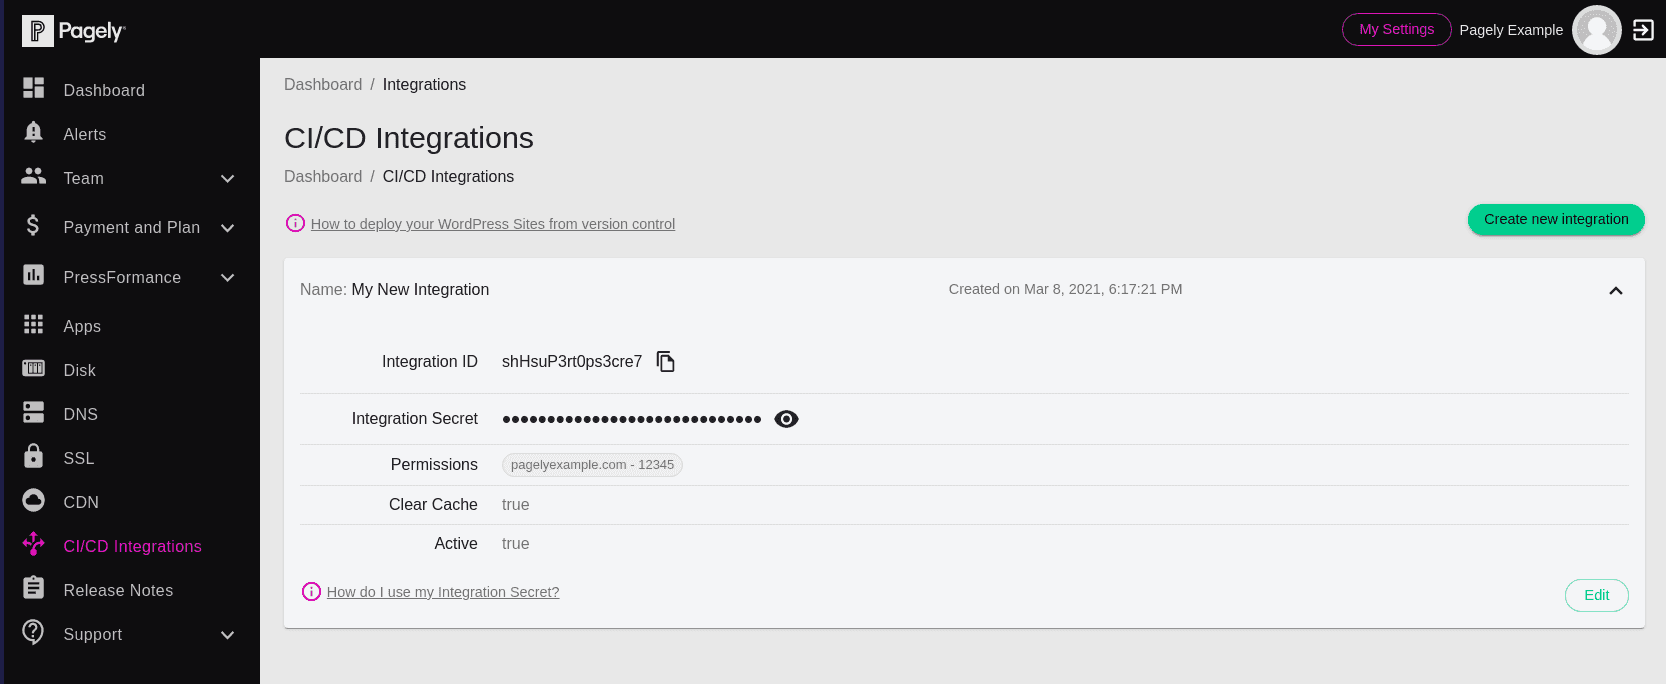
It may take a few moments to create your integration. Once complete, click on the integration to expand its details.
Now that you have created your integration, you'll be able to use that information for additional configuration on your provider's end.
