Generating a CSR in Atomic
When purchasing an SSL certificate, you'll be asked by your SSL issuer to provide a CSR. Your SSL provider will then use that CSR to generate your certificate.
CSRs can be generated from within the Atomic control panel. Let's walk through the process of generating a new CSR.
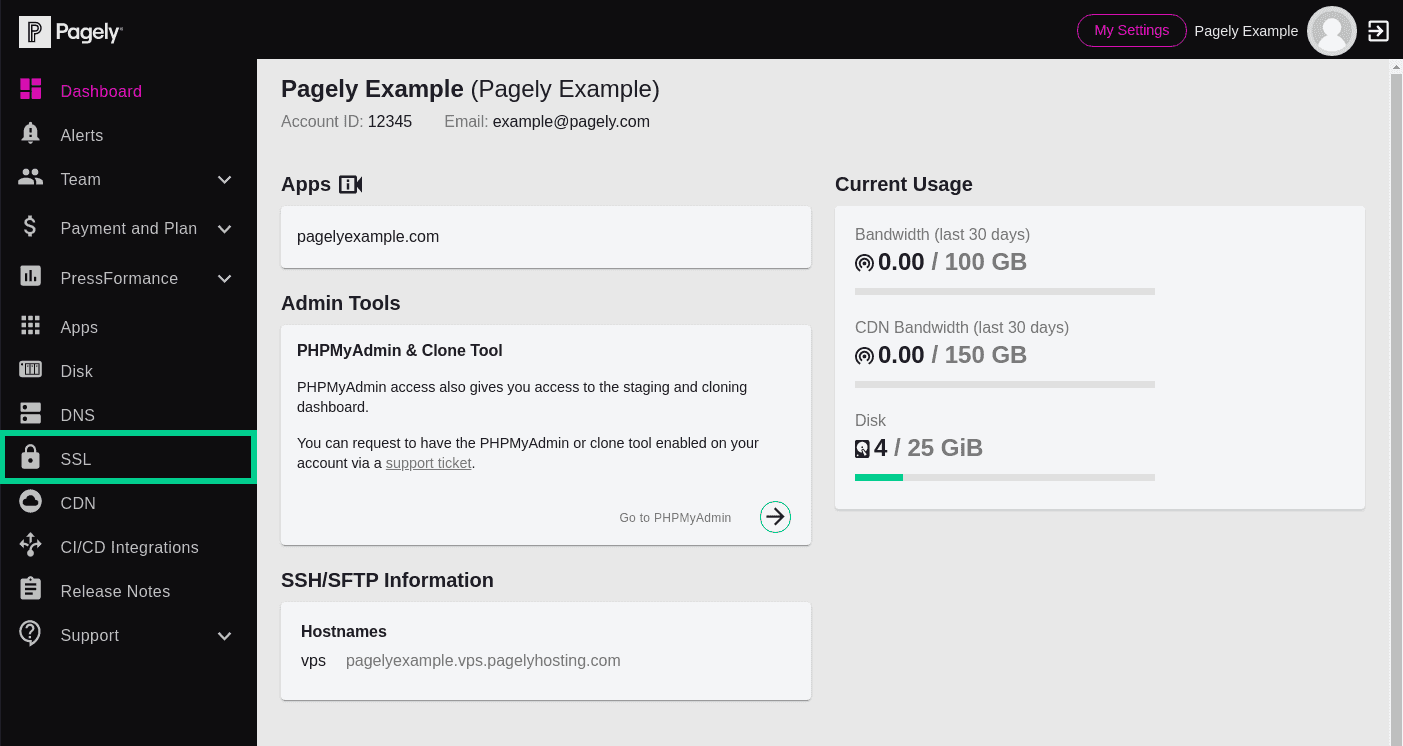
![Atomic left menu SSL]()
Begin by logging into Atomic and accessing the SSL Certificate Manager by clicking on the SSL menu item.
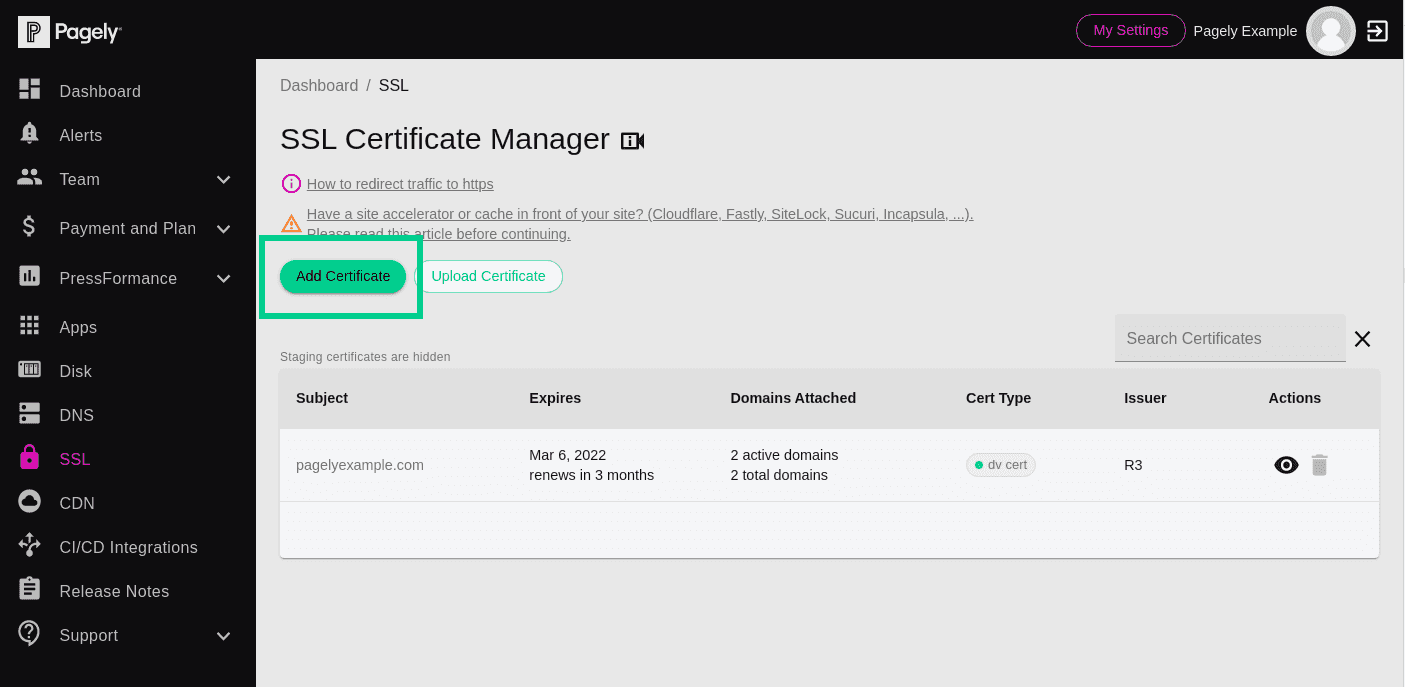
![Atomic SSL Certificate Manager Add Certificate button]()
From inside the SSL Certificate Manager, click on the Add Certificate button.
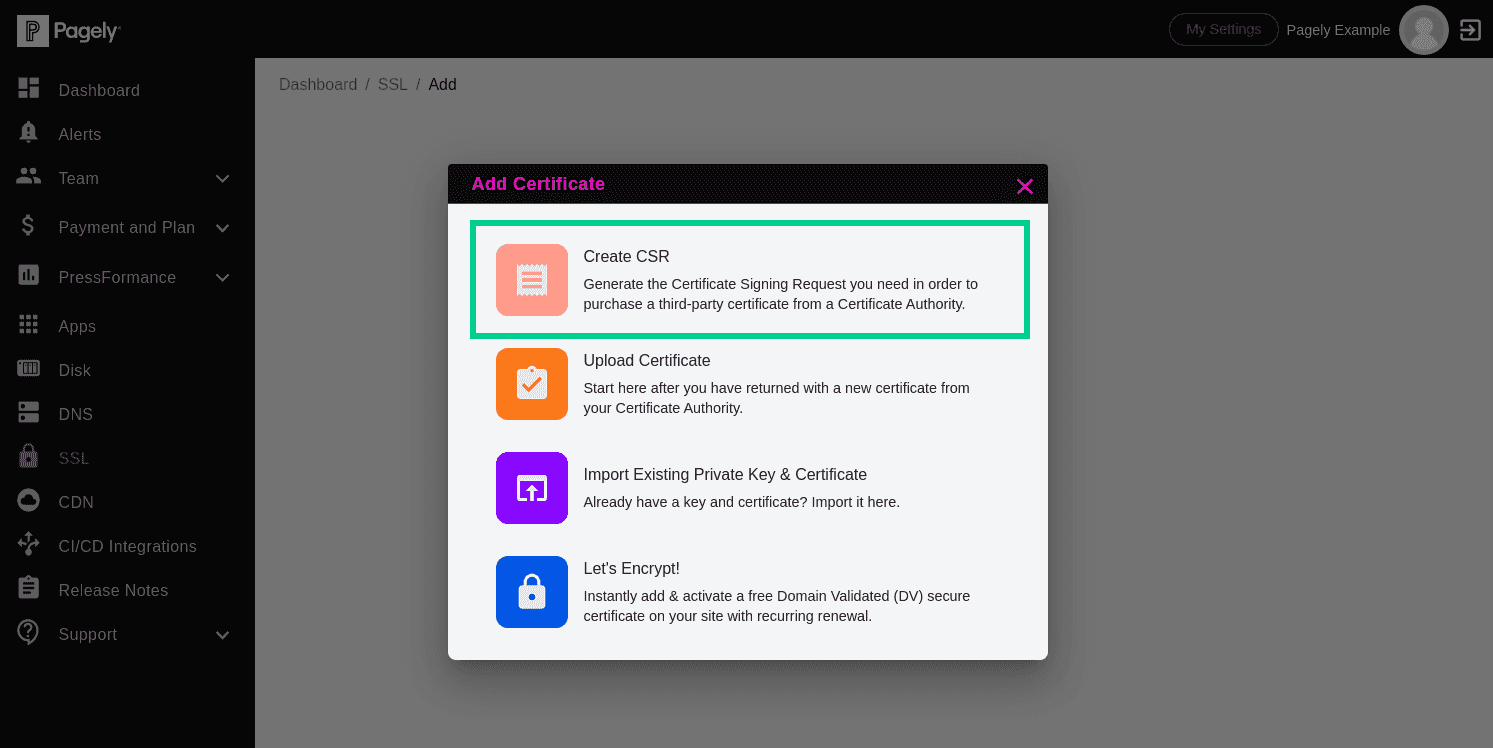
![Atomic create a CSR]()
Once the button is clicked, a new window will appear. Select the option to Create a CSR to begin the process.
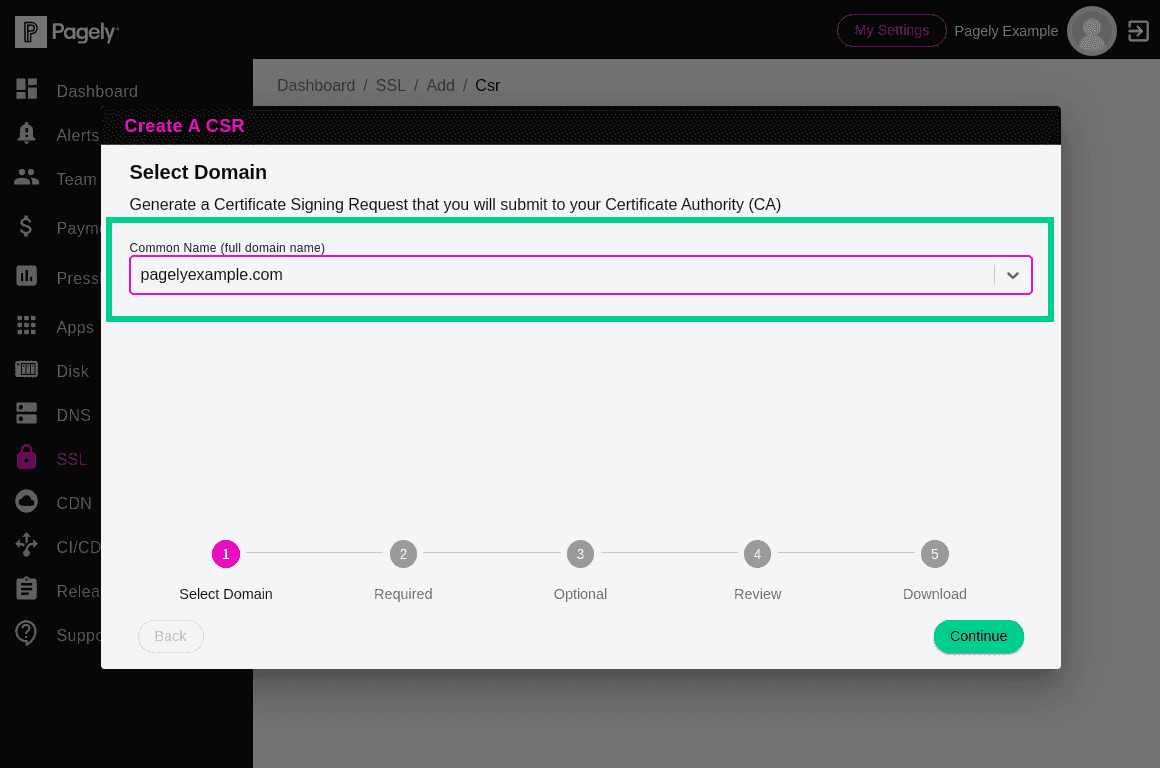
![Atomic CSR select domain]()
Inside the window, you'll now be prompted to select your domain. Select your domain from the drop-down, then click Continue.
![Atomic CSR required fields]()
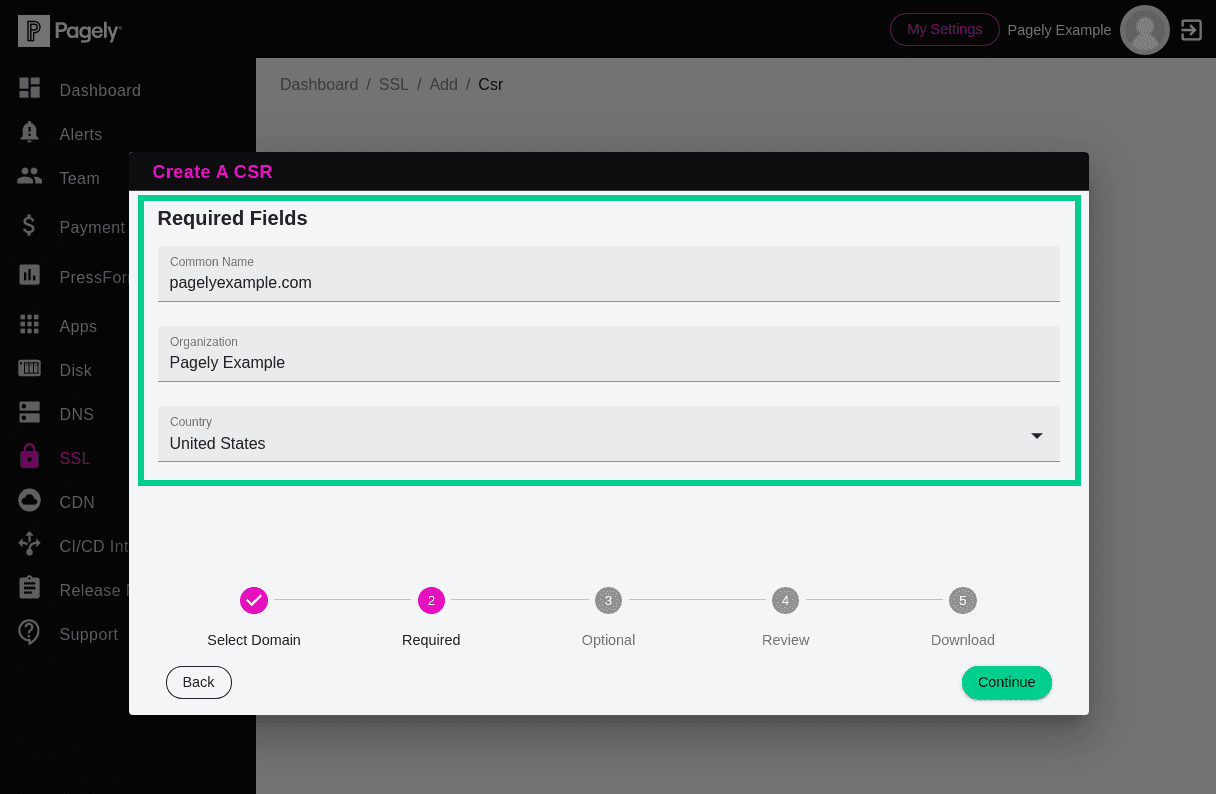
Next, fill out the required Common Name, Organization, and Country fields.
![Atomic CSR optional fields]()
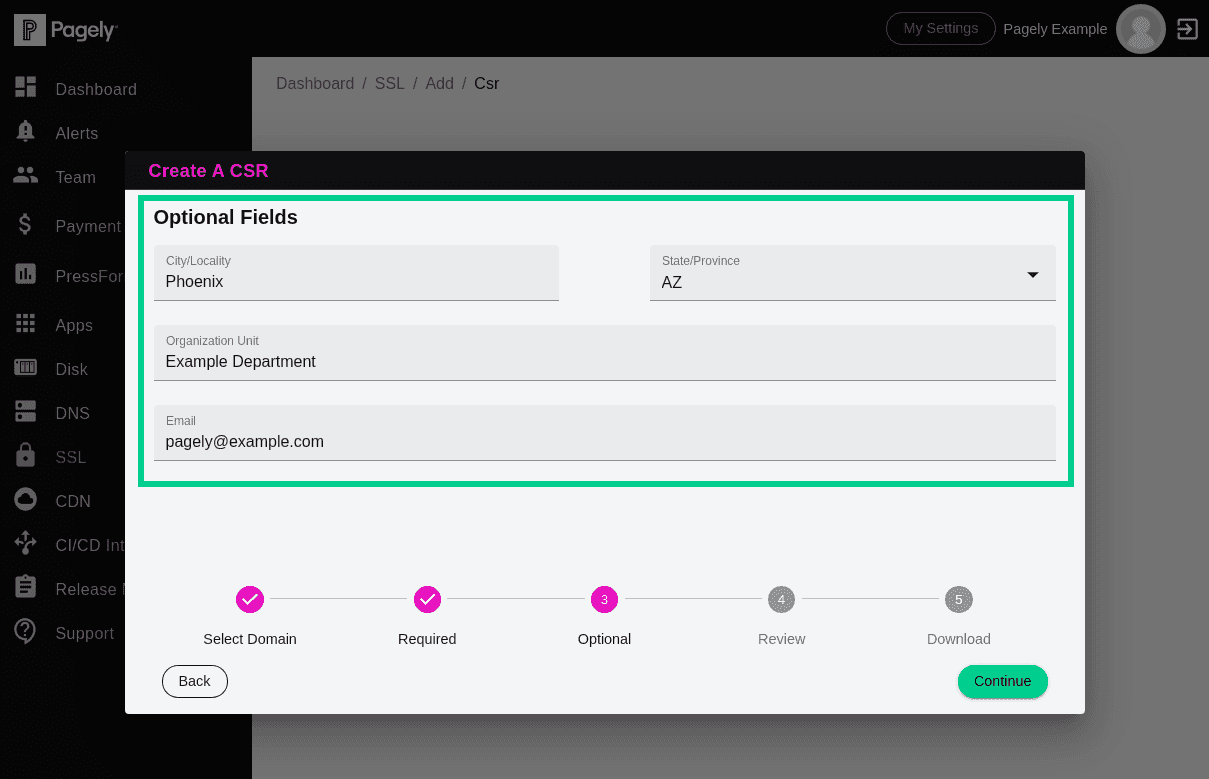
After submitting the required fields, you'll be presented with a few optional fields. These aren't required by all SSL providers, but it's generally a good idea to fill them out, just in case they're required by your SSL provider or certificate type.
![Atomic CSR verification step]()
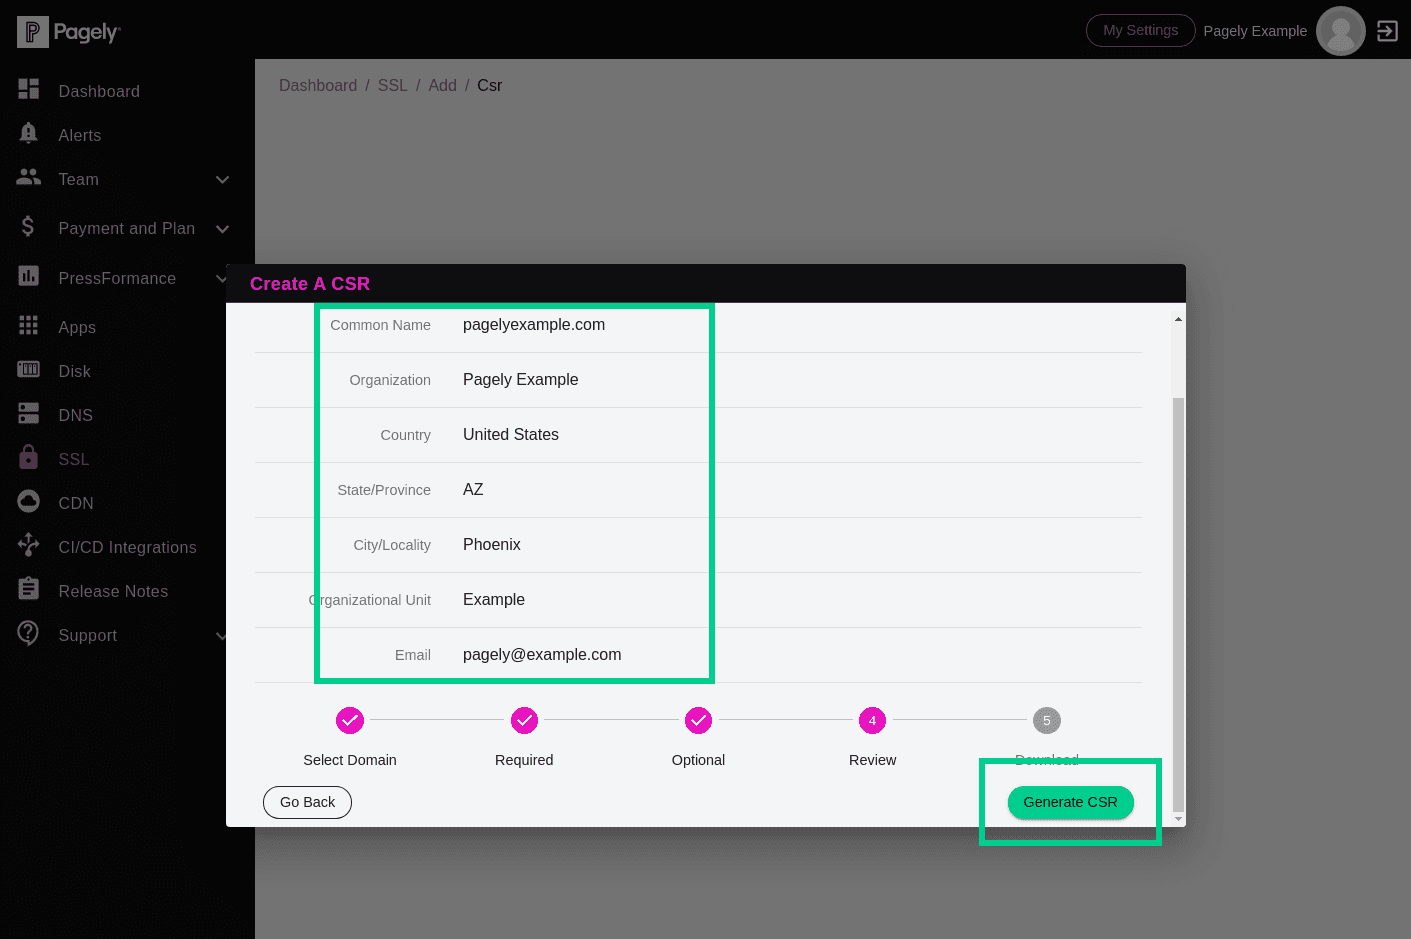
Now that you've provided the required and optional information that will be used to generate your CSR, you'll want to review it all to ensure that you didn't make any typos.
If everything look good, just click on the Generate CSR button to generate your CSR.
Now that your CSR has been generated, you'll be shown it's contents and be able to copy it to your clipboard. At this point, you can go ahead and purchase your SSL certificate.
Once your new SSL certificate is issued, you'll be ready to continue on to the next section of this course, which will show you how to install your new certificate.
