Installing an SSL Certificate from Let's Encrypt
Let's Encrypt is a great solution for those who don't have a definitive reasoning for a premium SSL certificate.
Without further ado, let's walk through the process of installing an SSL cerificate with Let's Encrypt!
![Atomic left menu SSL]()
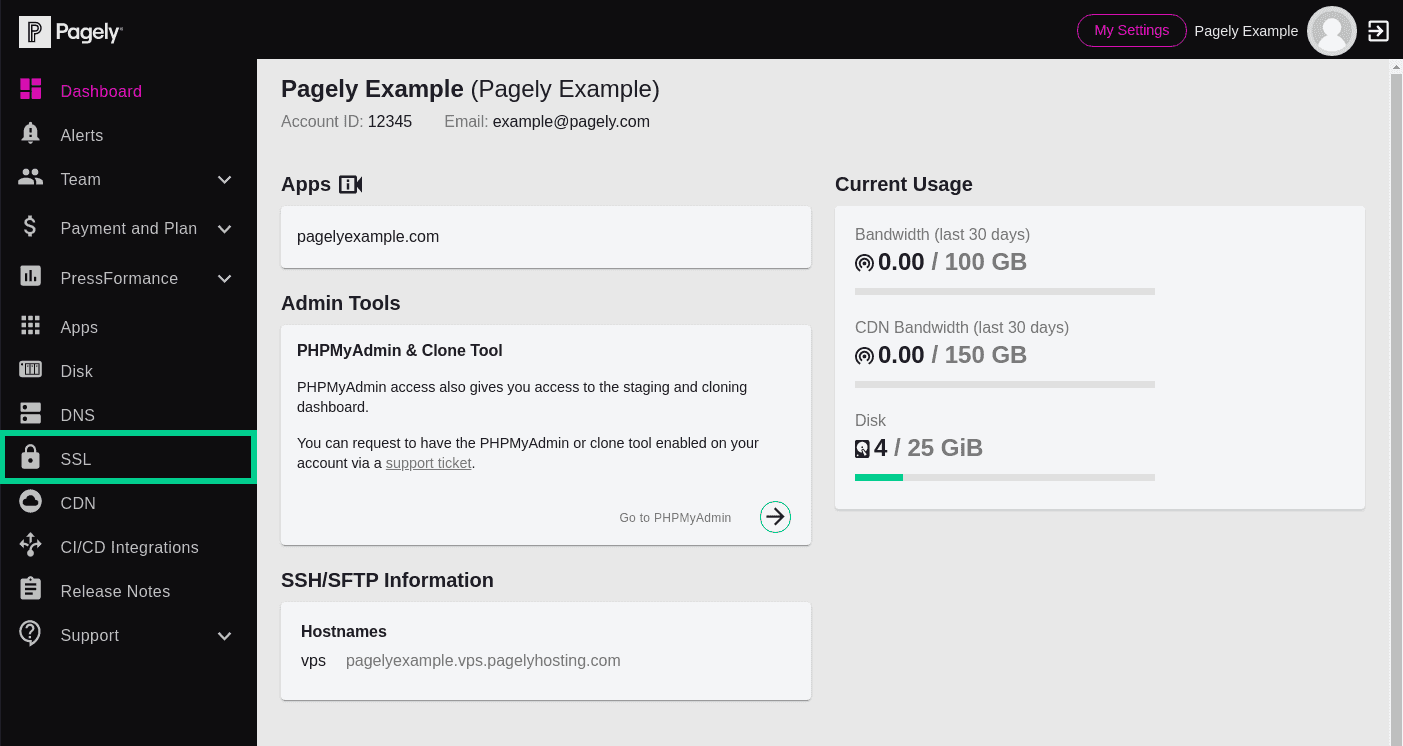
From inside the Atomic control panel, access the SSL Certificate Manager by clicking the SSL menu option.
![Atomic left menu SSL]()
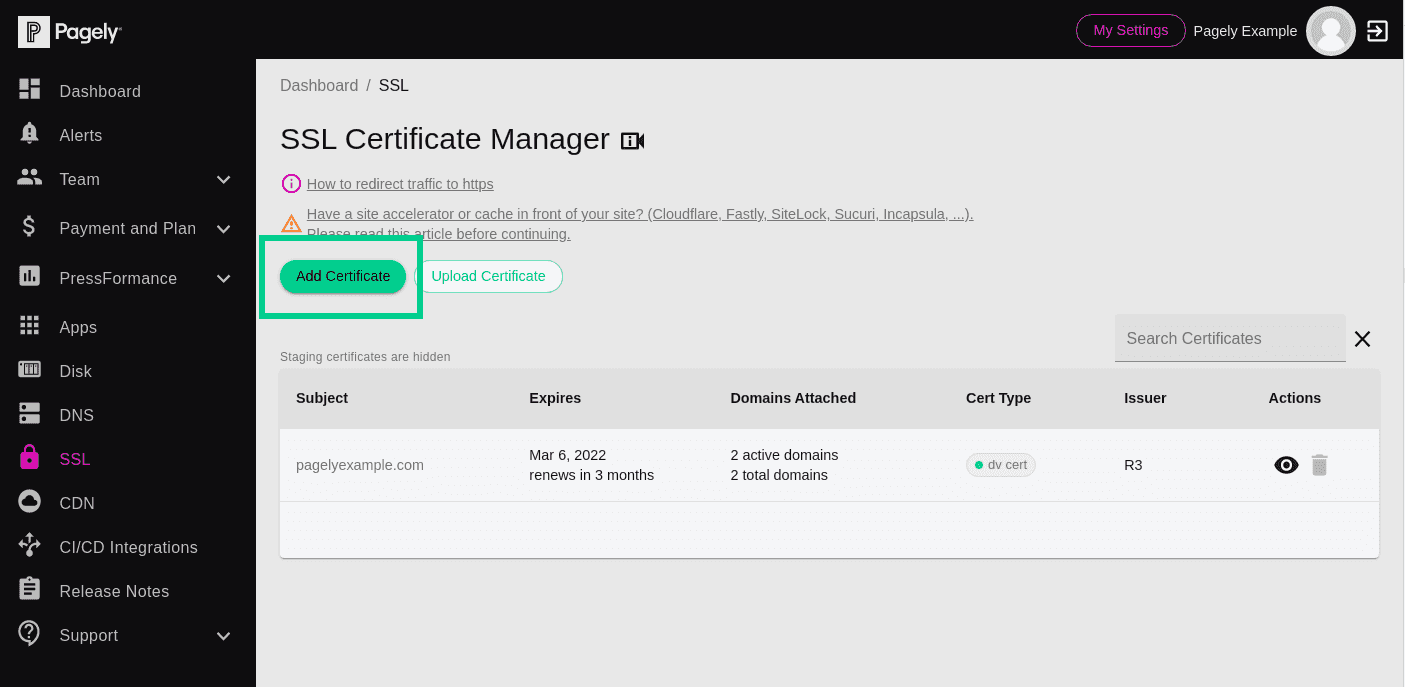
You'll now see a list of all currently installed SSL certificates.
Since we'll be adding a new certificate, click on the Add Certificate button.
![Atomic add certificate Lefts Encrypt]()
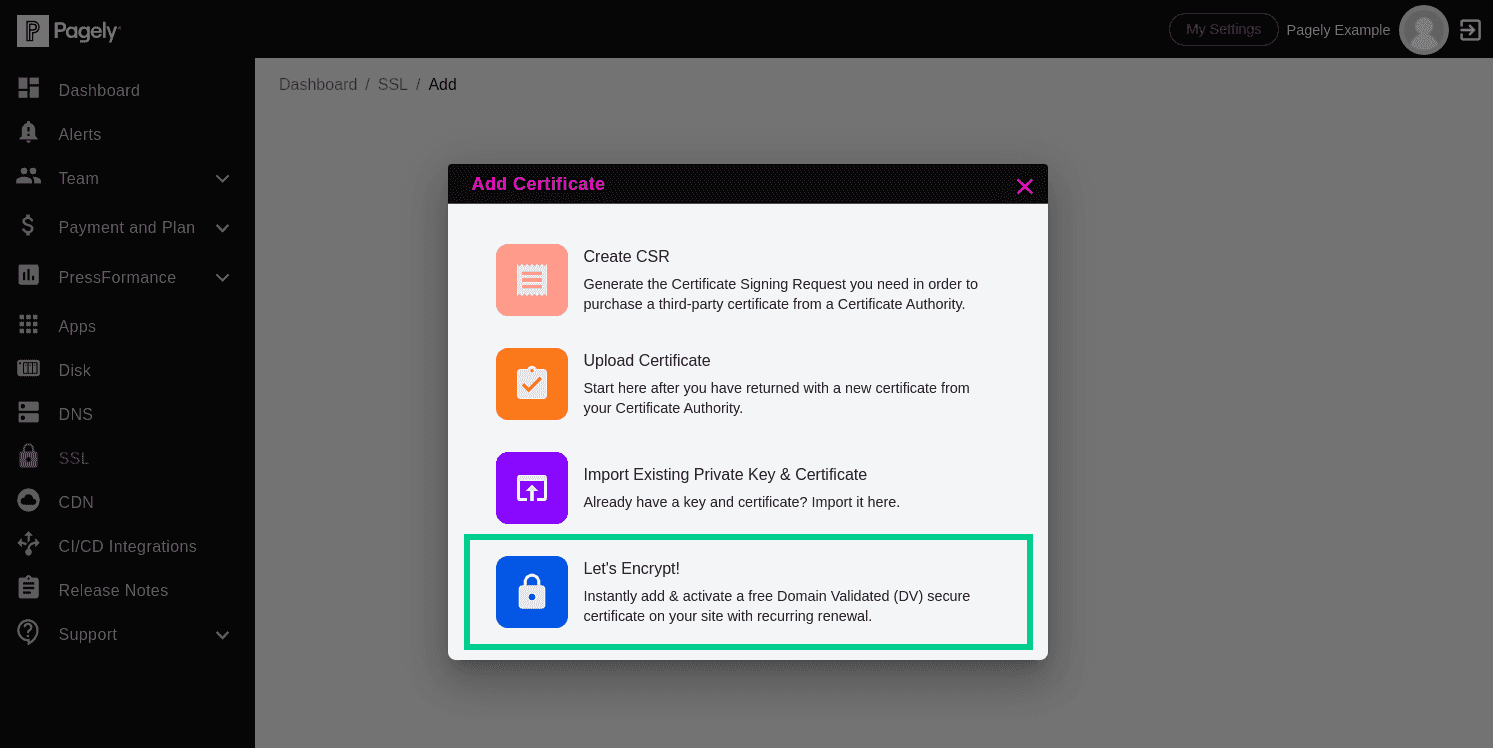
Then we need to click on Let's Encrypt to add a new certificate from Let's Encrypt.
![Atomic Lets Encrypt select domains]()
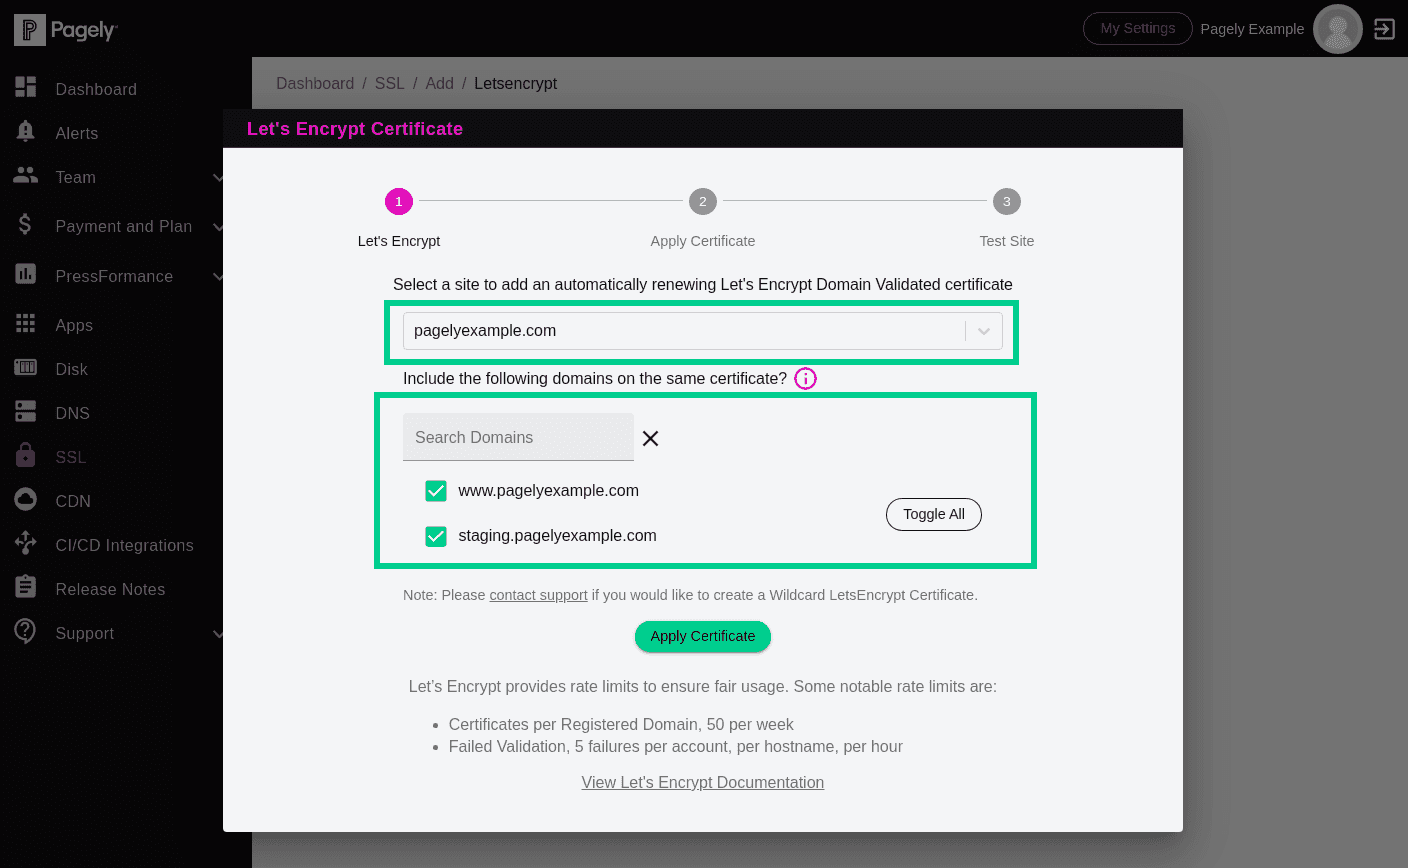
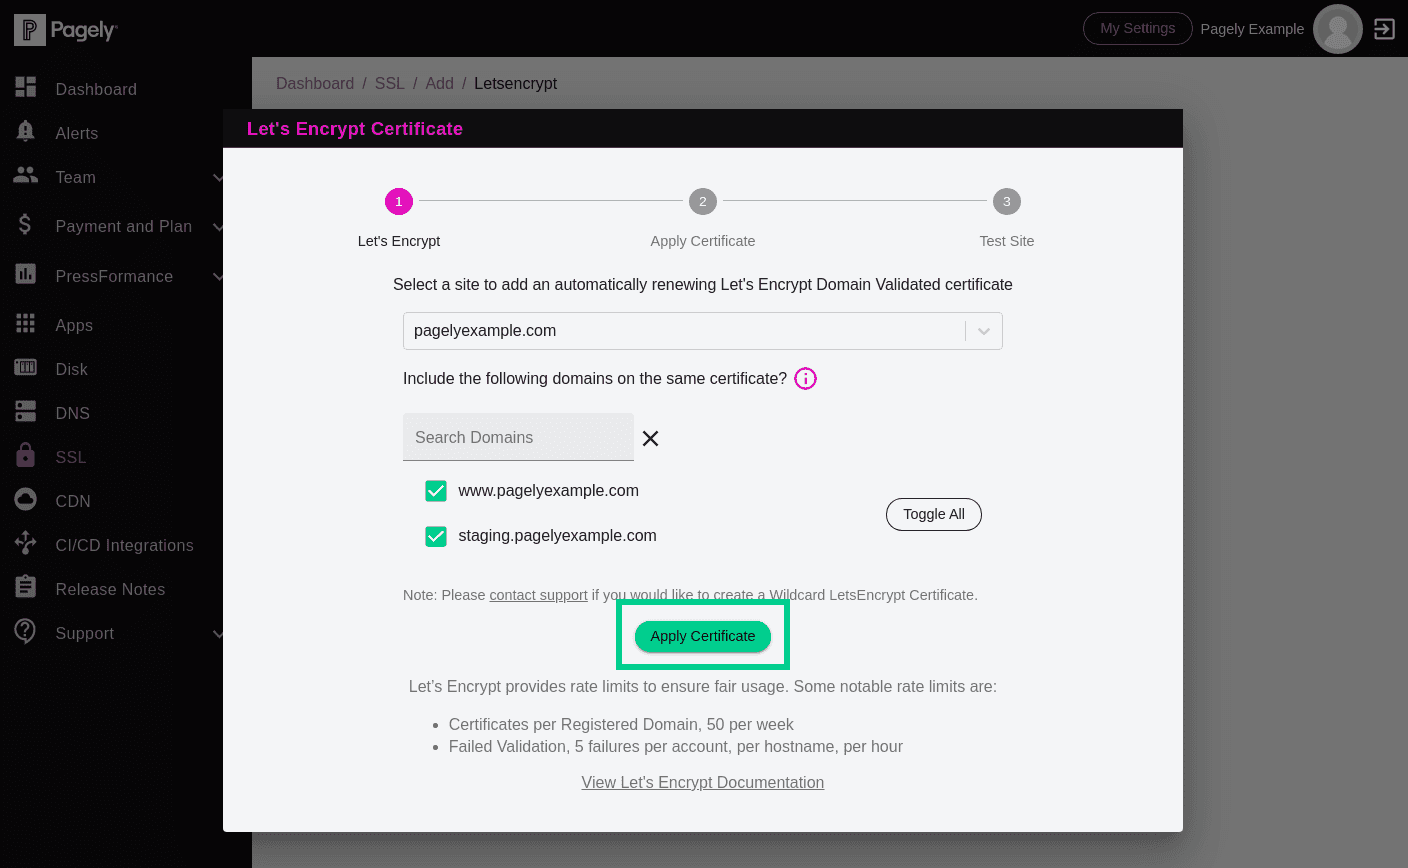
We'll now be prompted to select our domain from the drop-down.
If we want to add additional domains to this same certificate, we can also select those using the checkboxes next to each domain.
![Atomic Lets Encrypt Apply Certificate button]()
Next, we just need to click on the Apply Certificate button.
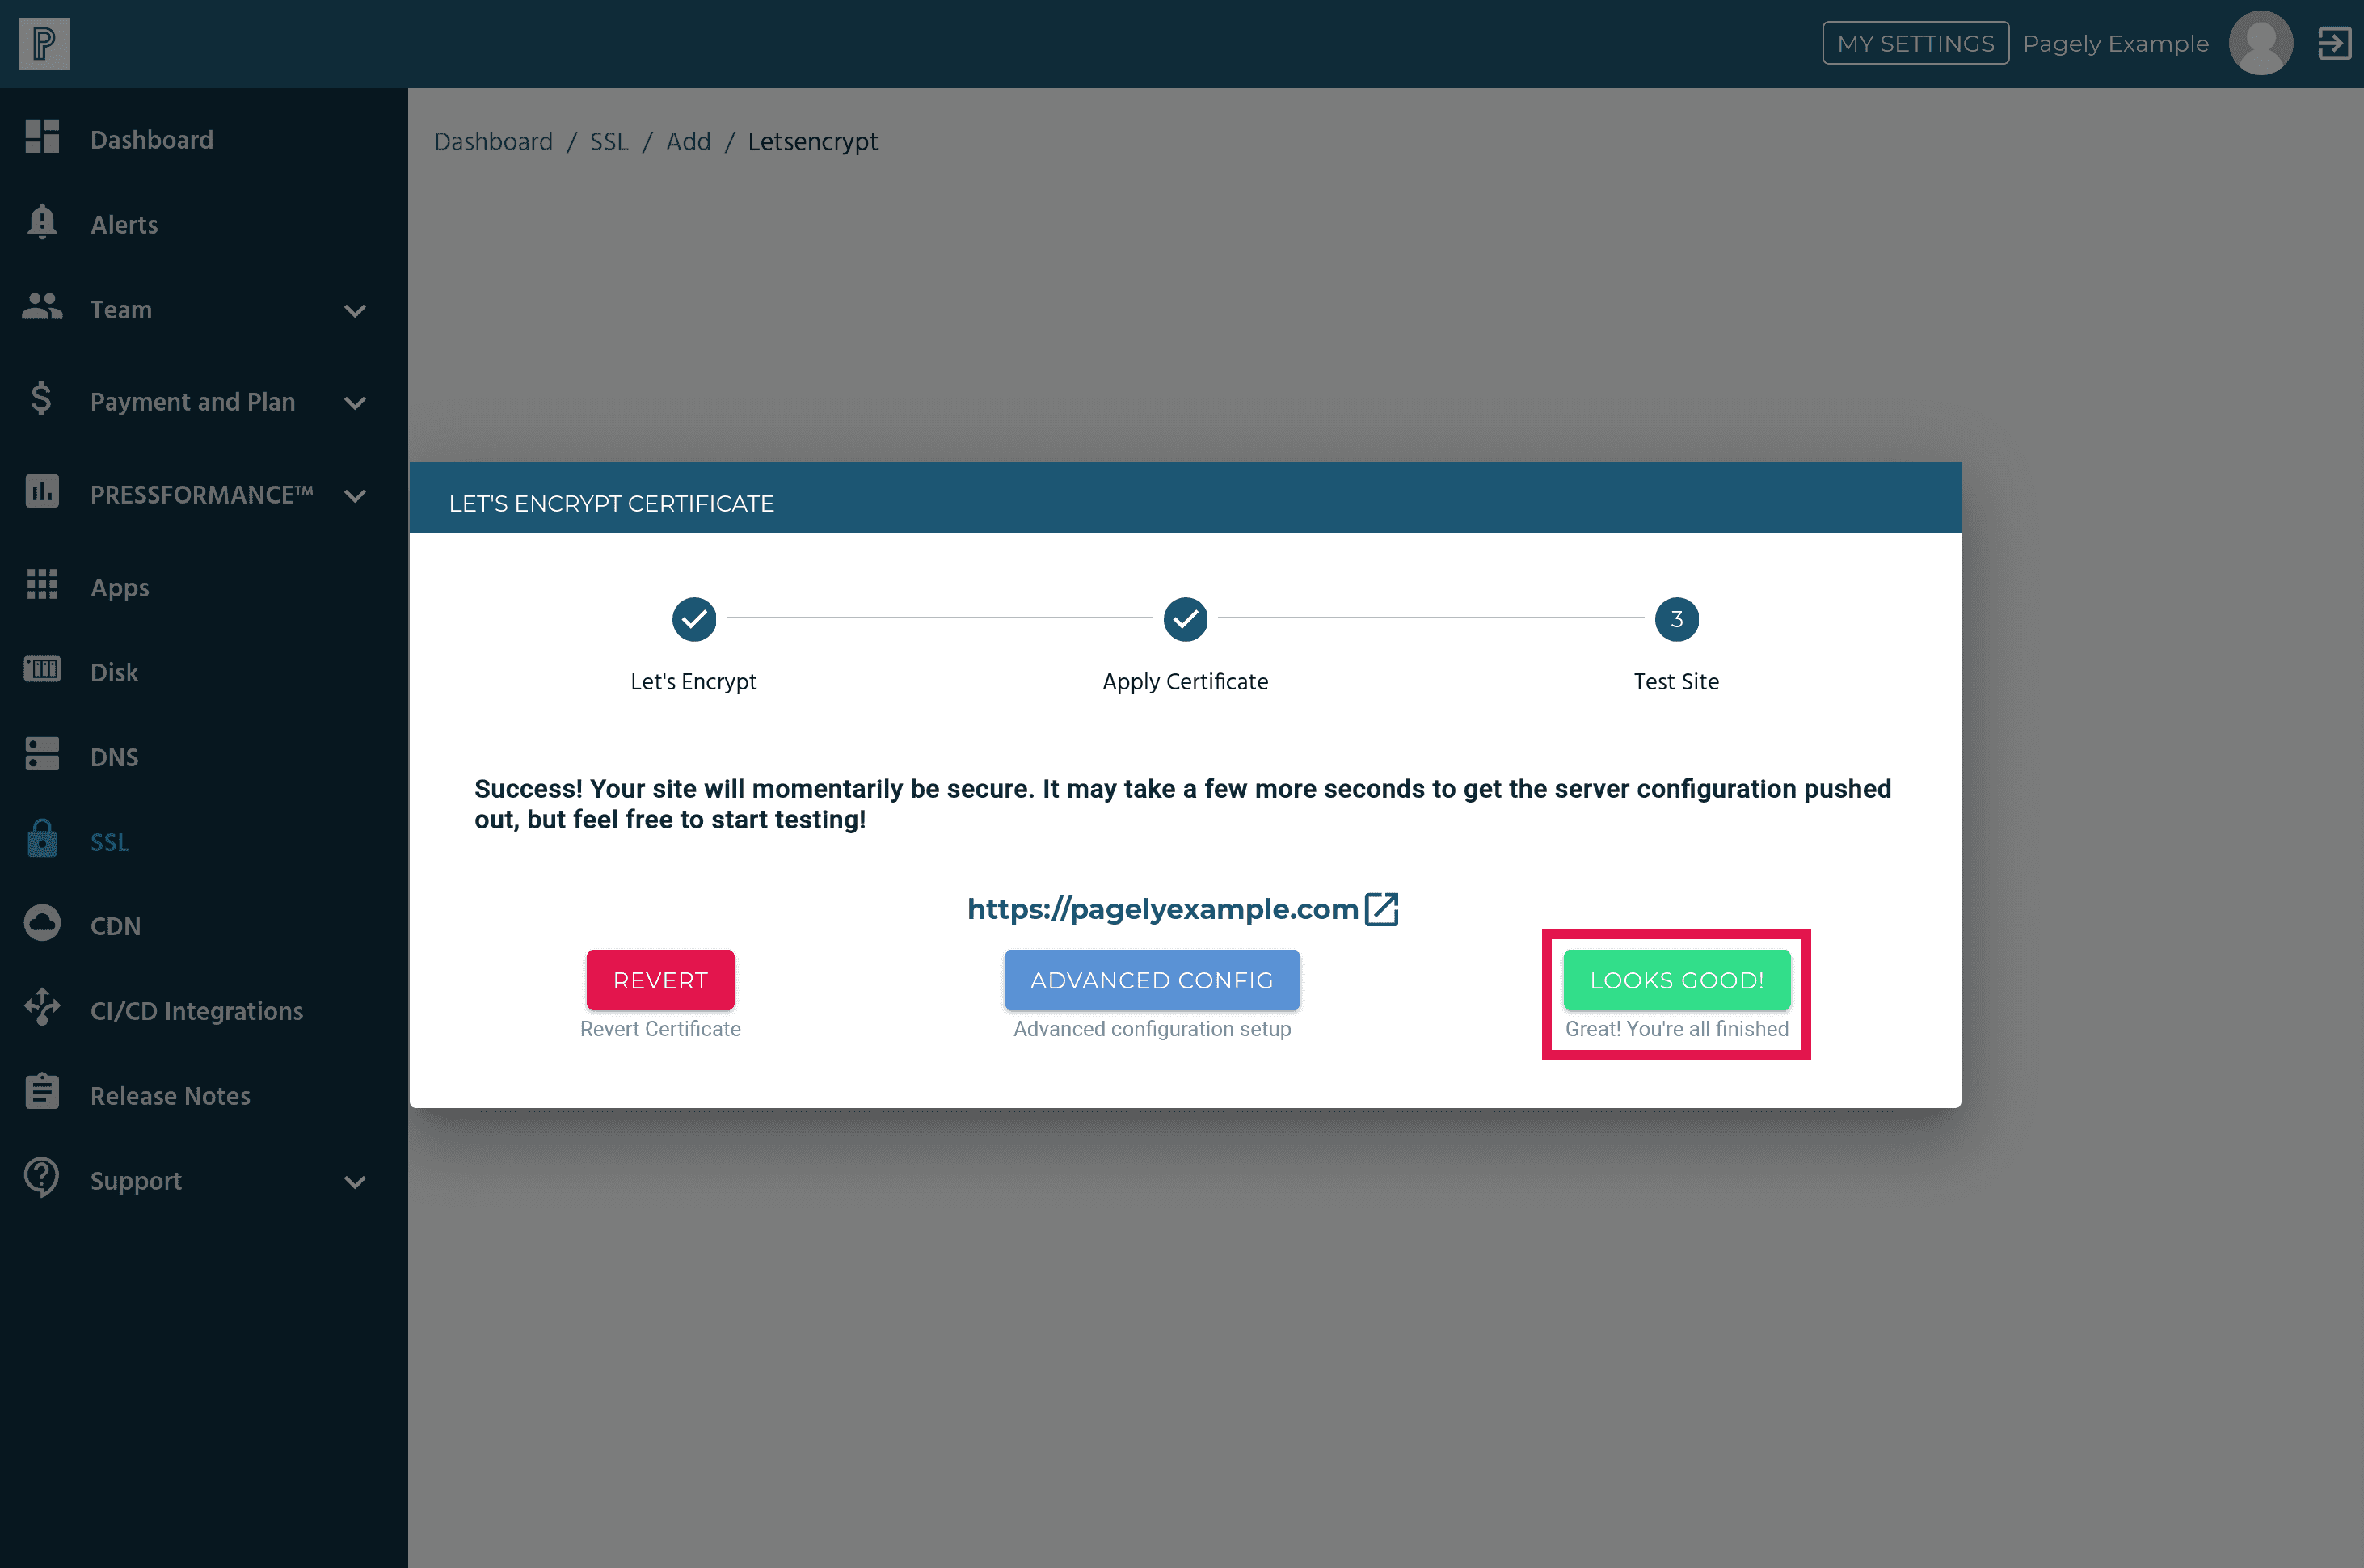
![Atomic Lets Encrypt success message Loogs Good button]()
After the Apply Certificate button is clicked, the installation will begin. When the installation completes, you'll be prompted to test your site. Be sure to give it a thorough check to make sure that everything is well.
If everything still looks good, go ahead and click on the Looks Good button to confirm that everything went as planned.
It really is that easy to install a Let's Encrypt SSL certificate on your Pagely-hosted WordPress site!
