Deploying From GitHub
After creating your deployment inside Atomic, it's time to configure a GitHub action that deploys your changes when an update has occurred. Here's how to do it:
(Note: These steps are simplified to get you started at Pagely. If you're integrating an existing production site with Pagely or would like more complete options, see our deploying WordPress sites from GitHub Actions on our main documentation site.)
Configuring GitHub Repository Secrets
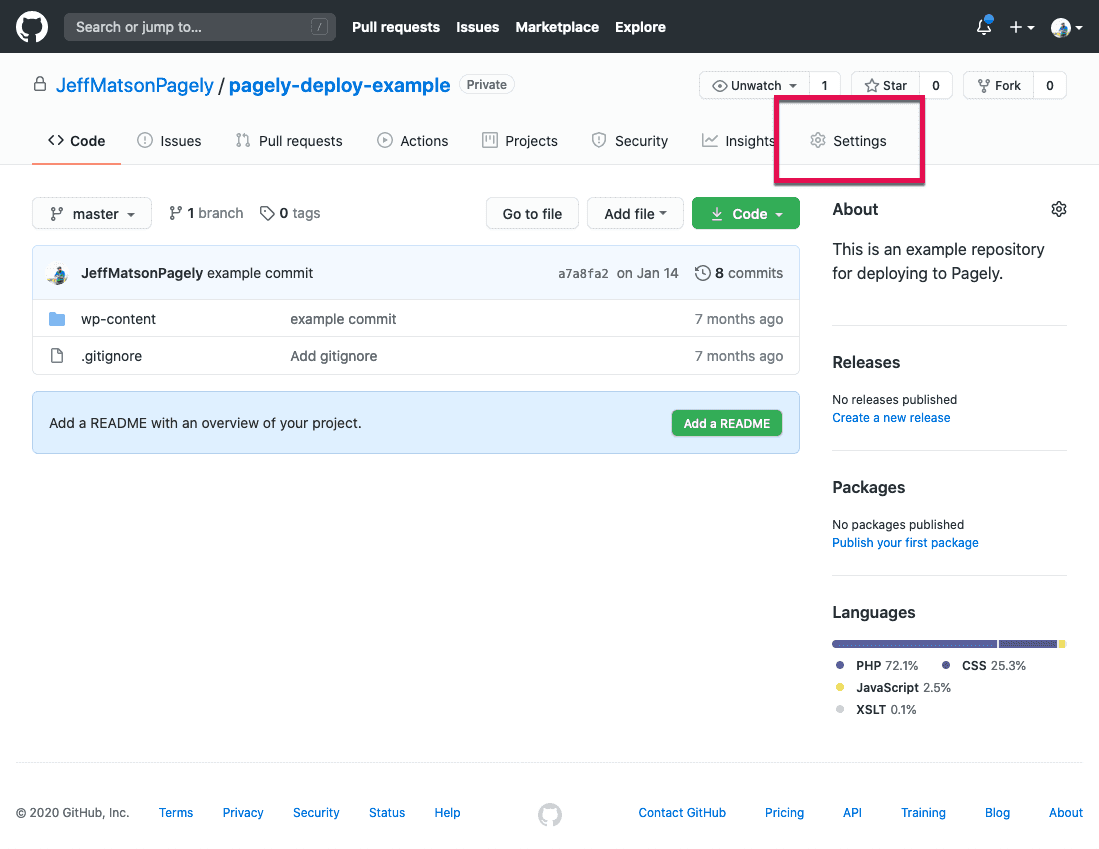
![Screenshot: GitHub repo settings tab]()
Start by accessing your GitHub repository and accessing the repository's Settings tab.
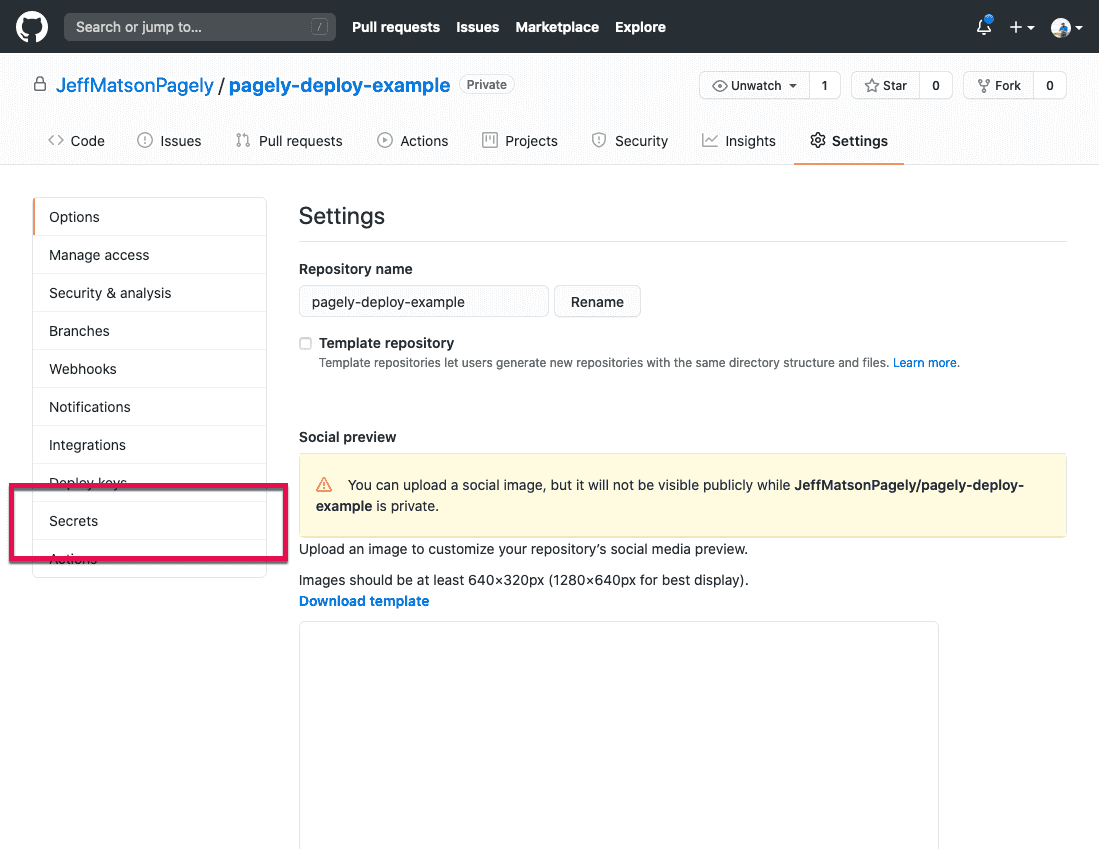
![Screenshot: click on secrets]()
Next, click on Secrets to access your repository's secrets.
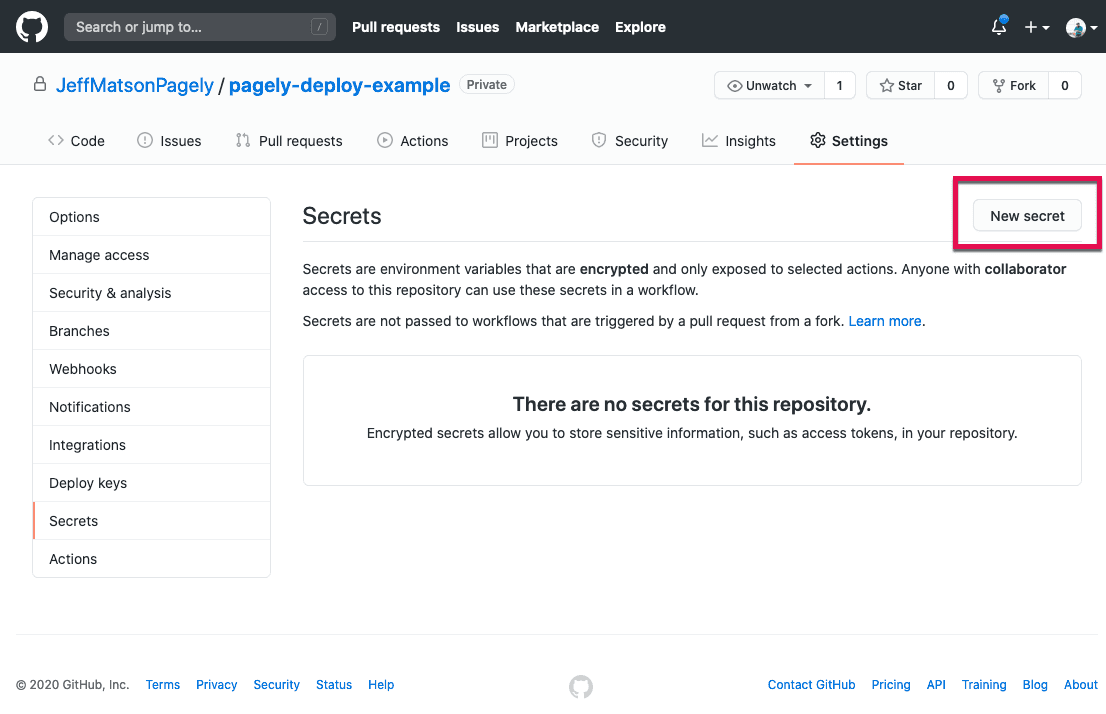
![Screenshot: click on new secret]()
Let's start adding a new secret by clicking on the New Secret button.
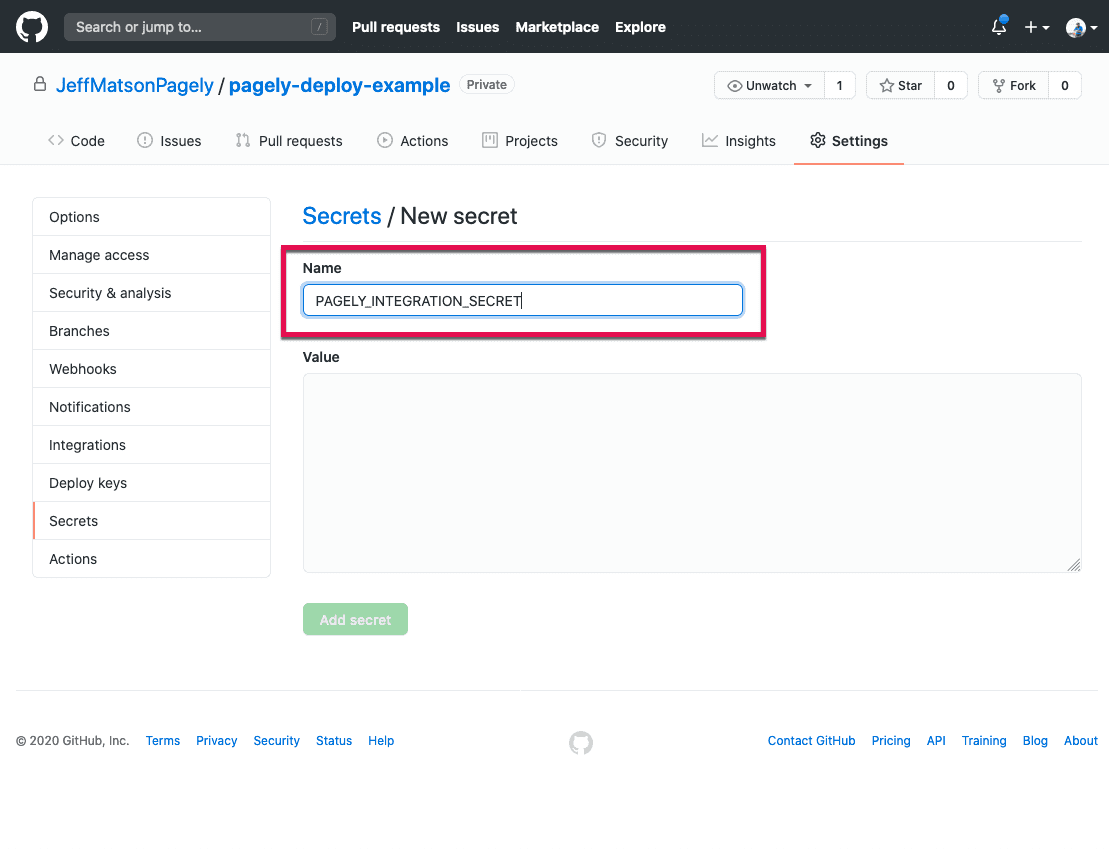
![Screenshot: secret name field]()
Inside the Name field of the secret, we'll set a variable name of
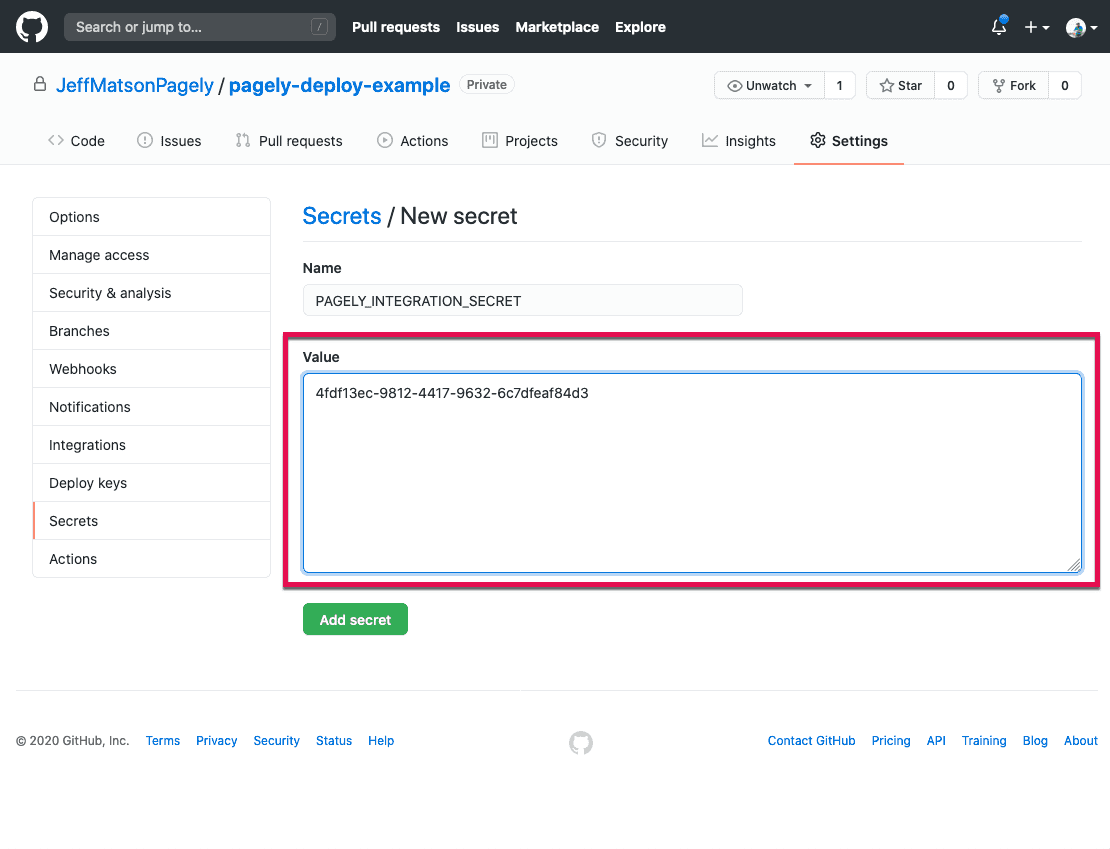
PAGELY_INTEGRATION_SECRET.![Screenshot: integration secret value field]()
Now our secret needs a value. Inside the Value field, enter the Integration Secret that was generated for you when creating the integration in Atomic.
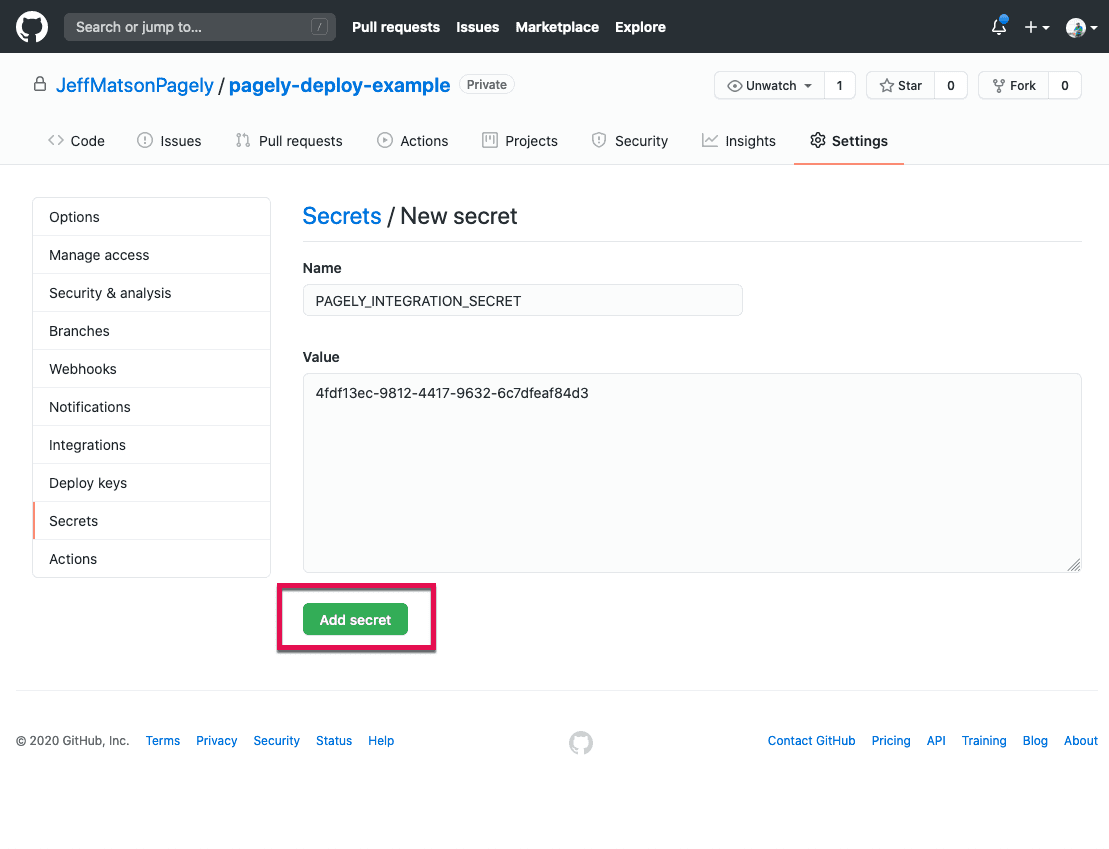
![Screenshot: add secret button]()
Now that the secret's name and value are filled, click on the Add Secret button to save it.
Creating a GitHub Actions Deployment Step
It's time to create a pipeline that will use Pagely's deployment action to handle all of the heavy lifting.
Start by creating a file within your repository at
.github/workflows/pagely-deploy.ymlwith the following contents:name: "pagely-deploy" on: push jobs: deploy: name: Deploy to Pagely runs-on: ubuntu-latest steps: - name: Checkout repo uses: actions/checkout@v2 - name: Run deploy uses: godaddy-wordpress/pagely-deploy-action@v1 with: PAGELY_DEPLOY_DEST: "/httpdocs" PAGELY_INTEGRATION_SECRET: ${{secrets.PAGELY_INTEGRATION_SECRET}} PAGELY_INTEGRATION_ID: "HhYn7RelGEiYFJz7nzvKl9" PAGELY_APP_ID: "12345" PAGELY_WORKING_DIR: ${{github.workspace}}Next, we'll need to change a few variables to reflect your site. These variables are as follows:
- PAGELY_DEPLOY_DEST: This sets the destination directory that you will be depoying to, with
/httpdocsrepresenting your site's root directory. If you're deploying your whole site from the repository, you'll leave this as it is in the example. If you're deploying a single plugin or theme, you'll want to change this to something like/httpdocs/wp-content/plugins/example-plugin-dir. - PAGELY_INTEGRATION_SECRET: This is a variable containing the deployment secret that we set up earlier. You'll only need to change this if you used a different name for your secret.
- PAGELY_INTEGRATION_ID: This contains the integration ID. You'll need to change this to reflect the integration ID that you were provided in Atomic.
- PAGELY_APP_ID: This is the ID of the app that you'll be deploying too. You can find this inside your app in Atomic.
- PAGELY_WORKING_DIR: This sets the directory that will be deployed. In the example above, we're using the repository's root directory. You'll only need to change this if you have a different directory that you'll be deploying from.
- PAGELY_DEPLOY_DEST: This sets the destination directory that you will be depoying to, with
Finally, triple-check over your settings to make sure you haven't made any typos, then commit your changes. From now on, any new pushes to the repository will be deployed to your WordPress site. This
At this point, you've finished creating an automatic deployment workflow using GitHub Actions. For more information not covered in this quickstart guide, take a look our support documentation for deploying WordPress sites with GitHub Actions.
