Deploying From GitLab
After you've created your integration credentials inside of Atomic, you'll need to take that information and configure GitLab to use a deployment pipeline that pushes your code when changes occur. Here's how to do it.
(Note: These steps are simplified to get you started at Pagely. If you're integrating an existing production site with Pagely or would like more complete options, see our deploying WordPress sites from GitLab CI on our main documentation site.)
Start by logging into GitLab and accessing the project that you want to deploy.
![Screenshots: click on CI/CD settings]()
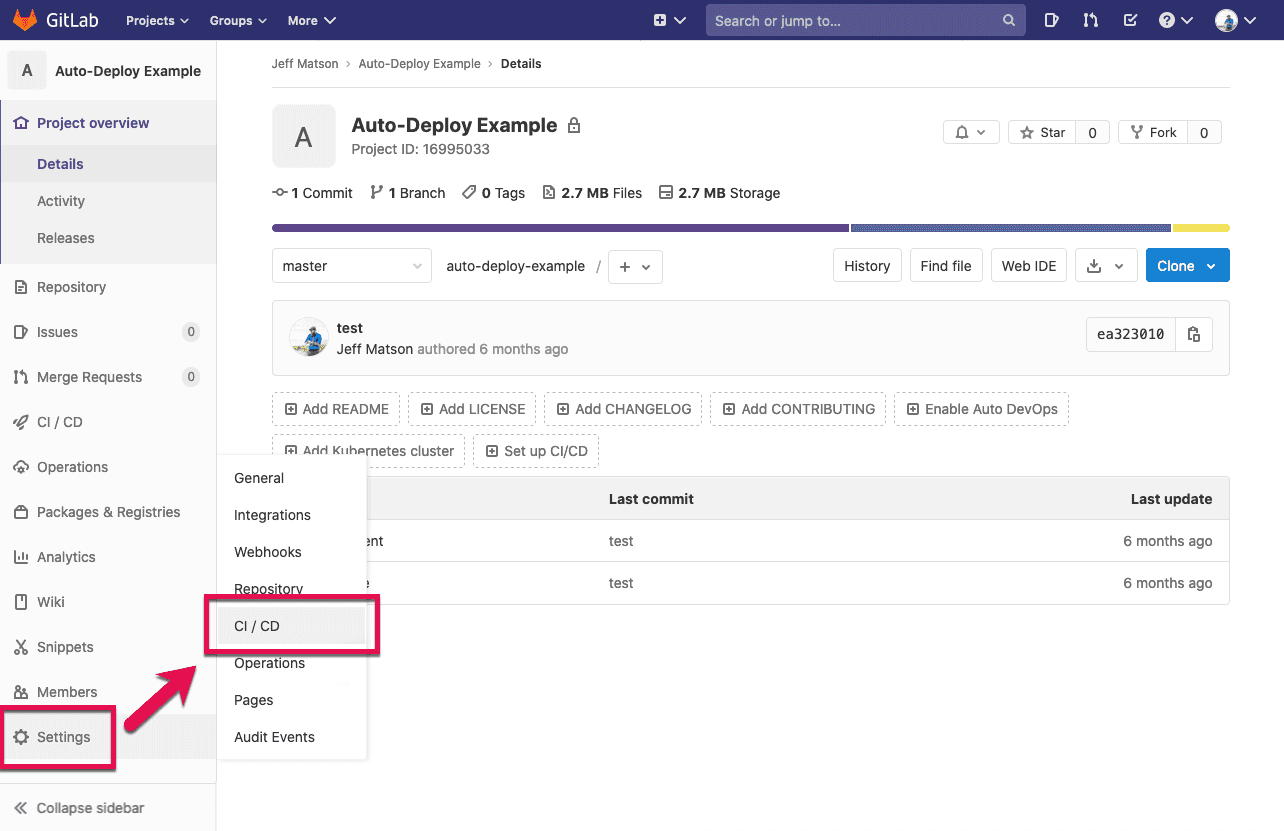
Within the left side menu of your repository, hover over Settings, then click on CI/CD.
![GitLab integrations URL field]()
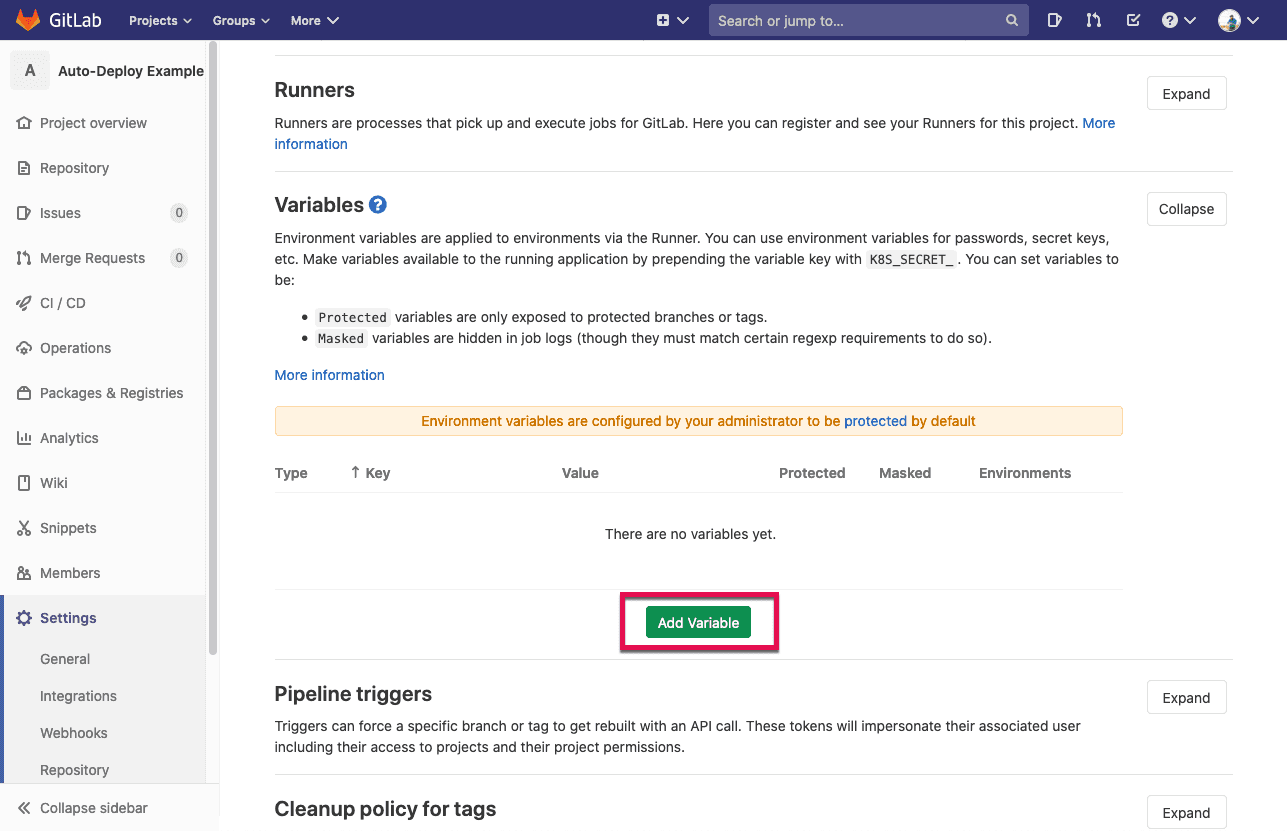
From inside the CI/CD Settings page, locate the Variables section and expand it. Once expanded, click on the button that says Add Variable.
![Screenshot: add variable key]()
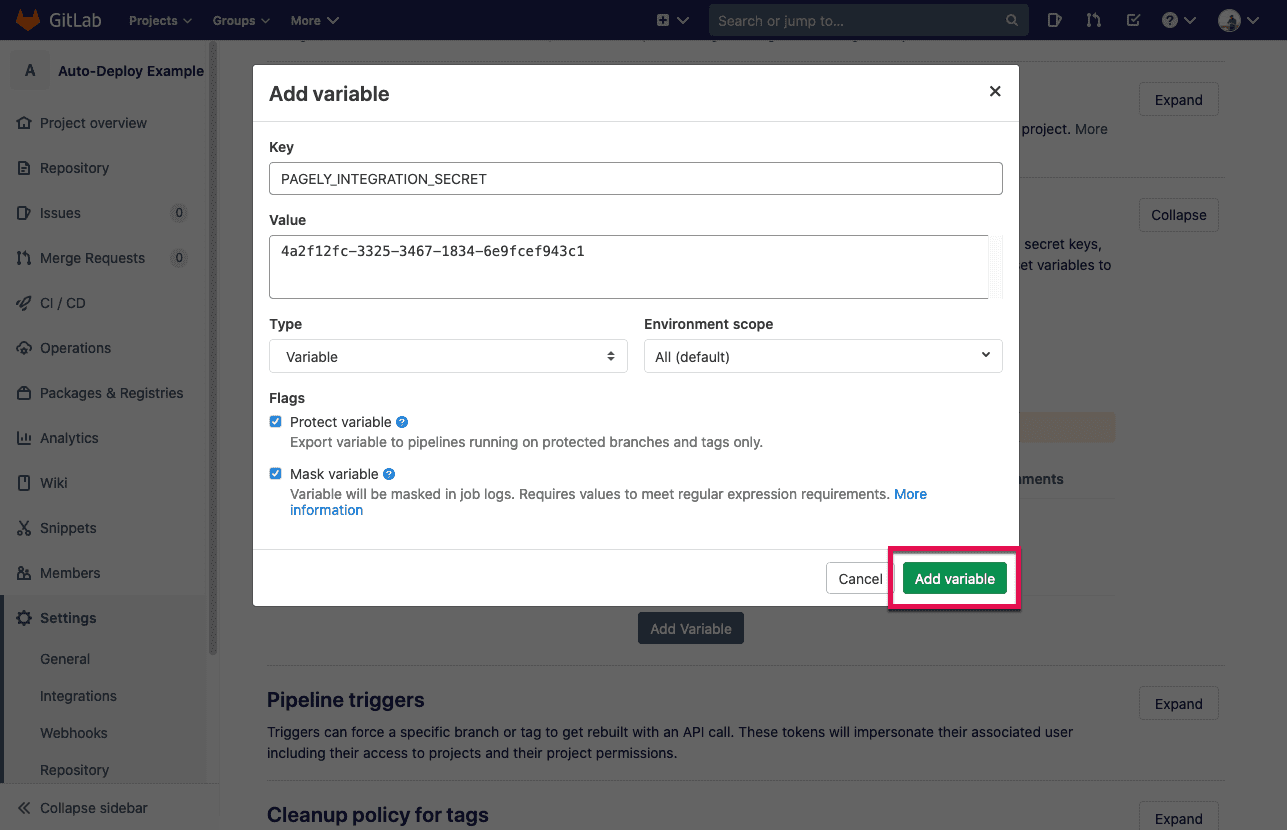
A new window will appear with fields to set for your variable.
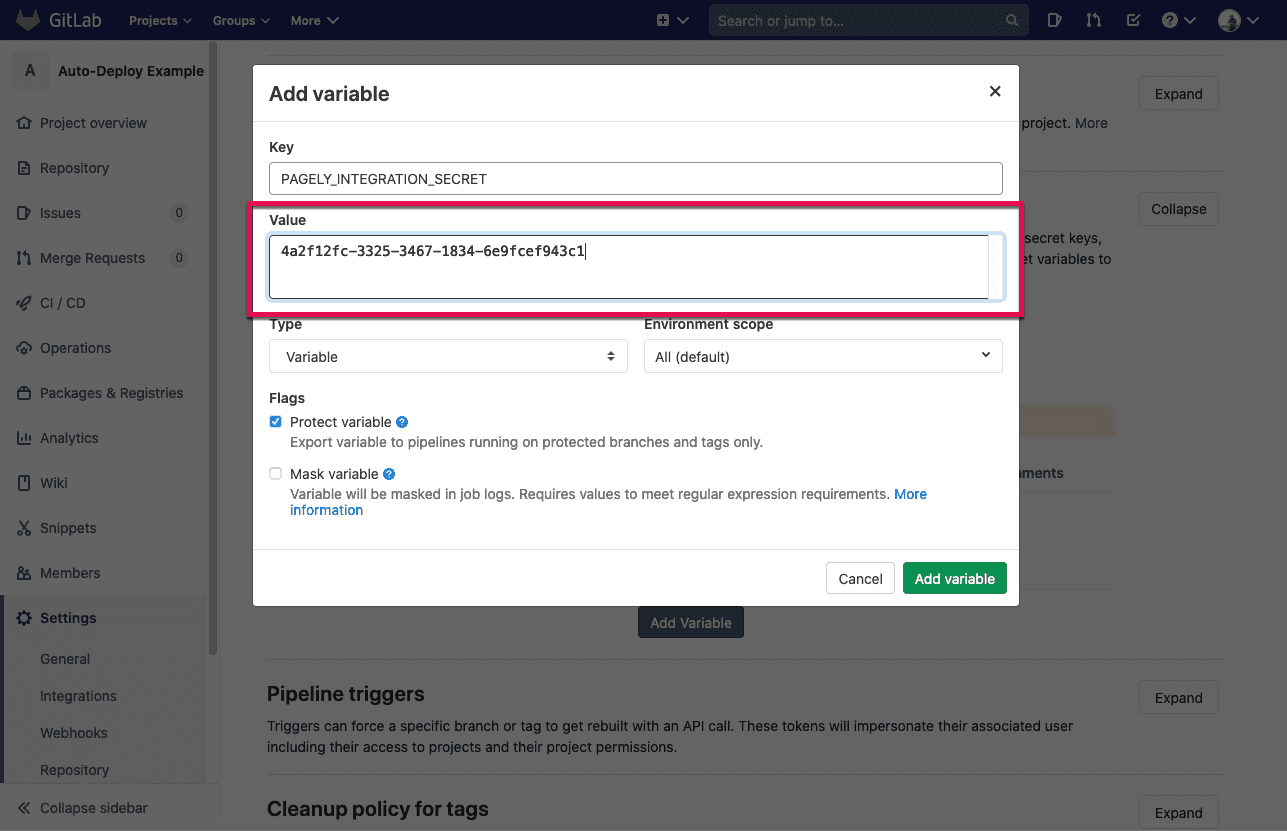
The first field is the Key field. Inside here, we'll enter the name of our variable as
PAGELY_INTEGRATION_SECRET.![Screenshot: integration variable value field]()
Inside the Value field, enter the Integration Secret value that was generated for you when creating your integration in Atomic.
![Screenshot: mask variable checkbox]()
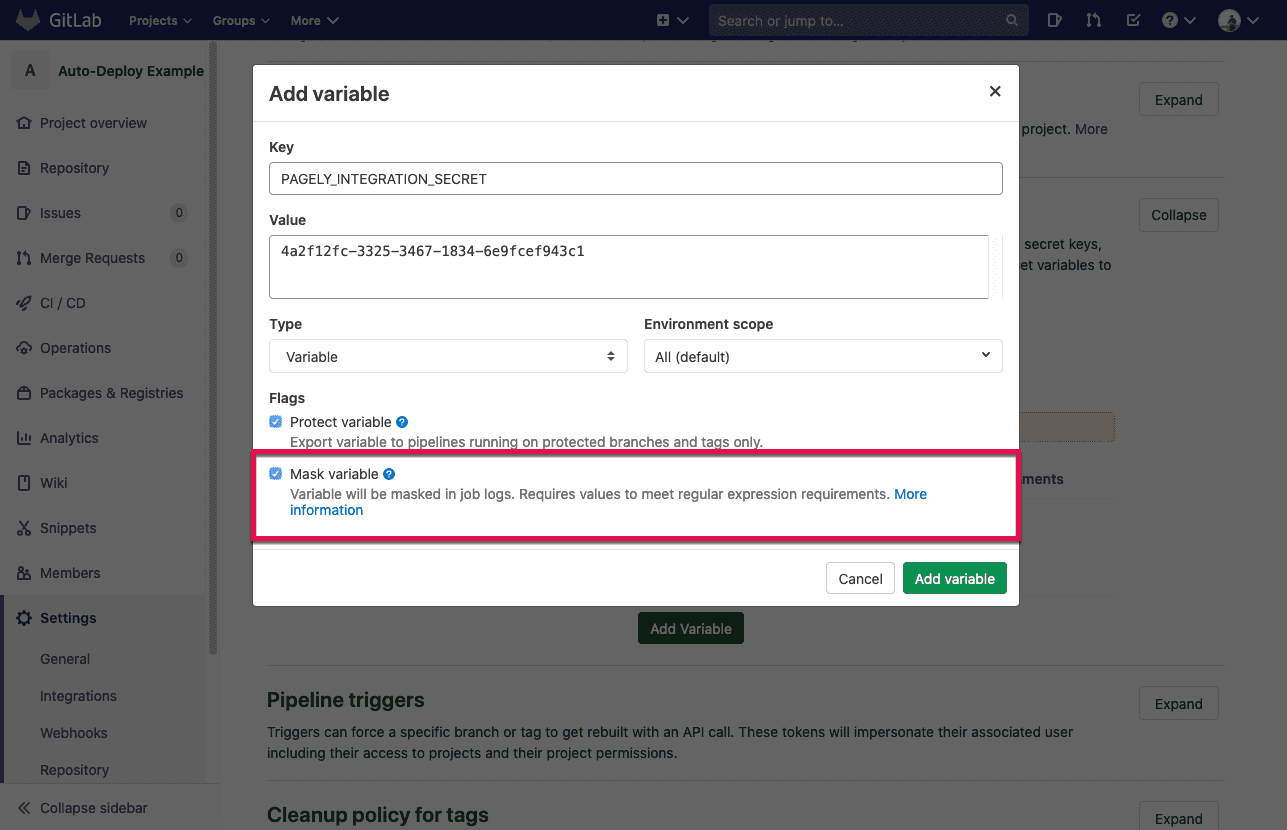
For security purposes, we'll want to mask this variable to make sure that it doesn't show in the logs. To do so, enable the Mask Variable option.
![Screenshot: add variable]()
Once the fields are set for the new variable, click on the Add Variable button to save it.
Creating a Deployment Pipeline
To simplify deployments of your WordPress site, Pagely provides a Docker image that will perform all of the heavy lifting for you. All we'll have to do is configure the deployment pipeline to use it.
Inside of your repository's root directory, create a file named
.gitlab-ci.ymland add the following contents to it:image: pagely/pagely-vps-deploy:1 deploy: variables: PAGELY_DEPLOY_DEST: "/httpdocs" PAGELY_WORKING_DIR: "/builds/$CI_PROJECT_PATH" PAGELY_APP_ID: "12345" PAGELY_INTEGRATION_ID: "HhYn7RelGEiYFJz7nzvKl9" PAGELY_INTEGRATION_SECRET: $PAGELY_INTEGRATION_SECRET script: - echo "Deploying $CI_PROJECT_NAME to Pagely app $PAGELY_APP_ID"Next, we'll need to adjust a few variables to reflect your repository and the deployment destination. These variables are as follows:
- PAGELY_DEPLOY_DEST: This sets the location that your repository will be deployed to. Inside the example, we've set this as
/httpdocs, which will deploy the repository to the site's root directory. If you're deploying a single plugin or theme, you'll want to adjust this to something like/httpdocs/wp-content/plugins/example-plugin-dir. - PAGELY_WORKING_DIR: This is the working directory on your repository that you'll be deploying from. Unless you're deploying for a separate build directory, you can leave this as-is.
- PAGELY_APP_ID: This is just the ID of the app you'll be deploying to. If you're not sure what this is, you can find it in your App Details page in Atomic.
- PAGELY_INTEGRATION_ID: This is the Integration ID that was generated when creating your integration in Atomic.
- PAGELY_INTEGRATION_SECRET: This sets the integration secret. Since we added this as a variable in previous steps, this can be left as-is.
- PAGELY_DEPLOY_DEST: This sets the location that your repository will be deployed to. Inside the example, we've set this as
After your values are in place, carefully check them over for any typos, then push it to your GitLab repository.
With your GitLab CI deployment pipeline now in place, each commit to will be automatically deployed.
For more information about our automated deployment system that wasn't covered in this quickstart guide, you can take a look at the full GitLab CI deployment guide within the Pagely support documentation.
