The WordPress media library is your site’s central hub for images, videos, audio files, and documents. From Media > Library, you can browse everything you’ve uploaded, preview files, and insert them into posts or pages without re-uploading. Think of it as a well-organized shelf where every asset is searchable, reusable, and editable in one place. If you’re new to it, start with the Media Library overview.
In this post, we’ll guide you through uploading and organizing your assets, managing essential metadata, and go over some tips for how to optimize your media for speed and accessibility.
Introduction to the WordPress media library
WordPress supports common file types out of the box:
- JPEG/PNG/GIF for images
- MP4 for video; MP3 for audio
- PDF for documents
Many sites also support modern image formats like WebP (and AVIF on supported versions). By default, WordPress stores uploads in year/month folders and automatically generates multiple image sizes, enabling responsive images (srcset) that fit different screens without manual work.
The Media Library offers two views. Grid view shows large previews for quick scanning and inline edits, while List view shows file names, upload dates, authors, and attachment metadata for more detailed management.
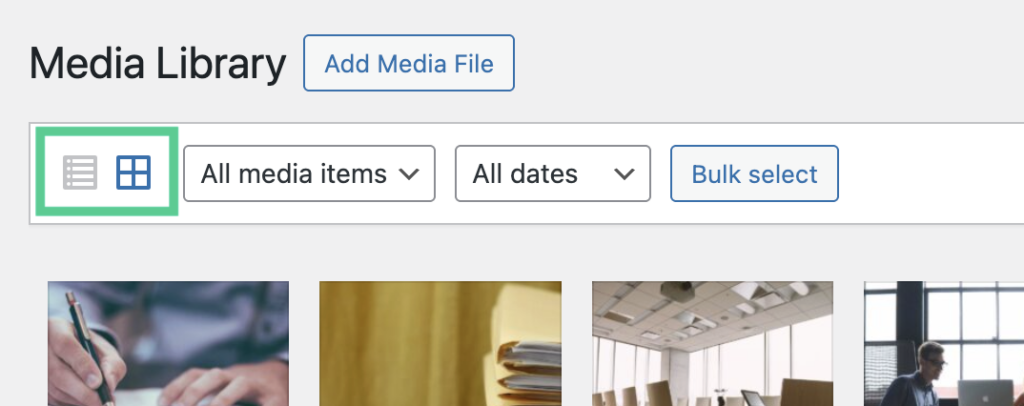
You can filter by media type (images, audio, video, documents) or by date, and you can search by filename or title to find assets fast.
When you select an item, the Attachment Details panel lets you add alt text, captions, and descriptions, or even crop and scale images with the built-in editor.
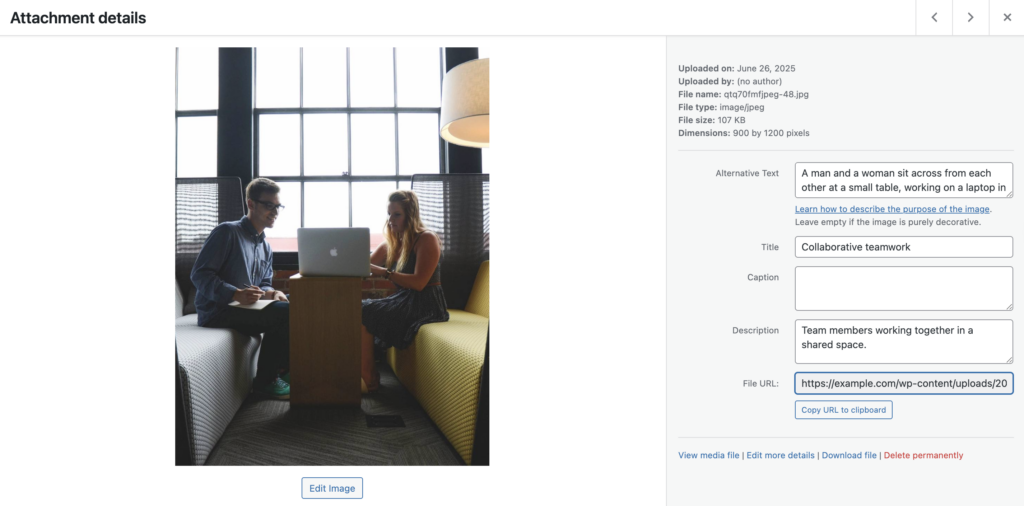
These details improve accessibility and SEO, and they make your media easier to find later.
Finally, the Library integrates tightly with the block editor, so inserting an image, gallery, or audio track directly from the Library (or uploading something new on the fly) is only a couple of clicks. In short, the Media Library is both your storage system and your creative toolkit for visual and downloadable content.
How to upload files to the WordPress media library
Uploading is straightforward, and there are several convenient paths. Here’s the most common workflow:
From the dashboard
Go to Media > Add New or click Add New at the top of Media > Library.
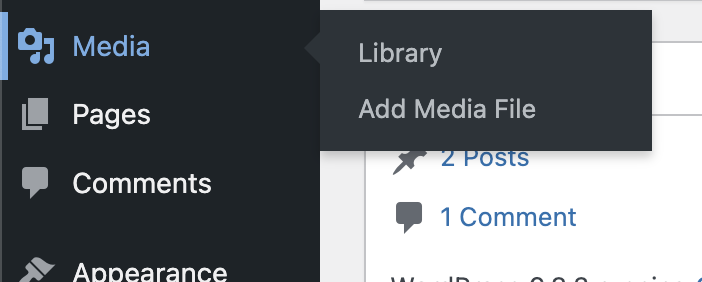
You’ll see the drag‑and‑drop area and a Add Media Files button. (More: Add New Media screen.)
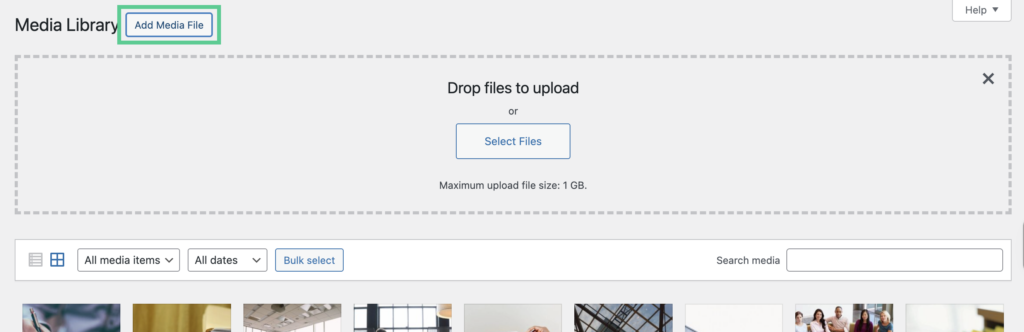
You can select multiple files at once in the file picker or drag in a batch. This is ideal when prepping a gallery or a multi-image article. When dragging and dropping files from your computer, you’ll see progress indicators for each file. When the upload finishes, click an item to open Attachment Details and add alt text, a caption, or a description.
Within the block editor
When editing a post or page, click the + icon and choose Image, Gallery, Cover, or Media & Text.
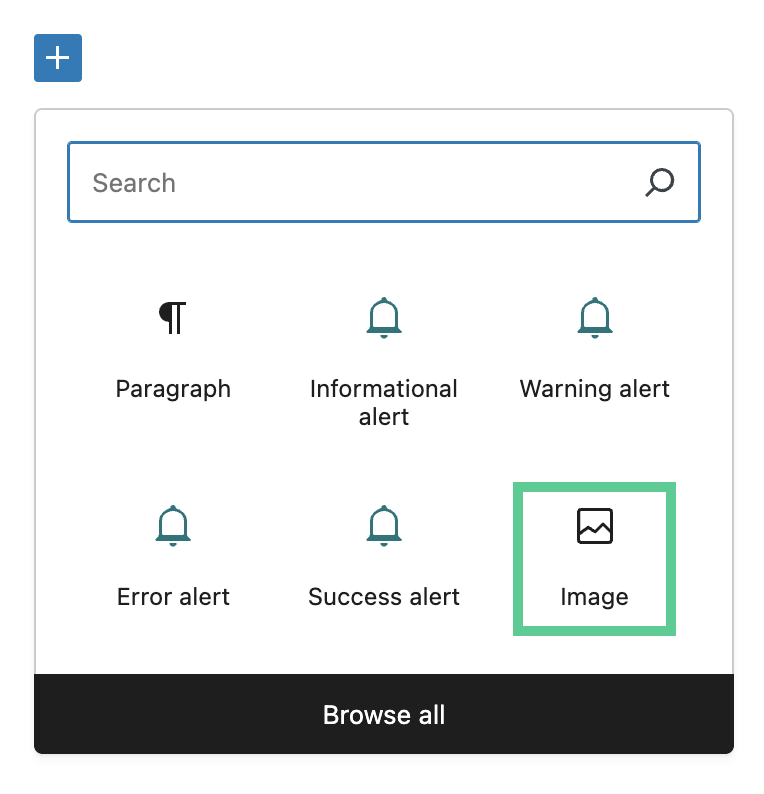
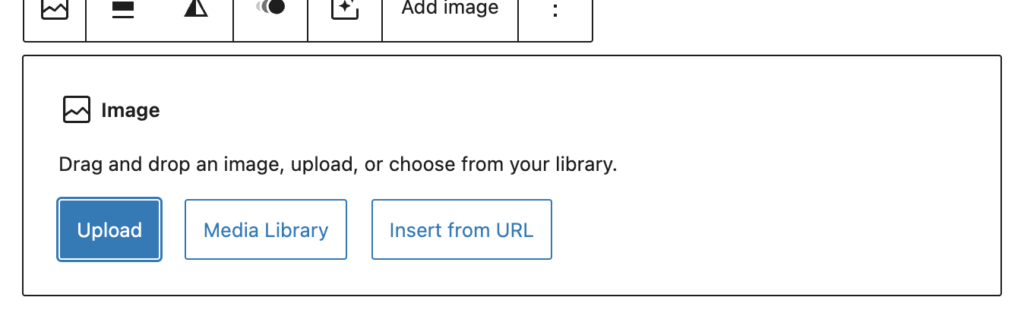
In each block, you can Upload, Select from Media Library, or Insert from URL. The Image block is the most common starting point.
Things to consider while uploading images
- Mind size and type limits: Your server (or host) defines the maximum upload size, and WordPress accepts only certain file types for security. If you hit a size limit, compress images before uploading or talk to your host about increasing the limit. SVGs are disabled by default on many sites due to security concerns.
- Video and audio: While WordPress can host video/audio files, large media may impact performance and bandwidth. Consider embedding from a streaming service (YouTube, Vimeo, etc.) using the Embed block or Insert from URL.
- After upload, add metadata: Select each file in the Library and complete the meta fields discussed earlier to help with accessibility, SEO, and organization.
Follow these steps and you’ll keep uploads fast, consistent, and ready for reuse across your site.
Organizing and managing your media files
Using folders and categories
Core WordPress doesn’t include true folders in the Media Library; instead, it stores files in year/month directories and lets you filter by media type and upload date. That said, you can still create structure and findability.
Start with naming discipline: use descriptive, hyphenated filenames (e.g., spring-menu-hero-2025.jpg) so searches surface the right assets. Add Titles, Captions, and Alt Text. These fields are searchable and make content easier to locate later. Use the List view for quick sorting by author, date, or title.
If you need folder-like organization, consider a media taxonomy (categories/tags for attachments) or a reputable “media folders” plugin that adds virtual folders without moving files on disk. This approach keeps URLs stable while giving editors a familiar folder tree. For teams, establish conventions (e.g., prefix campaign codes, standardize hero/thumbnail naming) so everyone files and finds assets the same way.
Editing media metadata
Proper metadata pays dividends in accessibility, SEO, and workflow. In Media > Library, click a file to open Attachment Details:
- Title: Human-friendly label you’ll see in the Library and sometimes in galleries.
- Alt Text: Text alternative for screen readers and when images fail to load. Write what the image shows and convey the same information users would get visually. (Avoid keyword stuffing; be concise and accurate. See accessible alt text best practices.)
- Caption: Appears alongside the image on the front end (theme-dependent). Great for photo credits or context.
- Description: Internal notes or longer context, often shown on the media attachment page.
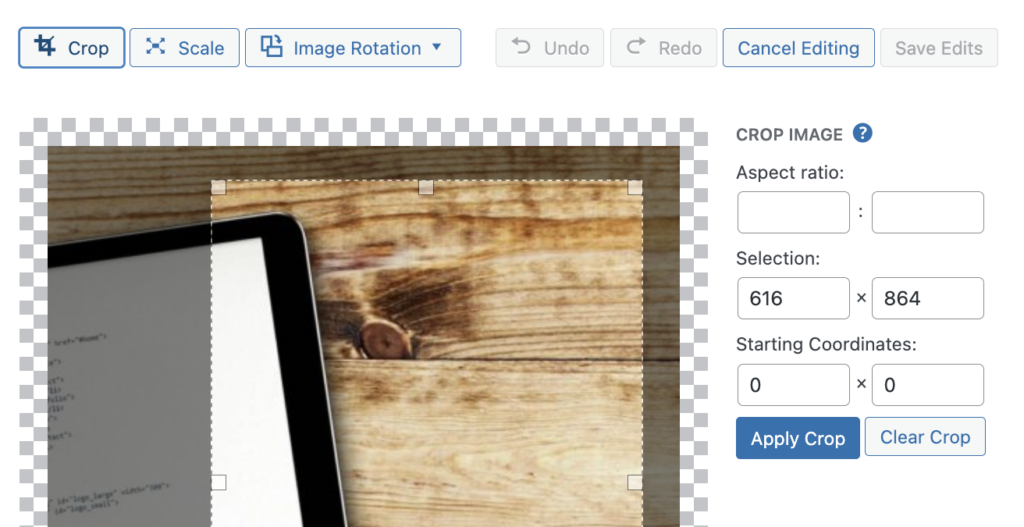
Need to tweak the image itself? Use the built-in Edit Image tools to crop, rotate, flip, or scale.
If you change theme image sizes later, run a thumbnail regeneration tool so WordPress creates the new sizes for existing images. This ensures crisp, responsive visuals across templates.
Tips for optimizing your media in WordPress
- Choose the right format: Photos > JPEG/WebP (or AVIF on supported versions). Graphics with transparency > PNG. Avoid BMP/TIFF on the web.
- Compress before upload: Use a reliable compressor to reduce file size without visible quality loss. Aim for a balance (usually 60–85% quality for JPEGs).
- Match dimensions to need: Don’t upload a 6000px image for a 1200px hero. Oversized images bloat pages even with responsive
srcset. - Leverage responsive images: WordPress generates multiple sizes automatically; use standard image blocks so it can output
srcset/sizes. - Lazy load wisely: WordPress lazy‑loads images by default. For your primary hero/LCP image, consider loading it eagerly to improve Core Web Vitals.
- Think accessibility: Always add meaningful Alt Text (or leave empty if decorative) and avoid text baked into images when possible.
- Standardize names and metadata: Consistent filenames, titles, and captions make search work and keep teams aligned.
- Use a CDN: Serving media from a CDN shortens distance to users and reduces origin load.
Remember to periodically remove unused or duplicate assets and regenerate thumbnails if you’ve changed image sizes or theme breakpoints.
If you’re scaling a content‑heavy WordPress site, pairing solid media hygiene with fast global delivery makes a measurable difference. Our Managed Hosting for WordPress is built for performance and security at scale, and plays nicely with leading optimization, offload, and CDN solutions. Ready to modernize your media workflows, including staging, CI/CD, image optimization, and edge caching? Talk with Pagely to get started.