
Menus are an important component of any successful website.
For a start, they add to a website’s aesthetics, but most importantly, they help visitors to navigate your website.
That’s why you’ll see most WordPress websites employing a menu at the top of the website, in the header bar.
This includes here at Pagely. Regardless of the page a visitor lands on, they are no more than one click away from contacting us, reading our blog posts, or learning more about our plans — they can find what they’re looking for with ease.
This is why most WordPress themes support at least one menu.
Today, I want to help you get started with WordPress, by showing you how to build a WordPress menu.
Getting Started
From the WordPress dashboard, head over to Appearance and then click Menus. To create a new menu, click on create a new menu — WordPress makes it as easy as possible for you to find your bearings! Be sure to give your new menu a name.
Now, by default, WordPress will give you three options for menu items:
- Pages: you can add WordPress pages to your menu
- Links: you can link to external or internal URLs
- Categories: you can link to posts saved under a specific category
The glaring omission from this list is WordPress posts. (Sure, you could link to individual posts using the links option and adding the URL manually, but thankfully there’s an easier way.)
At the top right of the Menus screen you’ll see a box called Screen Options. Click this and a menu will drop down.
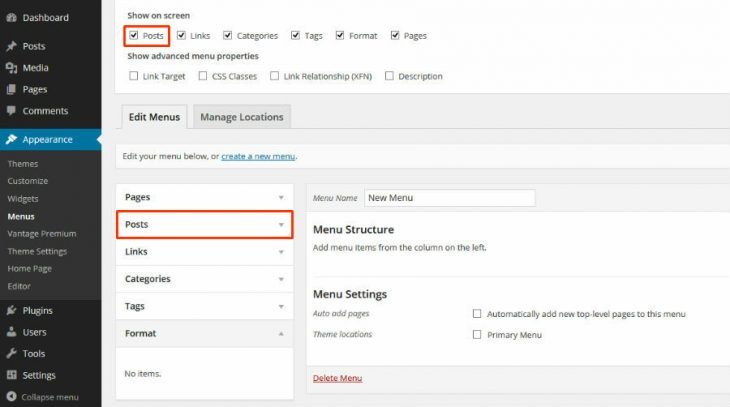
On this menu, you will see a number of checkboxes, with Pages, Links, and Categories already checked. If you want to add posts to your menu, check the Post checkbox now — you can also add tags this way.
Creating the Menu
You can now begin to populate your menu with posts, pages, and categories by selecting relevant items and hitting Add to Menu.
As you do this, you’ll see the menu items being added to your Menu Structure.
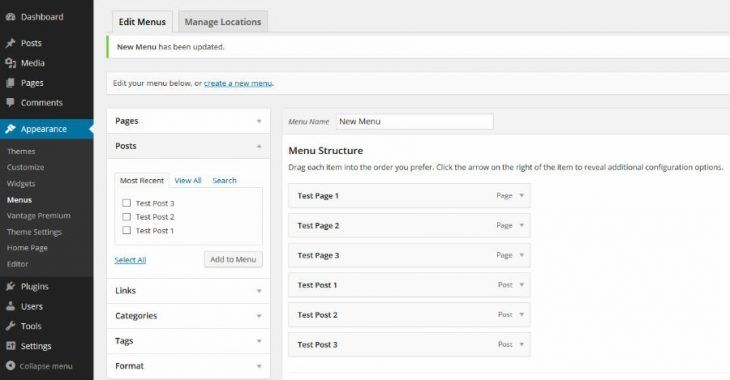
Using the drag-and-drop interface, you can re-order items simply by dragging them up and down.
You can also use the drag-and-drop interface to create menu sub-items, which sit directly below the top-level items. To see a sub-item in action, take a look at the Pagely menu at the top of the screen. Hover over the Plans menu item and you’ll see four options drop down: Personal / Business, VPS, Enterprise, and Custom Plans. These four items are the sub-items.
To convert a menu item into a sub-item, simply drag it out to the right using the drag-and-drop interface. When you’re done, it will look something like this:
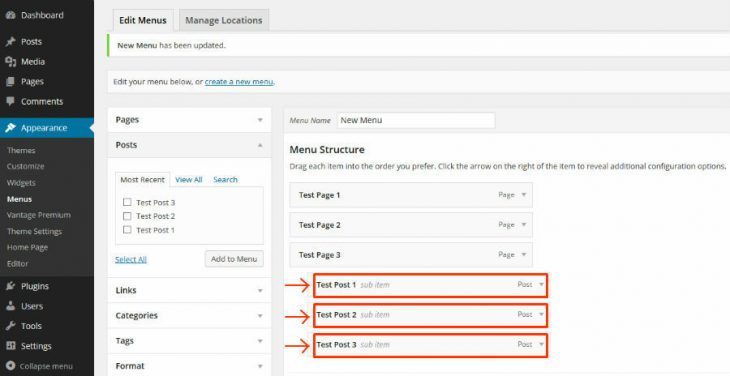
WordPress will confirm you’ve done this right by displaying the sub-item tag, as seen in the screenshot above.
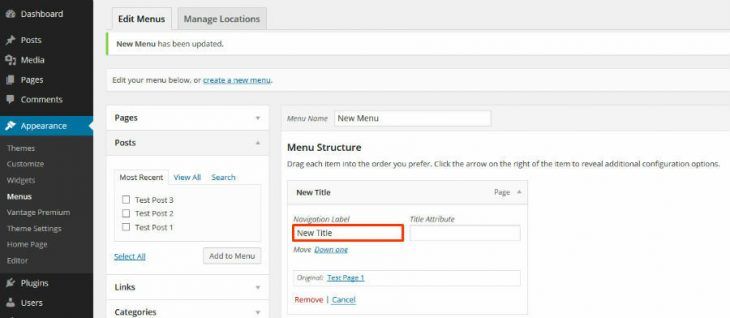
By default, WordPress will add the post, page, or category title to the menu, but you can change how each item appears. To do this, simply click on the downwards arrow to the right of each item, and edit the Navigation Label to set how you want it to appear.
When you’re happy with your menu, click Save Menu.
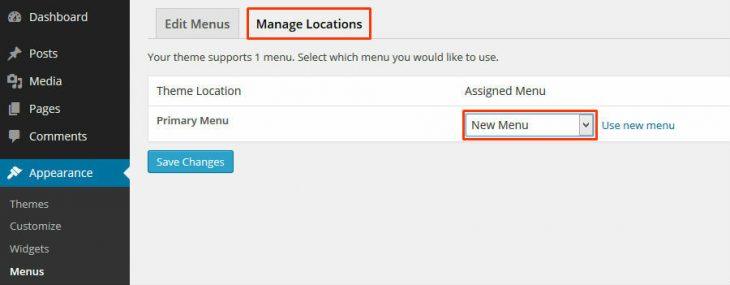
It’s time to add the menu you’ve just built to your website. To do this, simply head over to the Manage Locations tab.
From here, WordPress will tell you how many menus your theme supports — in this example scenario, just one — and will let you assign a menu by selecting from a drop-down list. Select your new menu, then hit Save Changes.
And voila, you’re done!
Menu Widget
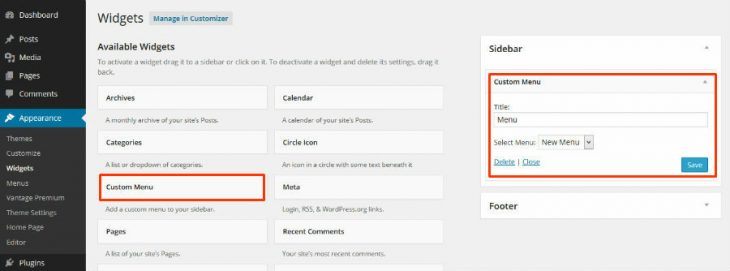
If your theme doesn’t support a menu, that doesn’t mean you can’t build menus to improve your website’s navigation.
However, instead of using a dedicated menu area, you’ll have to use a widget.
By default, WordPress supports a custom menu widget, so there’s no need to install a plugin. Simple head over to Appearance then Widgets, select the Custom Menu widget on the left, and drag it into the widget area you want.
From here, choose your new menu from the drop-down list, then hit Save.
All done!
Final Thoughts
That’s all there is to it: a simple guide to building menus for WordPress users.
My tip is to keep your menus as clean as possible — only use a few top-level items to keep it clutter-free, and to avoid running out of space. If you want to add more items to a menu, you can use sub-items to add more complexity, and further improve navigation.
Do you have any questions about setting up menus in WordPress? Ask away in the comments section below!
An exellent guide for beginners. I will recommend it to everyone how ask me about it.