
On September 16th, 2014, a new world record was set when 12,091 people attended the largest ever webinar held by Glavbukh in Russia. What makes this figure so astounding is the fact that only ten years earlier, almost nobody had even heard the word “webinar”.
In recent years, many businesses have come to realize the amazing potential of webinars as a marketing tool. A 2016 survey by Content Marketing Institute found that webinars ranked as the 2nd most effective kind of marketing content, behind only in-person events. The power of webinars has become so well known that 66% of marketers are now using them as part of their marketing strategy. Webinars also help to position your brand in a competitive space.
If you’re considering joining a large number of business who have had amazing success using webinars, it’s important to know as much as you can about how to run a successful webinar.
This article will show you why webinars are a fantastic marketing tool and help you choose webinar software that suits your specific needs. Skip below to see our ultimate ten step guide to setting up a free and fully functional webinar on your WordPress site, and give you some tips for making your webinar a success.
What Is a Webinar?
The word webinar, which is a portmanteau of the words web and seminar, refers to a presentation, workshop or seminar that is transmitted over the web using video conferencing software.
Businesses and organizations have long recognized the value of seminars. They allow people to discuss issues and exchange ideas, learn new information from industry leaders, network with peers and clients and generate warm leads.
The biggest problem with seminars is that they are expensive and time consuming for both the organizers and participants.
Webinars remove these hurdles by allowing people to attend from their home, office or any place that has an internet connection. As many webinars offer on-demand access, people who are unable to participate in the live event can watch the webinar at a later date.
Why Make a Webinar?
Here are six great reasons you should be using webinars.
- Webinars are convenient. You can catch up with business partners and customers from your home or office. It’s also convenient for attendees as they don’t need to travel. If you provide recorded content, attendees can watch your webinar anytime without having to worry about time differences. Increased convenience means that more people are likely to sign up.
- Webinars are cost-effective. Live seminars require paying for advertising, catering, displays, staff, transport and a place to hold the event. All you really need for an effective webinar is a computer and an internet connection.
- Webinars allow you to promote your business and increase your exposure to a much wider audience. Anyone around the world can join your webinar, giving you access to more potential customers.
- Webinars can help build your credibility and establish trust with your audience. Your audience can see you and interact with you, which is the next best thing to meeting face to face. Webinars have the added advantage of putting you in front of hundreds or even thousands of people at the same time.
- Webinars let you interact directly with your target audience, which helps you get a better understanding of their needs and challenges. Understanding what motivates them allows you to tailor your products, services, and advice to match their needs.
- Webinars are fantastic for lead generation. During the signup process, you can collect names, email addresses and other information from your audience. The best part is that these are all qualified leads from people who are interested in your product or service.
Still not convinced?
Consider this – the average conversion rate for a landing page is about 2.35%.
A conversion rate between 5% and 10% is considered “outstanding”.
Yet recent studies have shown that between 20% and 40% of webinar attendees turn into qualified leads.
That means that if you have 100 people attend your webinar, between 20 and 40 of them are likely to become paying clients.
If you have a WordPress site and you’re not using webinars, you’re missing out on a fantastic opportunity to increase credibility with your customers, expand your brand awareness, learn more about your current customers, gain valuable customer leads, and access a profitable revenue stream.
Setting up a WordPress webinar shouldn’t take longer than an hour.
Choosing WordPress Webinar Software
There are many different software packages on the market that allow you to add webinar functionality to your WordPress site.
Here are some important questions you need to ask when choosing webinar software.
Do I want a complete service that takes care of everything from registration to attendee feedback? Are basic features such as a video stream and a chat enough, or do I need advanced features such as detailed analytics, file sharing, and polling?
Do I need webinar software that can easily integrate with 3rd party apps and services such as YouTube, Facebook, iCal, Microsoft Office, LinkedIn and payment gateways? Do I want to pay for software or would I prefer a free option?
Paid WordPress Webinar Software
If you’d prefer a paid option with extended features, here are three popular choices.
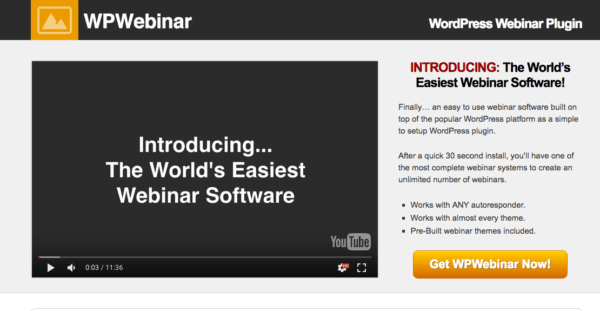
WP Webinar is an easy to use software designed specifically for WordPress. Here are some of the best features of this plugin.
- Focuses on simplicity and ease of use, which means it’s a good choice for inexperienced WordPress users.
- Installation can be completed in just 30 seconds.
- Create recurring webinars that are scheduled to broadcast multiple times per day or week.
- Utilize your own WordPress theme to keep consistency between your site and your webinar page, or choose one of the customizable pre-made themes included with the plugin.
- Numerous customizable features such as video size, headers, and button text allow you to create a webinar that looks original.
- Integrate with any autoresponder on the market and output the code into a fully customizable webinar opt-in.
- Create a Thank You page that integrates with Facebook, Google, LinkedIn, and Twitter to help your webinar go viral.
- Add Call to Action areas that are set to appear at specific times during your presentation.
- Use the Follow-Up System to create automated messages that remind your attendees to watch your webinar.
- A one-time payment that doesn’t require yearly renewals, which makes it a very cost-effective choice.
- Purchase includes lifetime updates so you can have access to the latest features as they are released.
A one-time purchase starts at $197 for a single site and $247 for multiple sites
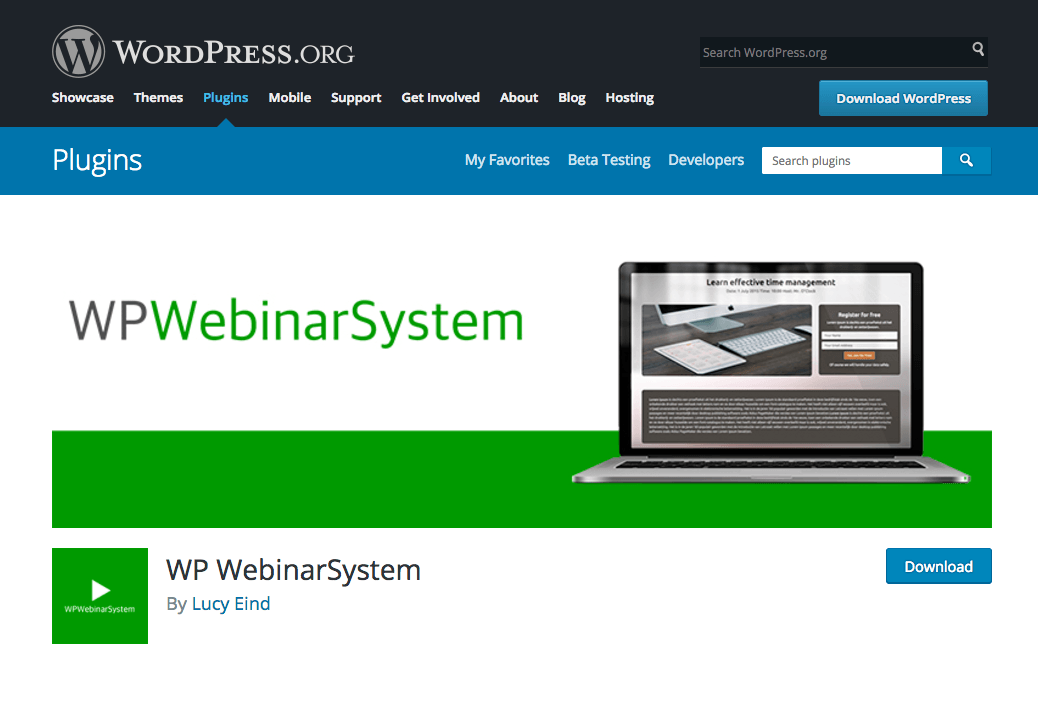
WP WebinarSystem is a customizable software that lets people without technical skills create a functional webinar. Here are some of the best features of this plugin.
- Webinars are based on Google Hangouts on Air which allows for an almost unlimited amount of viewers.
- All webinar pages are responsive and mobile-friendly, which means people can access the webinar from any device.
- Create a landing page for attendee registration, display a countdown timer for your webinar, and send reminders and notifications through the built-in email system.
- Use the Incentive Box to deliver presents, downloads or bonuses to your attendees.
- Set automated or recurring webinars that display a recorded video at a set time and date.
- Integrates with WooCommerce and several other major payment gateways, which allows you to charge people for attending your webinar.
- Create Call to Action buttons that appear at set times during a live or recorded webinar. These buttons allow you to redirect your attendees to an affiliate, add to cart or checkout link.
- Attendees can ask private questions that will appear on your dashboard in real-time. If you’re running an automated webinar, these questions can be redirected to your mailbox.
- Comes with an integrated live chat system, so you don’t need to install any third-party software.
- Collect attendee information when they sign up and export it to a text or CSV file.
- WP WebinarSystem is available in 26 languages.
There is a free version which has limited features and a Pro version which starts at $197 for a single site or $497 for unlimited sites.
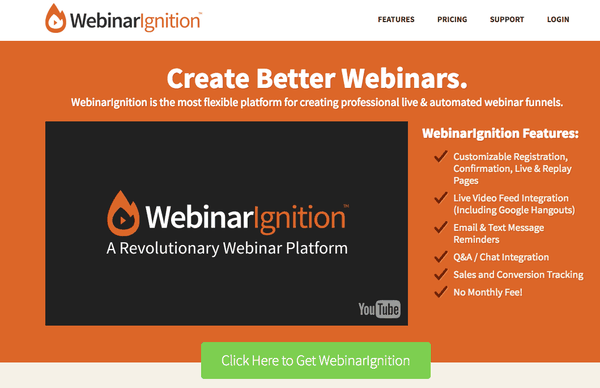
Webinar Ignition is a professional and flexible platform that integrates with any WordPress theme and is simple to set up. Here are some of the best features of this plugin.
- Create live or automated webinars that can be linked to any video stream, such as Google Hangouts on Air or LiveStream.
- Use the Live Console Hub for real-time monitoring of attendees, sales data and questions.
- Integrates with all the major email autoresponders such as GetResponse, AWeber, iContact, and MailChimp.
- Comes bundled with a number of professionally designed page templates that can be customized with your own brand colors and images.
- Attendees can sign up with a simple one-click registration.
- Add a viral sharing feature to your confirmation page, and offer gift incentives for participants who share their registration on social networks.
- Export the details of “hot leads” who attended your webinar, watched the replay, and are most likely to become paying customers.
- Push a Call to Action or any other HTML when you are ready to pitch your product.
- Increase your attendee rate by scheduling email and text notifications that can be integrated with any SMTP service or with Twilio.
- Choose between a Questions Box and a Live Chat for your webinar page depending on which feature is appropriate for each individual webinar.
- Integrates with popular payment gateways such as PayPal and Stripe which allows you to charge a fee for webinar entry.
- A one-time payment that doesn’t require yearly renewals, which makes it a very cost-effective choice.
The plugin costs $97 for one site, $197 for three sites, or $297 for unlimited sites.
Free WordPress Webinar Software: The Ultimate Guide
If you’d prefer a free option, the absolute best choice is Google Hangouts on Air, which has recently moved to YouTube Live. It offers all the basic features needed for a webinar including automatic recording and DVR, which means it’s the perfect choice for anyone on a budget.
In fact, we recommend that anyone who is interested in making webinars should try this free option first before committing to a paid software.
To help you out, we’ve put together the ultimate ten-step guide to adding a Google Hangouts on Air webinar to your WordPress site.
NOTE: Setting up a webinar requires a Google AdSense account. If you don’t already have one, a new account can take between 12 hours and 3 days to be approved. Make sure you have plenty of time to set up your account before you plan on broadcasting your first webinar.
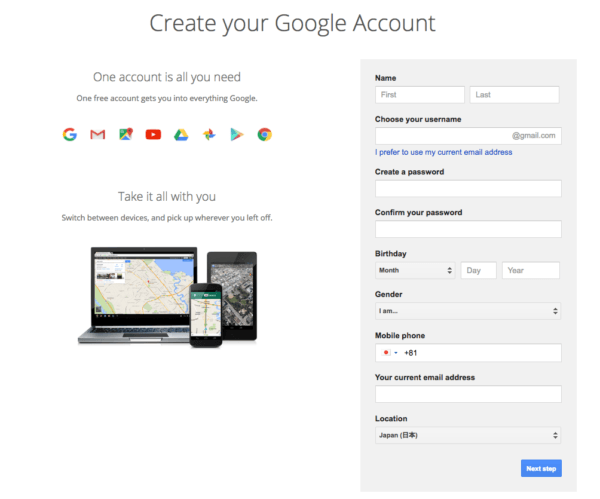
Step 1: Create a Google Account
The first thing we need to do is create a Google account. If you already have a Google account, you can skip this step.
To create a Google account, go to the Sign Up page, fill in your personal information and click “Next Step”.
Read the Privacy and Terms and click “I Agree”.
Google needs to verify you’re a real person, so enter your details, choose text or voice verification and click “Continue”.
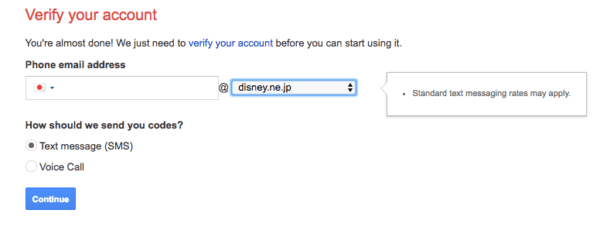
Enter the verification code you received by text or voice and click “Continue”.
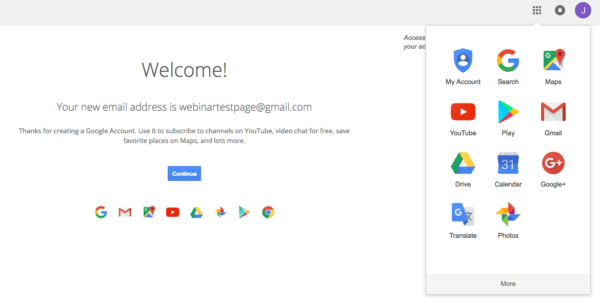
Your new Google account is now ready to use.
Since August 2016, Google requires anyone who wants to embed live videos to have a Google AdSense account, so the next thing we have to do is sign up for AdSense.
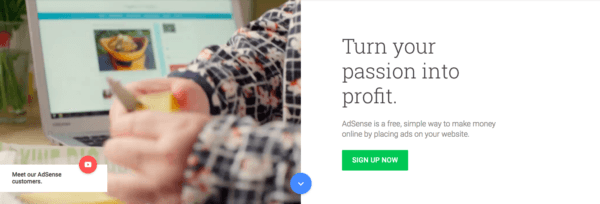
Step 2: Sign up for Google AdSense
Go to the Google AdSense site and click on the green “Sign Up Now” button.
Enter your details, read and accept the Terms and Conditions and click “Create Account”.
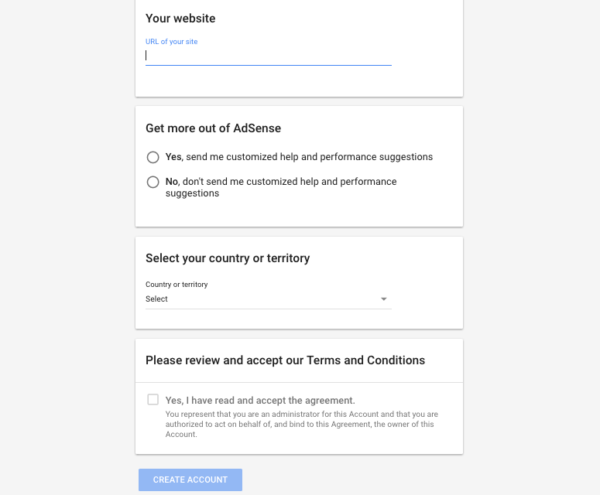
Enter your personal details and your website address, then complete the verification.
Next, you have to paste the AdSense code into your WordPress website. Click “Copy Code”.

Open a new browser window and log in to your WordPress site.
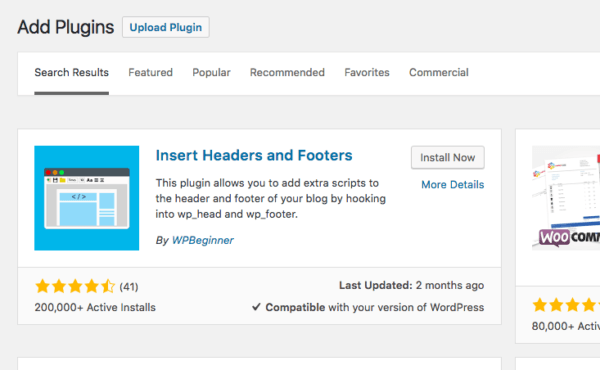
We need to add the AdSense code into our WordPress site. The method for doing this will be slightly different depending on what theme you’re using. One easy method which is guaranteed to work for all themes is to install a plugin called Insert Headers and Footers.
On your Dashboard menu, click “Plugins” and “Add New”.

Search for Insert Headers and Footers and click “Install Now”.
Click “Activate”, then click “Settings” and “Insert Headers and Footers” in the Dashboard menu.
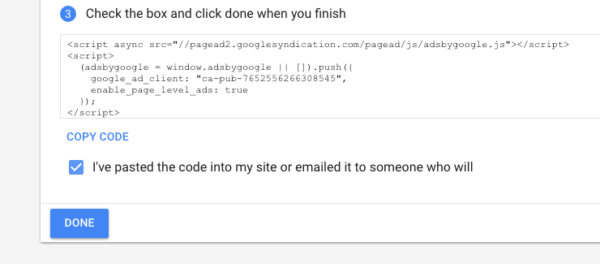
Paste the code into the “Script in Header” section and press “Save”.
Go back to the AdSense page, check the confirmation box and click “Done”.
Google will review your site and send you an email when they’ve finished. It says it will take up to 3 days, but it will usually be finished in less than 12 hours.
Take a break and come back when your confirmation has arrived.

Step 3: Create a New Event on YouTube Live
The next thing we need to do is create a new event in YouTubeLive, so go to Google, click on the 3×3 app icon in the top right corner of the page and click the link to YouTube.
If you’re not automatically signed in, click the “Sign In” button and enter your Google password.
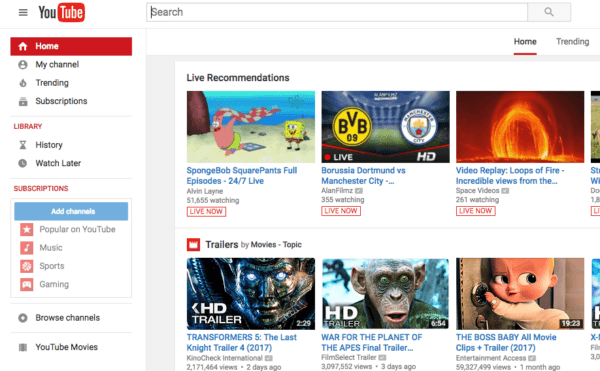
Next, click the “My channel” link in the left menu.
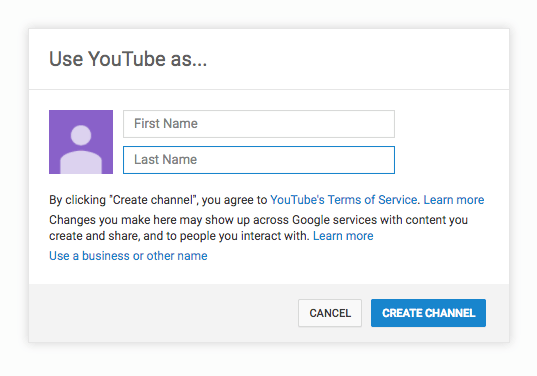
Enter your name, read the Terms and Conditions and click “Create Channel”.
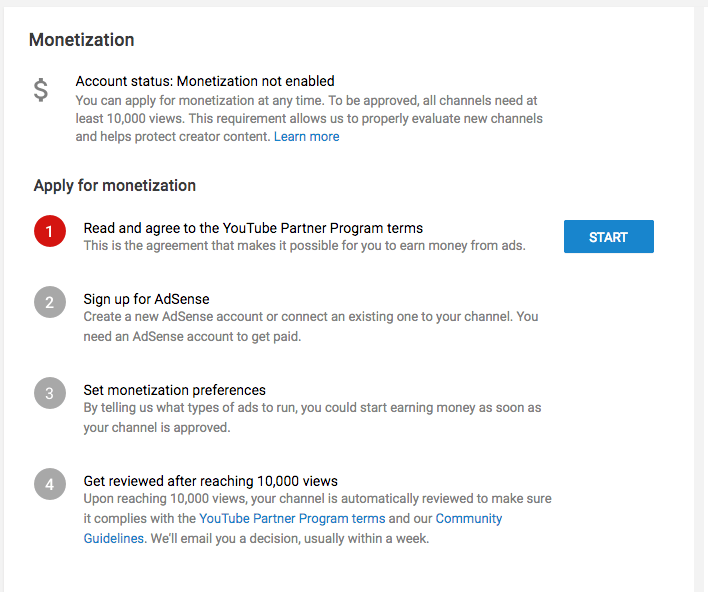
The next thing we need to do is check that YouTube has recognized your AdSense account and enabled embedding, so go to https://www.youtube.com/features.
Click “Enable” in the Monetization box.
Click the blue “Start” button, read the terms, check the boxes and click “I accept”.
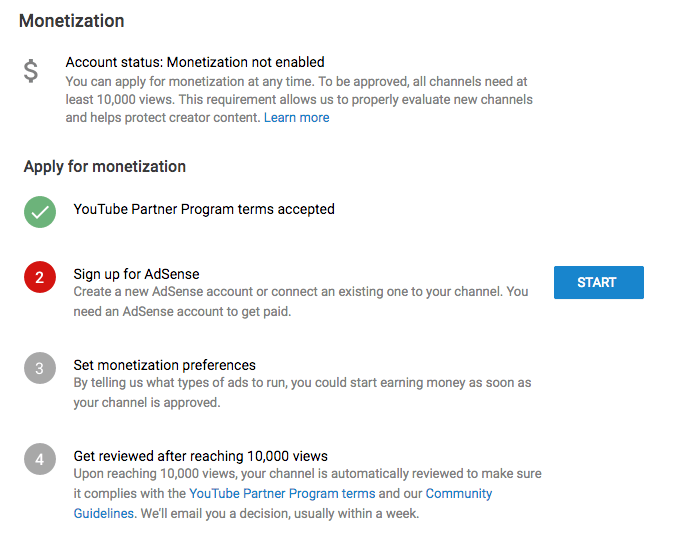
Click the blue “Start” button next to step 2, then click “Next” and sign in to your AdSense account.
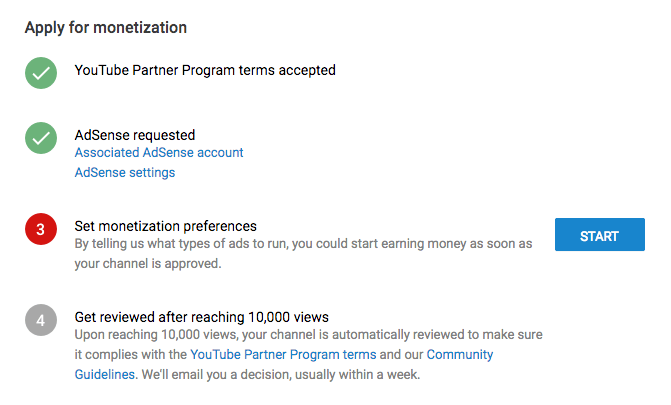
Check your details and click “Accept association”.
When you are redirected back to your dashboard, click the blue “Start” button for step 3.
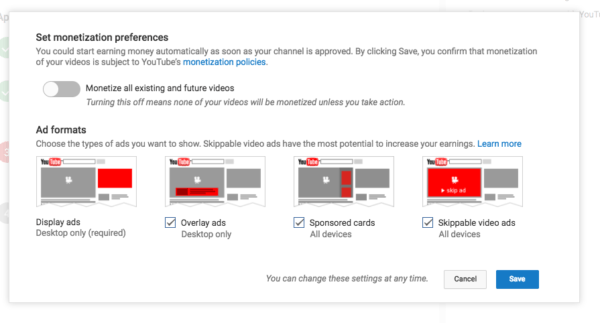
You can choose whether or not to monetize all existing and future videos. It won’t affect your ability to embed webinar videos.
Click “Save”.
Now we need to set up the webinar video. To make a webinar we need to create a live event, so click on the “Video Manager” link.
In the left menu, click “Live Streaming”, “Events”, then the blue “New live event” button.
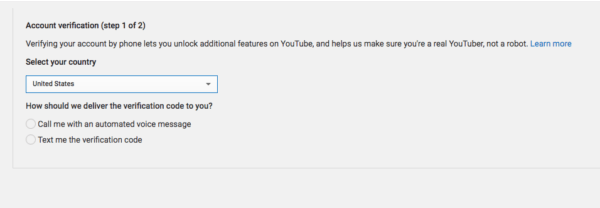
We need to verify our YouTube account, so enter your details, get your verification code and enter it on the next screen.
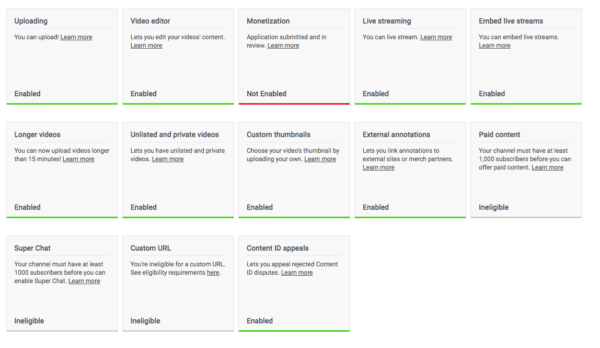
Now that we’re verified, lets double check that embedding is enabled.
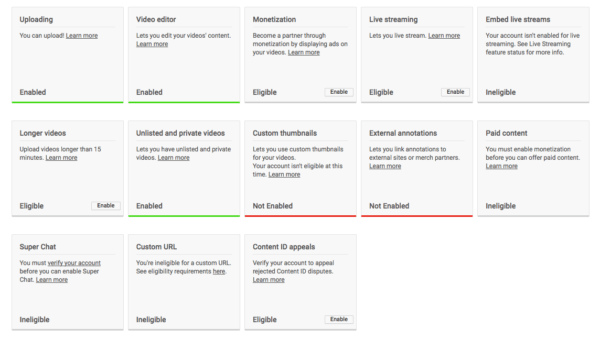
Click “Channel” in the menu on the left.
Live streaming and Embed live streams should be Enabled. It doesn’t matter if Monetization says Not enabled.
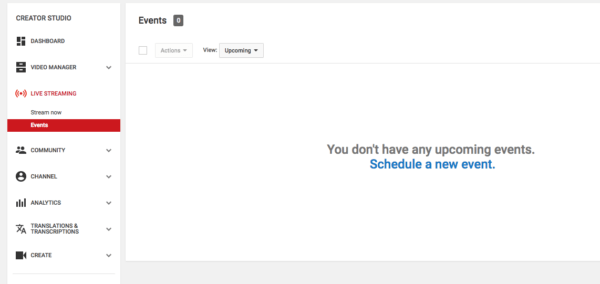
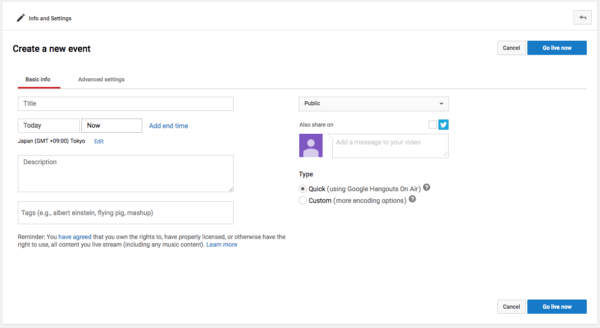
Next, we have to create our webinar event. In the menu on the left, click “Live Streaming” and “Events”, and then click the blue “Schedule a new event” link.
Enter the name of your webinar, the date and the start time. If you’re not sure about the best date and time to hold your webinar, have a look at our advice at the end of this article.
We want to use Google Hangouts on Air, so make sure you have the Quick type selected.
You can also choose whether you want your webinar to be Public, Unlisted or Private. Public events are viewable by anyone, Unlisted events are viewable by anyone who has the link, and Private events are viewable only by people who you personally invite. For most people, Unlisted will probably be the best option.
Step 4: Customize Your Event
If you want to customize your event further, click on the “Advanced settings” tab.
You can select languages, set age restrictions, change recording settings and numerous other things. For a basic webinar, you probably don’t need to change anything.
While you’re here, make sure that “Allow embedding” is checked.
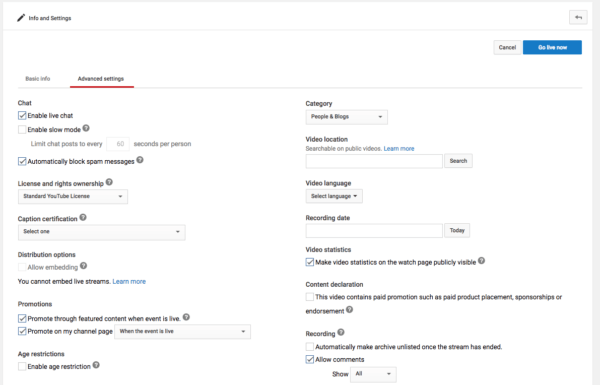
When you’ve finished, click the blue “Create Event” button.
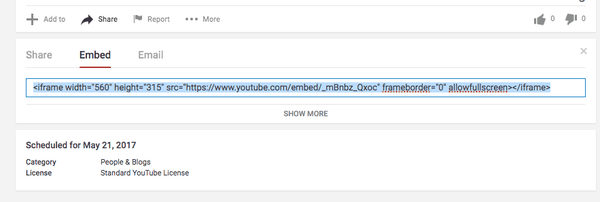
The next thing we want to do is grab the link to the video, so click on the title of your webinar.
You should see a grey screen with a countdown timer.
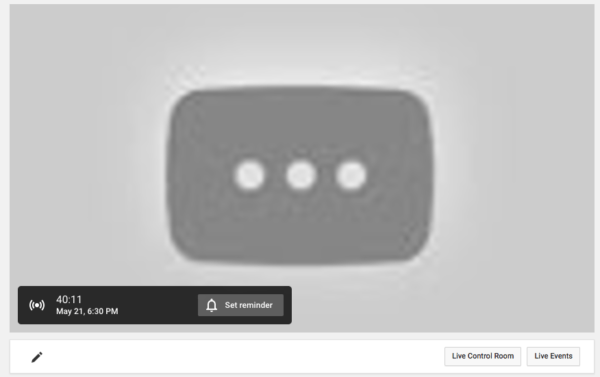
Click the “Share” button underneath your video, then click the “Embed” tab. Copy the embed code and keep it safe. We’ll use it a little later.
Step 5: Create a New Event Page for Your WordPress Webinar
Now we’ve got the video set up, let’s create a new page to display the webinar.
For this tutorial, we’re using the standard WordPress Twenty Seventeen theme.
Open your WordPress dashboard and click “Pages” then “Add New”.
Enter a title for your page
Step 6: Embed Your WordPress Webinar
We’re going to paste the video code into the page, so make sure you have the “Text” tab selected.
Paste the video embed code straight into the page.
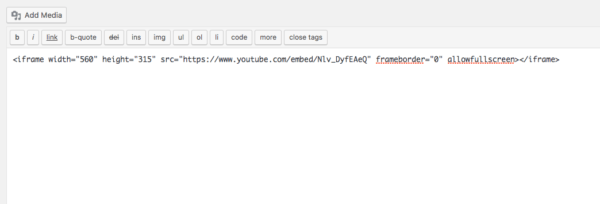
Click “Preview” to make sure the video is linked.
Congratulations! You should have a webinar video ready to broadcast.
Step 8: Create a Signup Page
If you want to have a successful webinar, you need to know who is going to attend, so let’s create a sign-up page.
We’re going to link this sign up page to an email marketing tool.
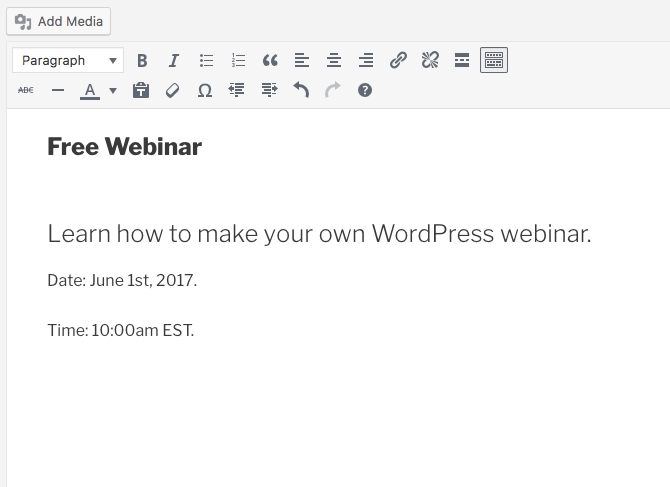
Use the same steps we used before to create a new WordPress page and give it a name.
Write a description of your webinar. You can use the “Visual” tab this time.
For this tutorial, we’ll make it very simple, but for a real webinar, it’s important to make it as persuasive and informative as possible.
Next, we’ll create a form to capture attendee information.
Step 9: Add a Form from Your Email Marketing Tool
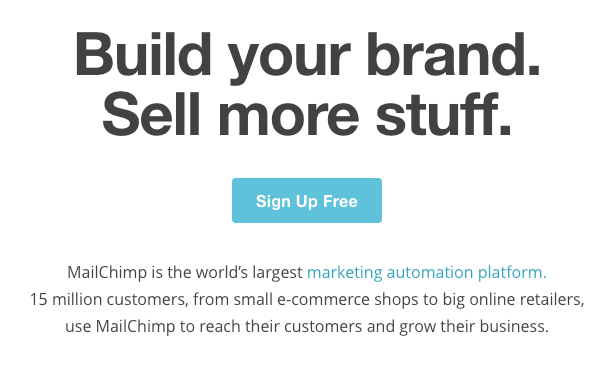
To create a new form, we need to use an email marketing tool. If you don’t already have one, some of the popular choices are MailChimp, Convertkit, and AWeber.
For this tutorial, we’re going to sign up for a new MailChimp account.
Open a new browser window and go to https://mailchimp.com/.
Click the “Sign Up Free” button.
Add your details and click “Get Started”.
Confirm your email address and fill in your personal information, then navigate to the MailChimp dashboard.
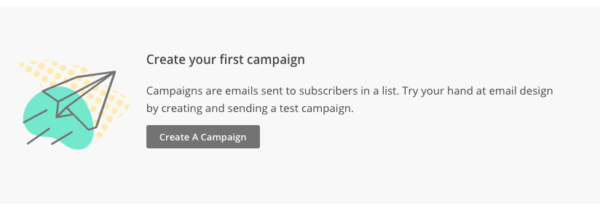
To create a form, we first need a list. Click “Create a list”.
Fill in your details and click “Save”.

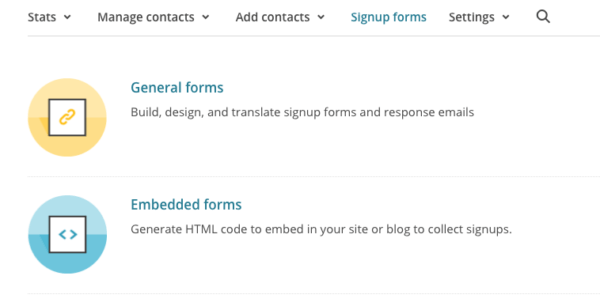
Click on the “Signup forms” tab, and click “Embedded forms”.
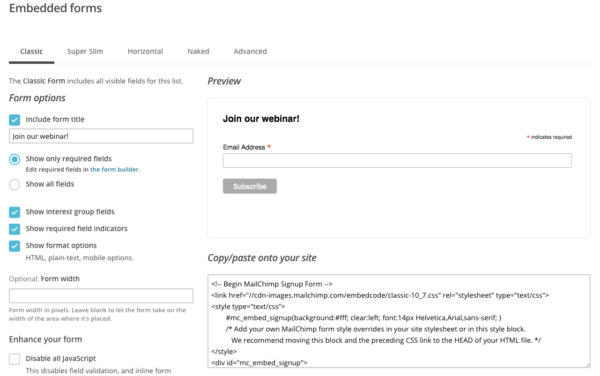
Change the form title to something more appropriate.
You can also change the information that will be collected by editing the fields.
When you’ve finished, copy all the code from the “Copy/paste onto your site” box.
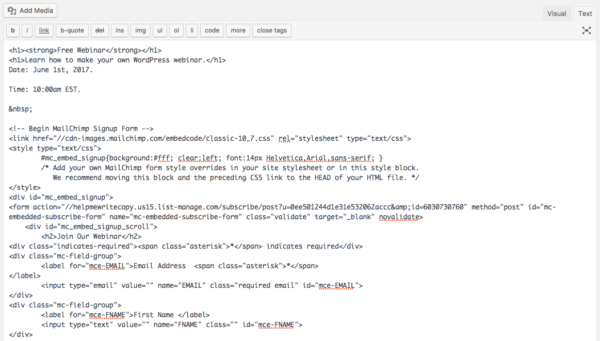
Head back to your sign up page, click the “Text” tab and paste the code below your webinar description.
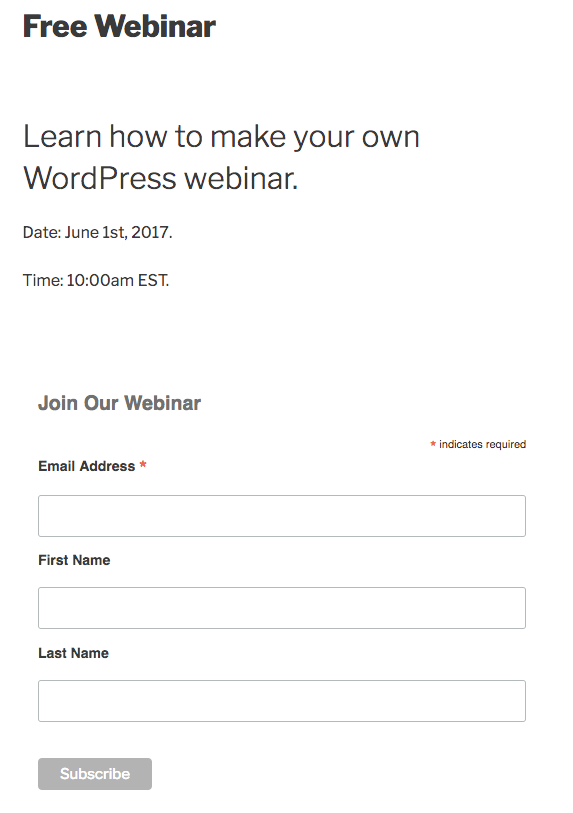
Click “Preview”.
You now have a signup page to capture your attendee details! Anytime somebody signs up you’ll get an email alert.
What Now?
Now that your webinar is ready, you want to make sure your webinar is as successful as possible. Here are some ideas you might want to try.
- Run a test webinar to help familiarize yourself with the YouTube live controls and make sure you don’t have any technical problems that could ruin your first live webinar.
- Make sure you have an interesting and useful presentation for your attendees. Audience participation is one of the most powerful aspects of a webinar, so don’t forget to include interactive elements in your presentation.
- Add a social media plugin such as Click to Tweet to promote and share your webinar.
- Create a replay page to allow attendees to come back and watch your recorded webinar at any time. YouTube Live automatically saves your webinar, so this is as simple as creating a new WordPress page and linking your saved video.
- It’s important to choose the right time and day to broadcast your webinar to ensure the maximum possible attendance. Here are some facts and figures from a study of 12,970 webinars held in 2015.
- Effective promotion of your webinar is key to having a successful webinar. While a large share of registrants signs up in the week leading up to the event, almost a quarter of registrants sign up more than two weeks before.
- Tuesday, Wednesday and Thursday are the best days for sending promotional emails as people will be more receptive. Weekends are the worst time, as people are not thinking about work.
- Wednesday and Thursday are the best days for holding your webinar, with Tuesday a close second. Friday, Saturday and Sunday draw the lowest audience.
- Scheduling a time for your webinar is difficult as participants may be located all over the world. The best performing webinars are scheduled to avoid lunchtime and commuting time for the majority of the participants.
- The average viewing time of a webinar is 57 minutes, so aim for a webinar that runs less than an hour.
- Having an on-demand webinar allows people who have other commitments or time constraints to attend your event. 33% of people watch the on-demand webinar but not the live one, so if you don’t have an on-demand option you could be missing out on a large part of your audience.
Webinars can be a great tool for connecting with potential customers, engaging with current customers, and growing your business. There are a number of great paid options to help you create a WordPress webinar. For those people with budget limitations, it’s relatively easy to set up your own free and fully functional webinar without needing any specific technical knowledge.