The sidebar is the area on your WordPress website where you can display widgets, such as links to recent posts, email newsletter sign up forms, or anything you like by using the free text widget.
While WordPress sidebars and widgets are very useful, there is a way to make them even more powerful. By creating custom sidebars that are displayed on the pages of your choice, rather than just having one sidebar that is displayed on every page on your site, you can ensure the content in your sidebar is always relevant to the content your readers are currently viewing.
If you’ve ever wanted to show different sidebar content and widgets, depending on which page your visitors are reading, then today’s plugin is just what you have been looking for.
Why Use Custom Sidebars?
Custom Sidebars is a free plugin which lets you easily create multiple sidebars on your site, and then decide which pages to display them on. These custom sidebars can then be displayed wherever your theme allows you to display widgets, whether that is the sidebar, footer, or elsewhere on your site.
Lots of sites display information about the website in the sidebar area. However, this information isn’t very useful when the visitor is currently viewing the ‘about us’ page. Instead of wasting the sidebar space, by using a custom sidebar, you could display your email newsletter sign up form or links to your best content instead.
Another use for custom sidebars could be to display links to other posts from the same category as the post the visitor is currently viewing. This makes the sidebar content highly relevant to what the visitor is reading, increasing the chances of them clicking through to more of your content.
You could even use this approach to display external links to related products or services, perhaps with an affiliate link, which will be of interest to readers based on the current post they are viewing.
How to Create Custom Sidebars in WordPress
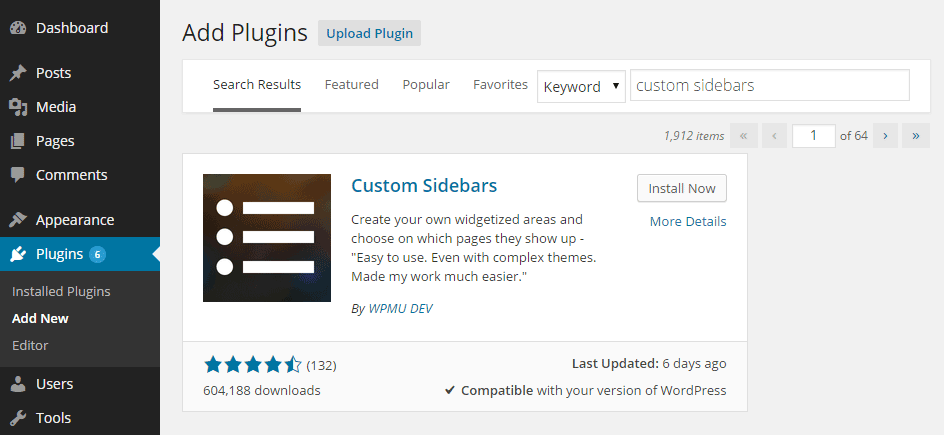
As the Custom Sidebars plugin is free to use, it can be installed on your site directly from the WordPress plugin directory
To do so, log into the admin area of your site (http://yoursite.com/wp-login.php) and then navigate to Plugins > Add New using the sidebar menu.
From the Add Plugins screen, enter ‘custom sidebars’ in the search field and then install the first item in the results.

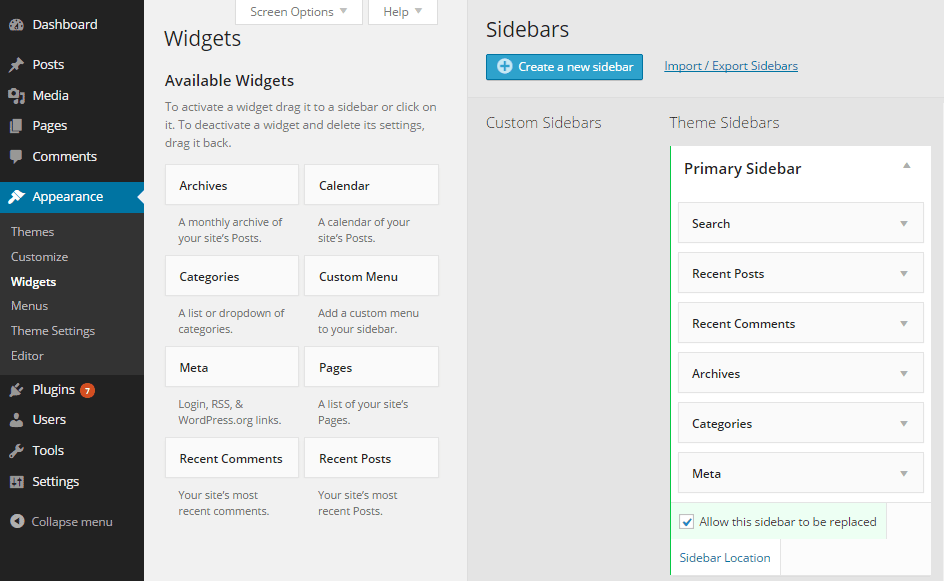
Once the plugin has been installed and activated, you can start creating new sidebars from the widgets page, which can be found under the Widgets item on the Appearance menu on the admin dashboard sidebar menu.

By clicking on the Create a new sidebar button, you can then enter the details of the widget area.

Once the sidebar is created, you can then drag and drop the available widgets into place and configure them as necessary.

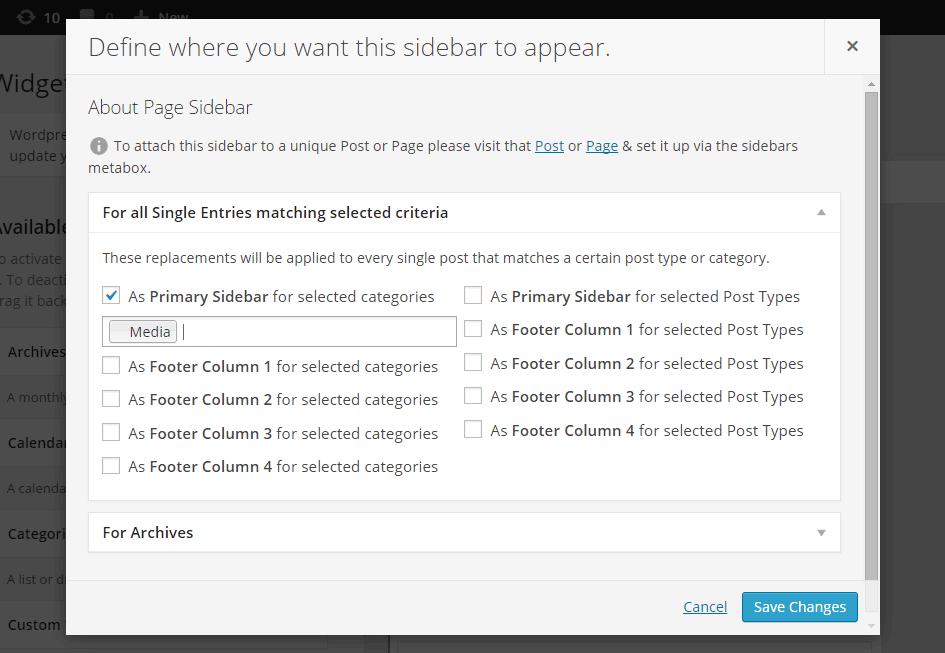
When it comes to defining when the custom sidebar will be displayed, you have a few options to choose to from:
- Display alongside all posts from a particular category
- Display with all posts of a certain type
- Display on archive pages, such as the front page or blog posts page
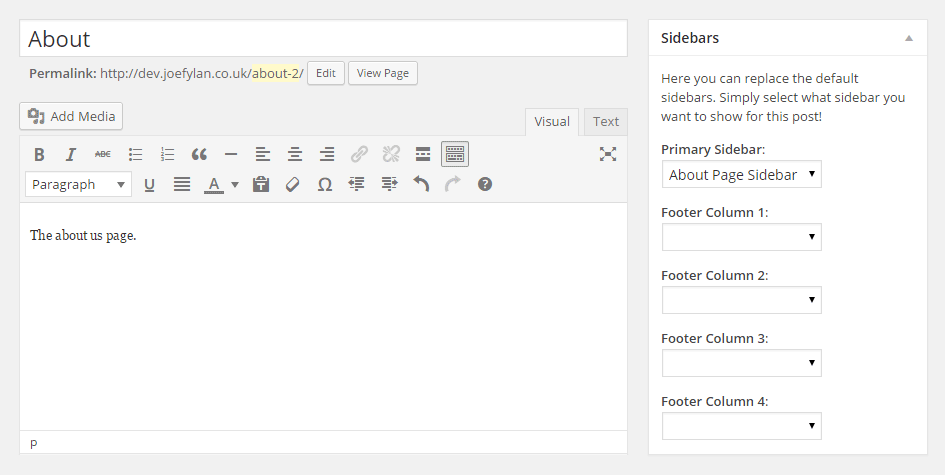
- Display on specific posts or pages
If you do want to display the sidebar alongside a specific post or page, this can be done from the options panel on the editor screen for that specific post or page.

If you’ve created multiple sidebars you can set them to be displayed in the all the available areas of your theme, including the footer or header locations.
Conclusion
Custom Sidebars is a relatively simple plugin to use, but it opens up a lot of possibilities for how you can use the widgets and the widget areas on your website.
If you have any questions about making the most of your sidebars and widget areas, or using this plugin, please leave a comment below.
