
If you want to make it as easy as possible to change the fonts on your WordPress website, and you’d also like access to a library of over 650 free fonts, then the Google Fonts service is just what you have been looking for.
In this post we will show you how to integrate the Google Fonts service with your WordPress website by using a free plugin that allows you to start changing which fonts are in use on your website.
Easy Google Fonts WordPress Plugin
Although there are a few plugins that integrate Google Fonts with WordPress, Easy Google Fonts is a great option as it allows you to get a live preview of how the different fonts will look on your website before you make your final decision.
Not only can you change the font face in use by the different types of text on your site, such as paragraphs and headings, but you can also change the size, color, and other attributes of the text, all through the WordPress Customizer.
In short, this plugin allows you to add Google Fonts to your theme without having to write a single line of code.
How to Use Easy Google Fonts on Your Website
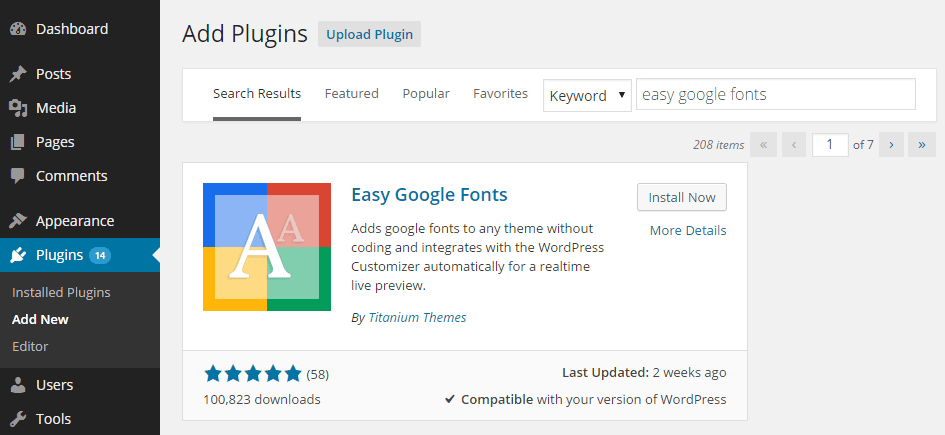
As the Easy Google Fonts plugin is free to use, it can be installed on your site directly from the WordPress plugin directory
To do so, log into your site’s admin area (http://yoursite.com/wp-login.php) and then navigate to Plugins > Add New using the sidebar menu.
From the Add Plugins screen, enter ‘easy google fonts’ in the search field and then install the first item in the results.
After installing and activating the plugin, you can begin changing which fonts are used on your website.
Customizing the Fonts
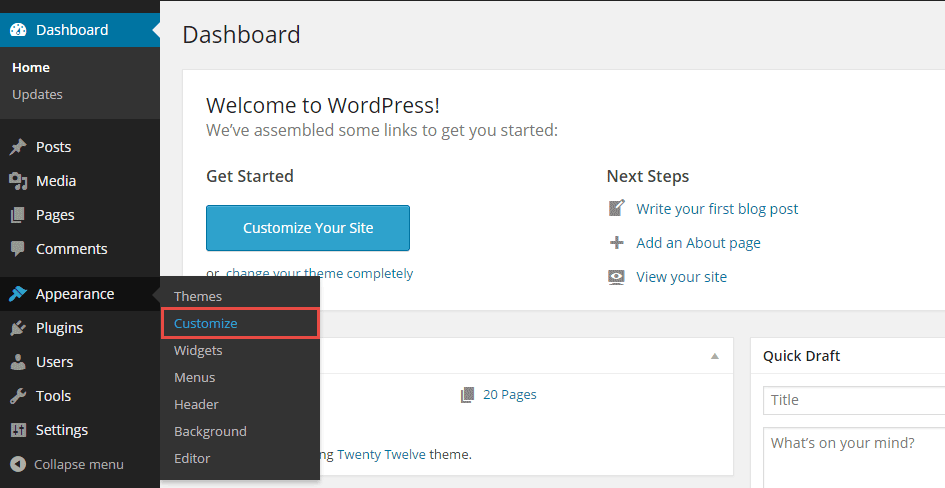
As the Easy Google Fonts plugin allows you to preview and change the different fonts in use on your website by using the WordPress Customizer tool, to start making changes, click on the Customize item on the Appearance menu on your site’s admin dashboard.
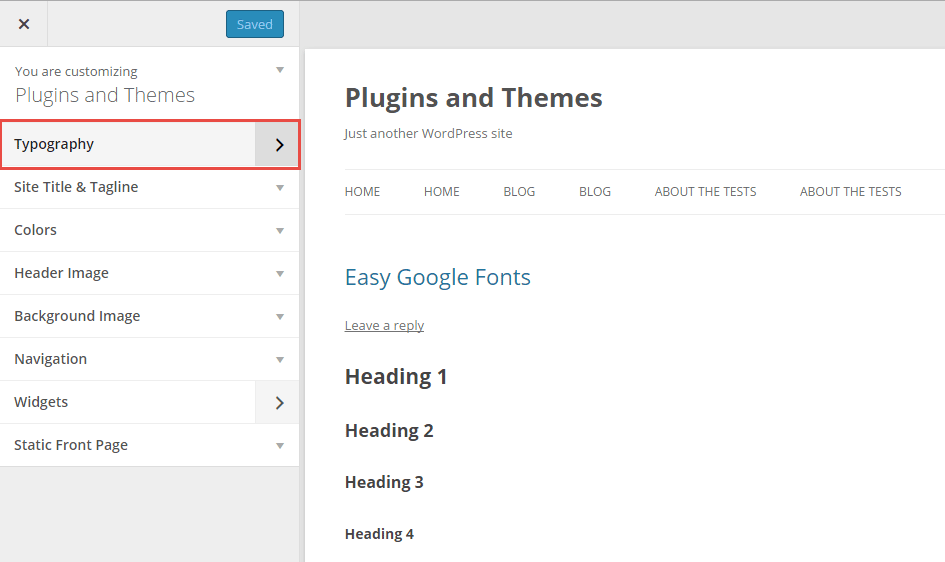
Once the plugin has been activated, it adds a new section of controls to the Customizer titled Typography. From here you can start trying out the different fonts available from Google, and customizing the ones that are in use on your website.
This is all done with a live preview that allows you to immediately see what effect your changes will have on your website. However, visitors to your website won’t see those changes until you hit the Save & Publish button.
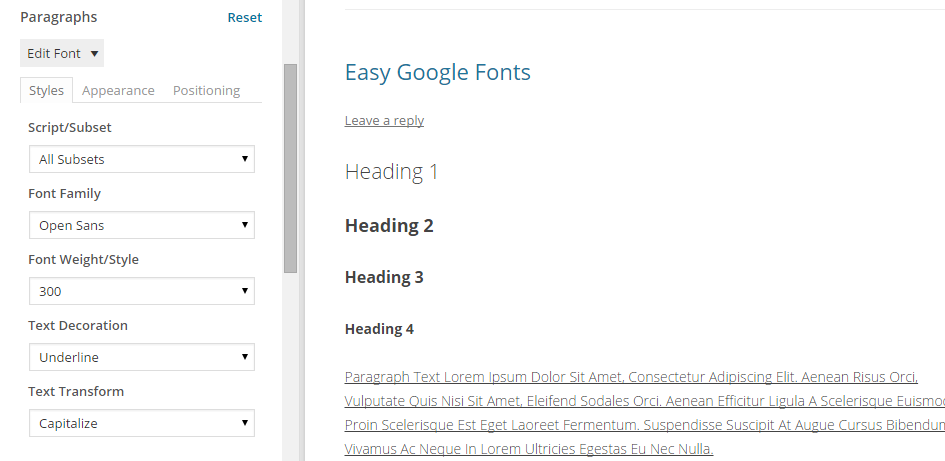
Easy Google Fonts gives you lots of controls for customizing how the text on your website looks. So to start changing the fonts, click on the style you would like to customize and then choose an option from the Font Family dropdown menu.
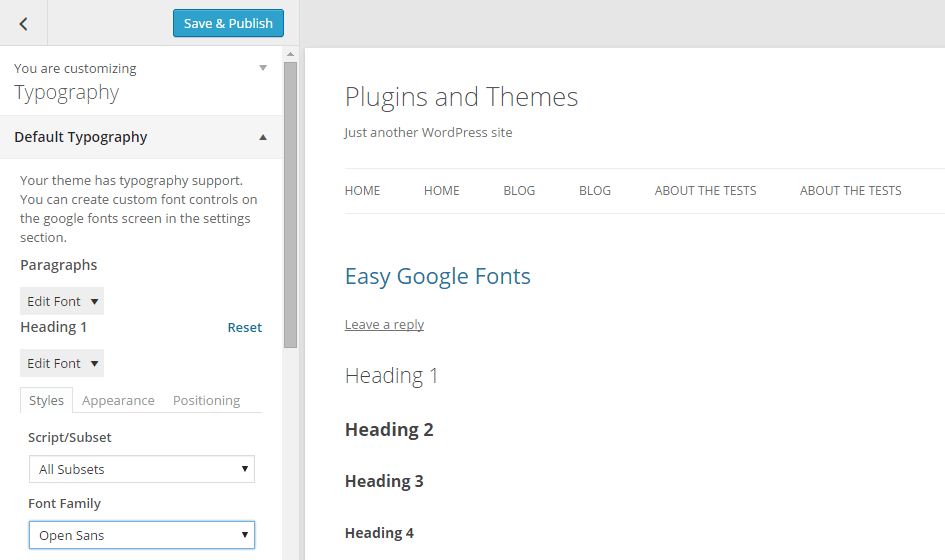
For example, if you wanted to change the font used for the paragraph text on your website, click on the Edit Font button under the Paragraphs section. From there you can then change the actual font from the Font Family dropdown menu; set the decoration, such as underlined; and change the case.
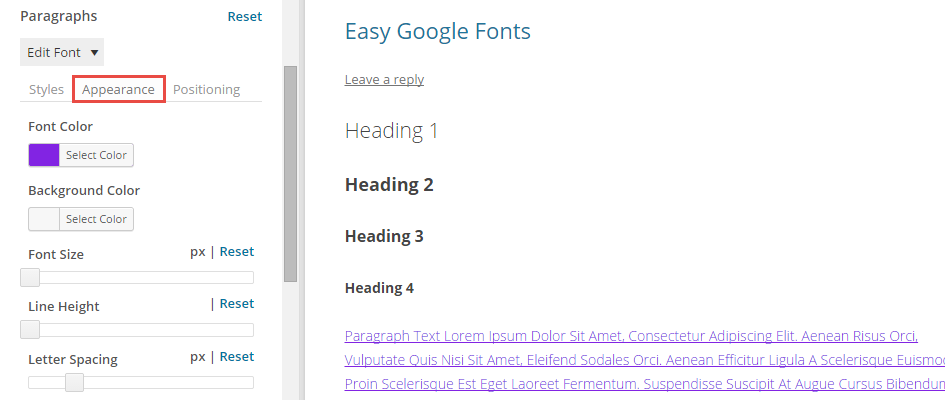
By clicking on the Appearance tab, you can also change the font color, text size, line height, and letter spacing. While the controls under the Positioning tab allow you to change the margins and padding.
You can reset the text customizations at any point by clicking on the reset link, and then when you are happy with how your text looks, click on the Save & Publish button to update your website.
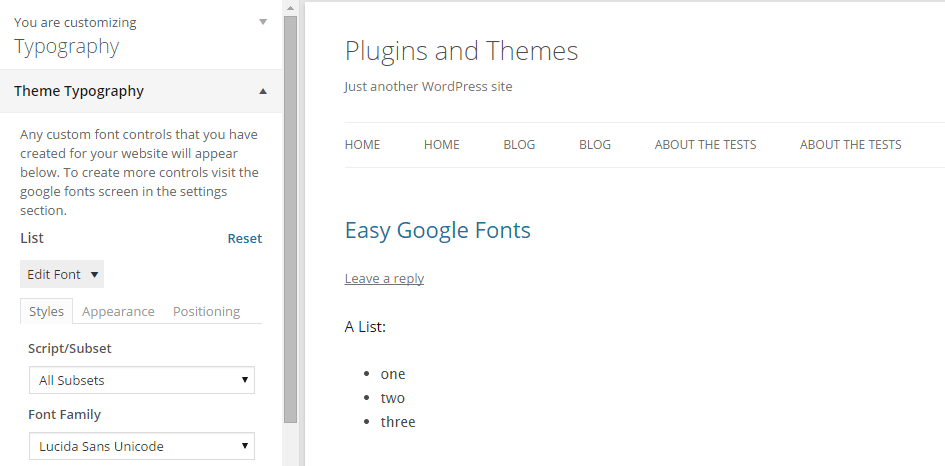
Creating Custom Font Controls
While the Easy Google Fonts plugin allows you to change the appearance of the paragraph and heading styles through the Customizer, you might want to change other styles on your website.
This could include block quotes, lists, and other styles that are used by WordPress or the theme you have installed.
Easy Google Fonts does allow you to customize these styles, however you do have to enable the controls yourself. To do so, click on the Google Fonts item from the Settings menu on your site’s admin dashboard.
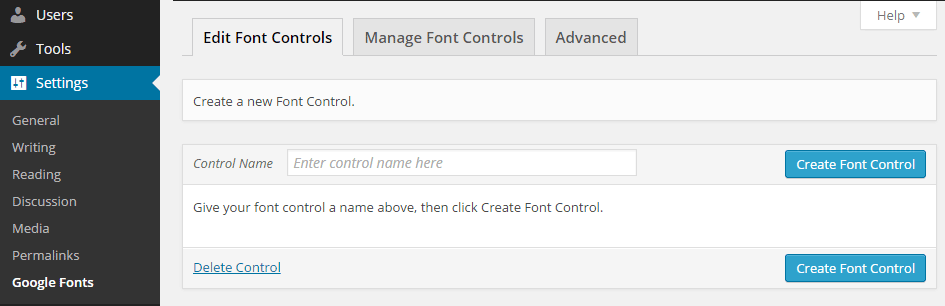
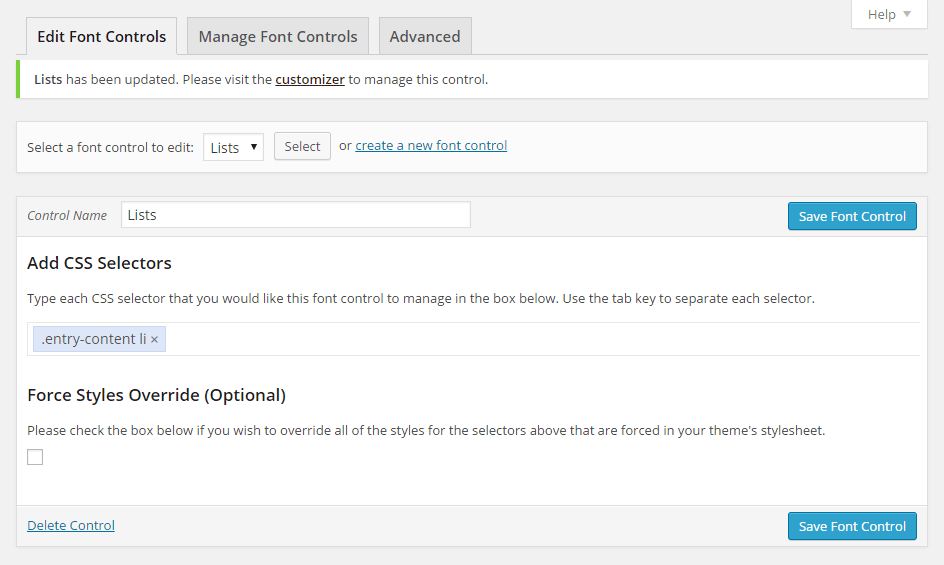
From the Font Controls screen you can then create a new control for the style you want to customize on your site.
For example, if you want to change the font for the lists in your posts, you could create a new style called Lists, and then add the relevant CSS selectors you would like to customize, which in this case would be .entry-content li.
Then once you have saved your new custom control, there will be a new section on the Customizer titled Theme Typography which should display the custom controls you just created.
So while Easy Google Fonts makes it very easy to customize the standard text styles, it also allows you to add the custom controls you need to change any of the text styles in use on your website.
Conclusion
Easy Google Fonts is a really easy to use plugin that not only allows you to choose from a list of over 650 free fonts, but also gives a live preview while you are making the changes to the text on your website.
If you have any questions about this plugin or using Google Fonts on your website, then please leave a comment below.
One of the neatest and well thought out plugjns when it comes to adding fonts to the customizer – I tried it out and unfortuntely was a no go for one basic reason – while it is great that it takes advantage of the live customizer preview, you have to physically select each font in the drop down before seeing what it looks like in the customiser window which can be time consuming when there are hundreds of fonts to browse through. I went with font customizer by themesandco because it live previews as you hover the fonts in the select list – much faster. If this plugin did that I would prefer it by far – much more nicely thought out interface. Is this something that could be added?