We all know that the key to a successful website is quality content, right?
This is, of course, true, but many bloggers are missing the point about what quality content really is.
We all know that blog posts should be informative and engaging, but that’s not the complete picture.
These days, badly formatted, poorly organized content just won’t cut it. The way you present your content is almost as important as the content itself. This is especially true for long-form content, which requires more of a time commitment to read in its entirety.
In one of my previous posts, I’ve already offered up one solution: content tabs.
Today, I want to give you a different option: tables of content.
Fortunately, it’s really easy to add tables of content in WordPress, thanks to the awesome free plugin, Table of Contents Plus. Today, I’m going to show you how to use it.
Getting Started
Before we can add table of contents to our posts, we need to install the plugin.
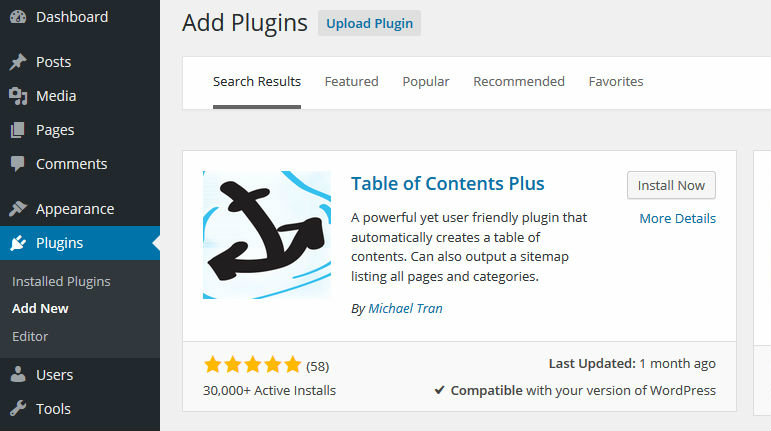
Navigate to Plugins > Add New > search for ‘Table of Contents Plus’. When you’ve found the right plugin (see screenshot below), click Install Now > Activate Plugin.
Configuring the Plugin
Because the plugin creates tables of content (ToC) automatically, it’s important we configure the correct settings first. This is done by heading to Settings > TOC+.
Fortunately, the plugin is super-easy to configure. Each field is relatively intuitive, so I’ll focus only on the main settings.
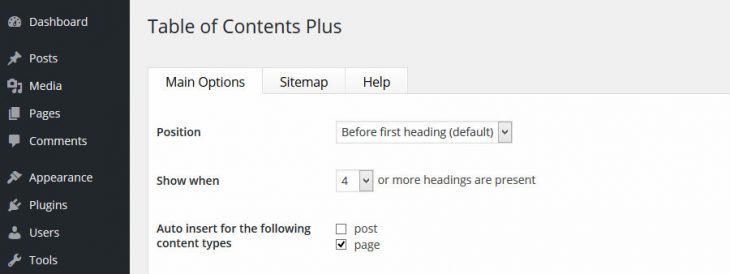
Start by choosing where your ToC will appear relative to your content. The default setting is my favorite, Before first heading. This allows you to write an introduction before your ToC is displayed, with the ToC positioned directly above your first header tag. You might also decide to use one of the other three settings, After first heading, top of page, or bottom of page.
The plugin also asks you to specify how many headings must be present for a ToC to display. This is particularly useful as ToCs can look quite silly on shorter posts, and work best with long-form content. With this in mind, consider how many headings — HTML header tags: H1, H2, H3, etc. — you want before a ToC is needed, and configure the plugin accordingly.
Just below, you can also select whether ToCs will automatically display on posts and/or pages.
Scrolling further down the screen, you’ll see an Appearance section. As the name implies, this is where you can customize what your ToC looks like. You can specify the width, height, font size, and color scheme used. The plugin supports five simple color pre-sets, as well as a custom option — the custom option lets you control all elements of the ToC design, with a choice of infinite colors.

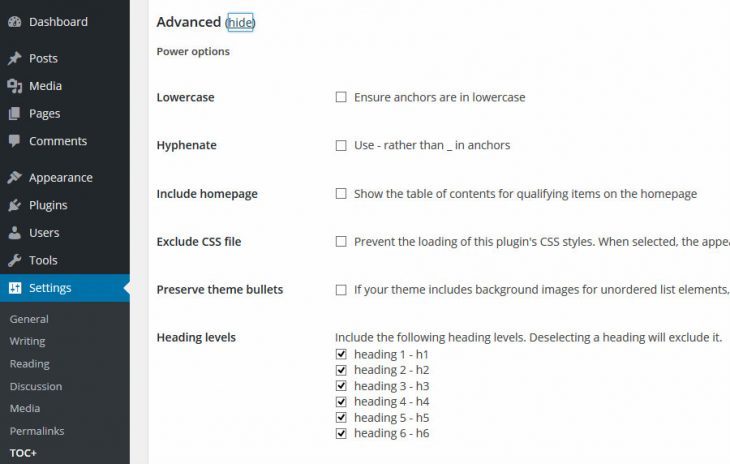
There is also an Advanced section, which you can access by clicking the show button.
Here you can select which heading tags you want to include/exclude from the ToC. For example, you might want to only display your top level headings, H2, and ignore the rest. Others might prefer a hierarchical ToC, and include every header tag — it’s your decision!
When you’ve done configuring your settings, don’t forget to hit the Update Options button.
Adding Table of Contents
That’s all there is to it — when a post/page ‘qualifies’ for a ToC based on your settings, the plugin adds one automatically.
In my settings I specified at least four headings were needed to trigger a ToC, and (conveniently) this post uses five headings. That means that as soon as I hit the Publish button, visitors will be able to see a ToC with no extra work on my part.
Here’s the proof:
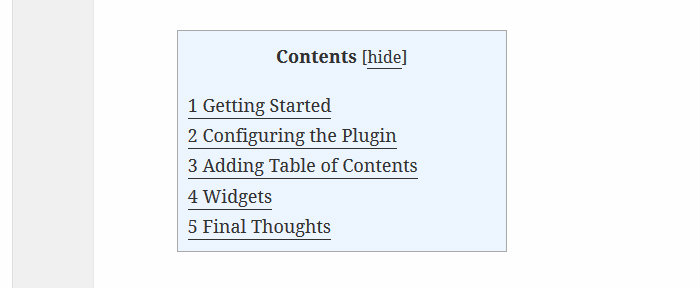
Now, when visitors click on one of the ‘chapters,’ they’ll be taken straight to that part of the post — awesome, huh?
Widgets
Table of Contents Plus also includes a dedicated widget which you can add to your sidebar.
This is done by navigating to Appearance > Widgets. From here, you can use the drag-and-drop interface to place the TOC+ widget into the relevant widget area.
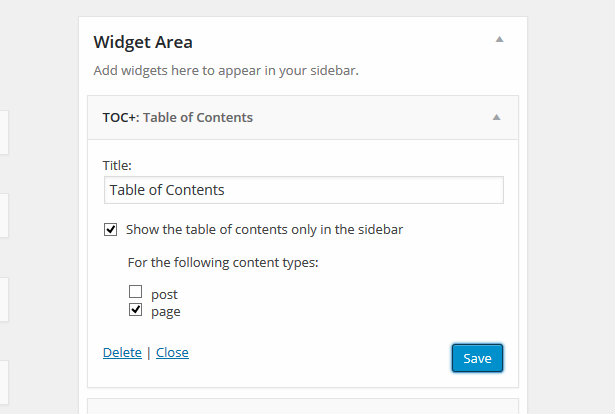
Want to see a ToC widget in action?

As you can see, the design options are far more limited, but the plugin still produces a stylish result.
Final Thoughts
So there you have it: a short tutorial showing you how to add ToCs to your WordPress content.
The Table of Contents Plus plugin is really easy to use and creates simple simple-yet-stylish ToCs. More importantly, however, they’re fully functional, and this makes it easier for your visitors to navigate and enjoy your content.
Remember: if you publish long-form content, a wall of text can intimidate readers. ToCs break your content up, allowing visitors to dip in and out as they please, and this is proven to boost your blog’s engagement levels.
Have you used Table of Contents Plus? Share your experiences in the comments section below!
