
WordPress’ default post types are useful for creating blog posts, pages, attachments, and other standard elements of your website. However, if you’re looking to facilitate streamlined and efficient content creation for your business site, you may find the default post types somewhat restrictive.
This is where WordPress custom post types come into play. You can use them to generate specific kinds of content that will better suit the needs of your company — such as product descriptions, testimonials, portfolios, and so on. What’s more, they are relatively easy for you or your staff to create and manage.
In this article, we’ll take a closer look at exactly what a WordPress custom post type is. After that, we’ll discuss how you can implement this feature on your website for maximum effect.
What Custom Post Types Are (And How to Benefit From Them)
A WordPress post is an individual piece of content that you create through the dashboard. When you navigate to Posts > Add New, you will be presented with a specific interface for creating a blog post, which includes options for adding text and media, publishing the post, and more.
Custom post types might be more accurately called custom content types, as they aren’t just for blogs. Either way, the term refers to any post type that is not included in WordPress by default. This means you can create more specific kinds of content, using the same WordPress editor.
For example, if you added a custom post type for products, you could go to Products > Add New in the dashboard and access an editor with custom fields for adding prices, shipping times, and product images:

Custom post types can, therefore, make your website more efficient and easier to manage. By assigning your various departments post types with custom fields to fill in, you’ll save them time, eliminate guesswork, and improve task organization.
What’s more, custom post types can make the structure of your site more conducive to conversions. For example, you could use them to display testimonials or product profiles on your home page. Since potential customers will often view your home page first, employing custom post types to showcase your latest offerings or most glowing testimonials is a smart way to increase the likelihood of conversions.
Now that we’ve established the benefits of WordPress custom post types, let’s talk about how you can add them to your WordPress site. Fortunately, the process is quick, simple, and cost-effective.
How to Create a WordPress Custom Post Type Using a Plugin (In 3 Steps)
There are two main ways to add custom post types in WordPress. The method you employ will depend on the needs of your organization. If you need to roll out custom post types for your teams to start working on quickly, a plugin is your best bet. However, if you want a solution tailored to the more specific needs of your business, the manual approach may be a better fit. Let’s start by discussing the plugin method.
Step 1: Choose a Dedicated Plugin
There are lots of WordPress custom post type plugins to choose from. Most present a hassle-free way to configure meta boxes, user-defined fields, and other key components of your post types. Since they are user-friendly and require no coding, these plugins are excellent time savers that can be readily rolled out to your development team.
Custom Post Type Maker, for example, is both lightweight and feature-rich:

It comes with an intuitive interface you can use to create fields, adjust visibility settings, and more. This plugin is compatible with virtually any WordPress theme, and even lets you add your own dashboard icon for your custom post types.
In addition to letting you create new content types, Pods lets you extend existing ones:
The latter option is particularly useful if you want to add new functionality to a custom post type added by another plugin (for instance, a WooCommerce product). This plugin also offers migration capabilities, so you can easily transfer over custom post types you’ve already created.
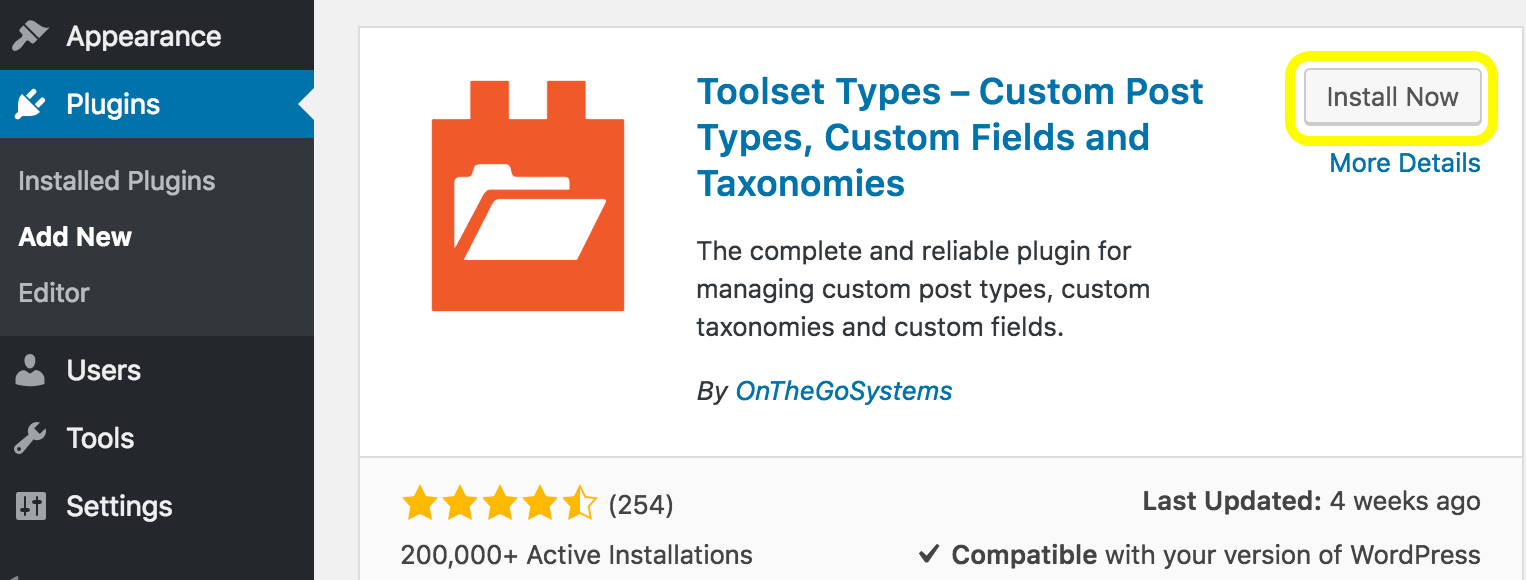
Finally, there’s Toolset Types:

This well-supported plugin delivers an array of options for creating and styling custom post types. You can customize each post type’s permalink, configure whether or not they appear in searches, and more. Toolset Types also enables you to define the relationships between your custom post types. This lets you enhance the organization and navigability of your site, both of which are integral components of its conversion funnel).
Step 2: Install the Plugin and Configure Your Custom Post Type
Now that we’ve covered some of the best plugins available for the task, let’s walk through how to actually create a WordPress custom post type. We’ll use the Toolset Types plugin to demonstrate the process, as it is simple to use while offering a lot of handy features.
First, navigate to Plugins > Add New in your WordPress dashboard, and search for Toolset Types. When you find the right plugin, you can install and activate it:
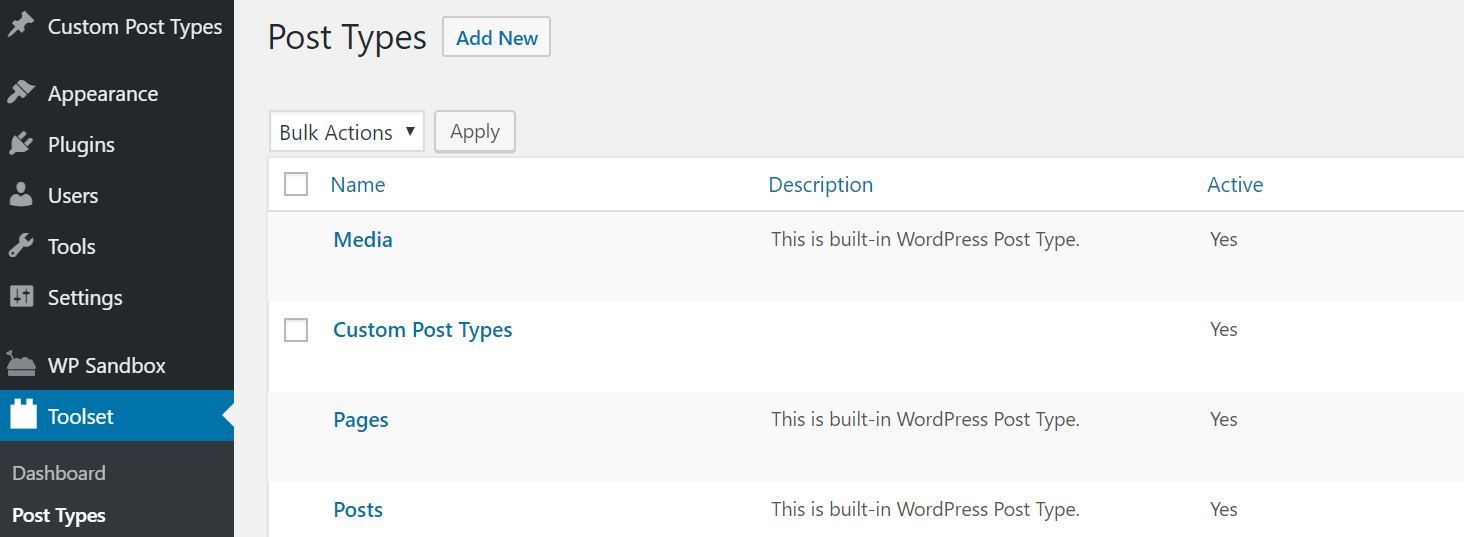
After that, you should see a new Toolset tab in your dashboard. Navigate to Toolset > Post Types, and then select Add New:
Now, you will be directed to a page called Edit Post Type. Here you can enter the post type’s URL slug and name (both for singular and plural usage), assign an icon to it, and configure how it looks on your site:
![]()
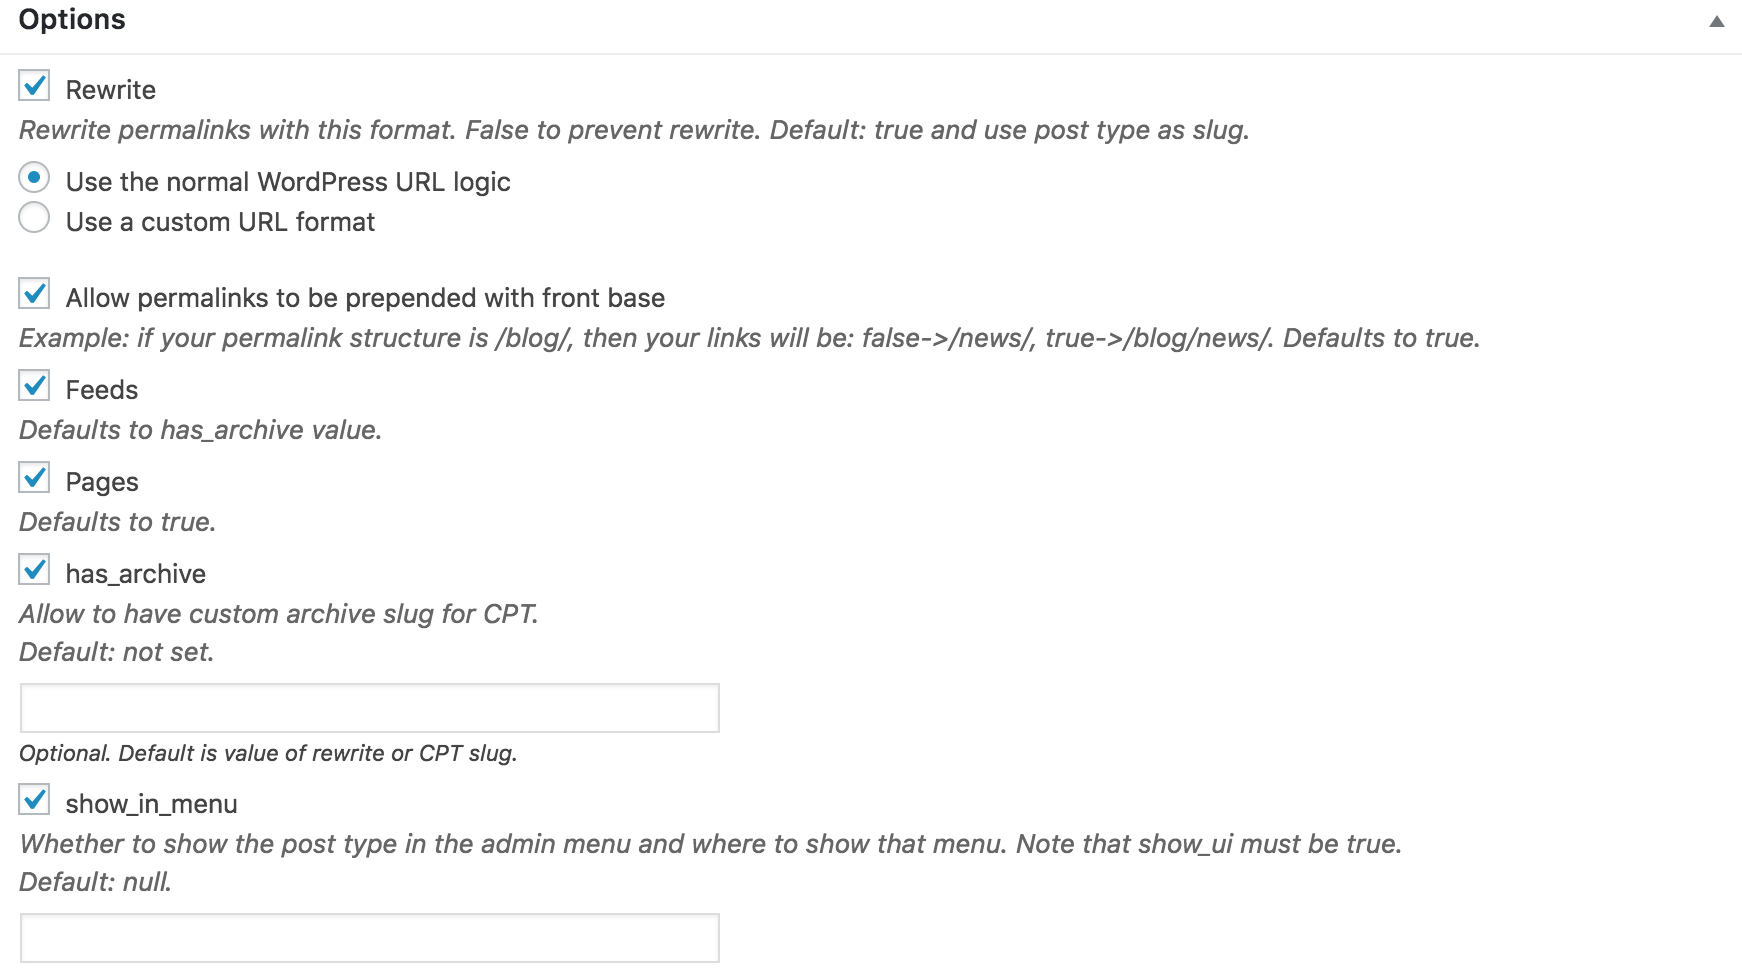
You can also assign attributes to your post type in the Options drop-down menu. These include its permalink and visibility settings:
Finally, you can establish hierarchies and connections between the custom posts you have created in the Post Relationships (Parent/Child Panel) menu:
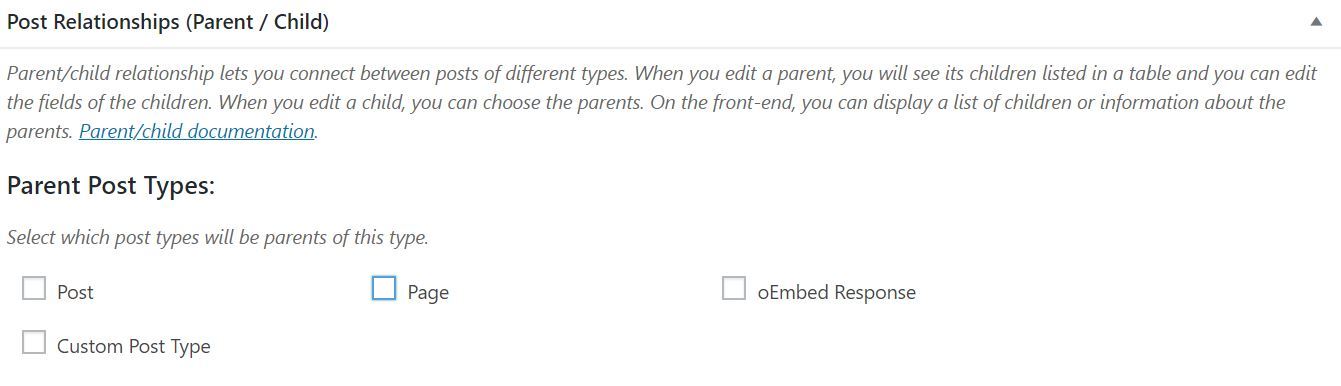
If you want to do this, Toolset Types offers a comprehensive guide about how to set parent and child post types for your website.
Step 3: Create Custom Fields and Taxonomies
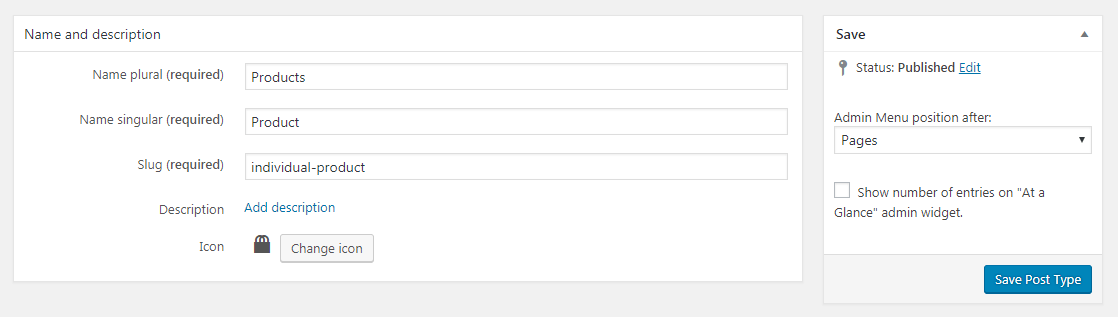
When you’re happy with how your custom post type is configured, you can publish it. First, decide where you want it to appear on your dashboard in the Save menu at the top of the page. Then select Save Post Type:
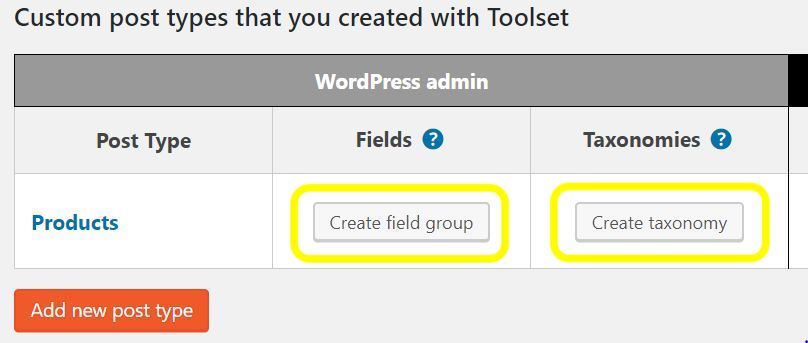
We haven’t yet mentioned how to create custom fields or taxonomies (in other words, how to add new fields and organization to your custom post type). To do that, navigate to Toolset > Dashboard. From there, you can create custom fields and taxonomies, by selecting those options for the post type you just created:
That’s it! Using the many options offered by Toolset Types, you can give your development team the means to crank out custom content quickly and efficiently. Toolset Types also offers some handy user guides to help you configure post types to meet your exact needs.
How to Create WordPress Custom Post Types Manually
There’s no question that using plugins is the quickest way to create custom post types. However, if the plugin you’ve used is ever uninstalled (or becomes inactive), all the post types you’ve made will disappear. Plus, the data they contain will become difficult to access from the admin area.
By creating your custom post types by hand, you’ll be able to make them more permanent. Plus, you won’t need to add an extra plugin to your site. Therefore, if you’re considering using custom post types extensively, it’s worth taking a look at the manual approach.
By having members of your development team manually create post types, you can also style them in ways that plugins often don’t permit. For example, if you want your custom post types to integrate maps, micro interactions, or other features that are not included in plugins, putting your top coders on the task can help you create content types that are much more useful.
The manual method of creating custom post types is a more technical process. What’s more, its complexity depends on how many custom fields and other elements you want to include. You’ll need to edit the code in your site’s functions.php file, which will register the new post type and add various ‘arguments’ (the options for what the post type will display). Fortunately, there are numerous online guides detailing the correct way to create custom post types using code.
Conclusion
As we have seen, custom post types present an excellent way to streamline content production. If used efficiently, they can also play a role in your conversion funnel, as you can use them to better convey important information (such as through testimonials and product descriptions).
Let’s recap the two ways you can add a WordPress custom post type to your website:
- Use a plugin such as Toolset Types. This will enable you and your team to create custom post types rapidly.
- Create your custom post types manually. This is more challenging, but results in secure and flexible content templates.
Do you have any questions about creating and using custom post types? Let us know in the comments section!