



One of the most important aspects of a WordPress website migration is ensuring that all of the SEO work you’ve implemented on your existing website is successfully transferred to your new one. A properly executed SEO migration helps preserve your search engine rankings and overall organic search performance. On the other hand, a poorly planned and executed migration can lead to broken links, missing keywords in SEO titles and website content, slower page speeds, and a decline in search visibility.
Here are some practical WordPress migration tips to help you move your website while keeping your SEO performance intact.
1. Identify all the existing webpages on the current website
Before migrating your website, create a complete list of all the web pages on your current site and store them in a spreadsheet. This will help you set up redirects during the migration process, which we’ll discuss in a later section.
There are two simple ways to identify all the pages on your website.
The first method is to use Screaming Frog, a popular SEO crawling tool. Simply enter your domain name, and Screaming Frog will crawl your website and generate a list of all your URLs. The free version allows you to crawl up to 500 URLs. If your website has more than 500 pages, you’ll need to purchase a license.
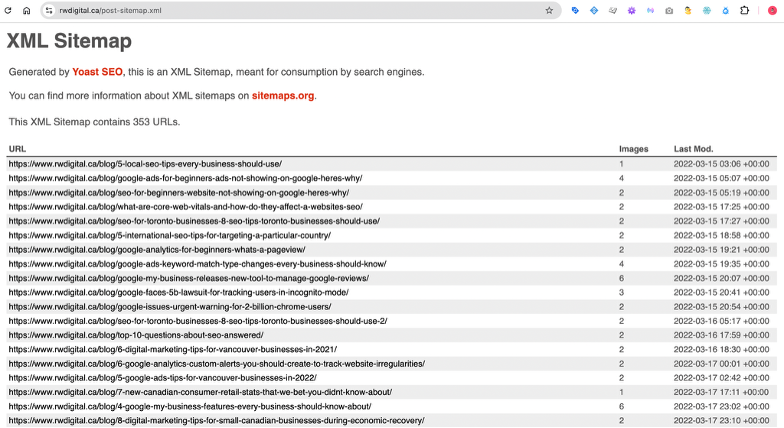
Another option is to access your website’s XML sitemap. If you’re using an SEO plugin such as Yoast SEO or Rank Math, your XML sitemap is usually generated automatically.
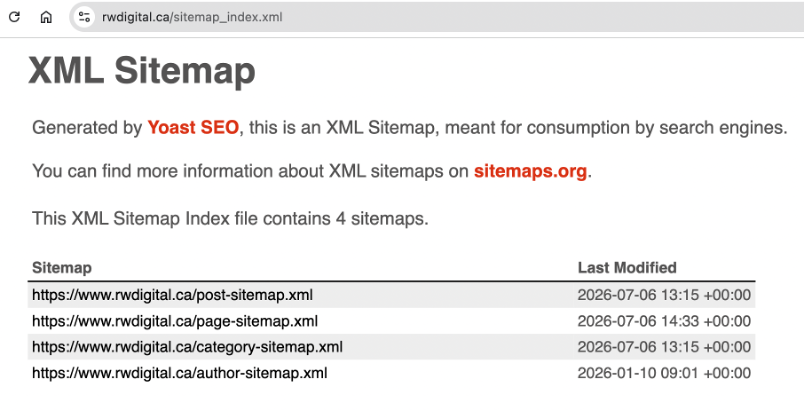
An XML sitemap is essentially a directory of all the pages on your website. You can usually find it by visiting one of these URLs:
domain.com/sitemap.xmldomain.com/sitemap_index.xml
For example, you can view RW Digital’s XML sitemap at: https://www.rwdigital.ca/sitemap_index.xml
From there, you can manually copy the URLs into a spreadsheet or use an AI tool such as Claude or ChatGPT to extract all the URLs from the sitemap and organize them into a spreadsheet.
2. Identify Existing Redirects
If you’ve migrated your website before, there’s a good chance you’ve already set up redirects from older versions of your website.
Compile a list of all URLs from previous versions of your website that currently redirect to your existing website. These redirects should also be accounted for during your new migration to ensure visitors and search engines continue reaching the correct pages.
3. Setup 301 Redirects From Webpages From the Previous Website(s) to their Respective Webpages on the Next Website
Once you’ve compiled all the URLs from both your current website and any previous versions, create a spreadsheet with two columns:
- Old URL
- New URL
Match each old URL with its corresponding new URL.
For example, if your old SEO services page was located at /seo/ and the new page is located at
/seo-services/, your redirect should point /seo/ to /seo-services/.
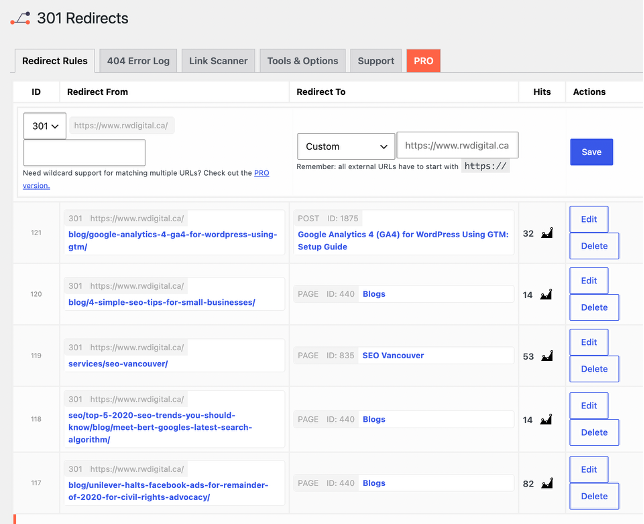
After creating your spreadsheet, install a WordPress redirect plugin such as 301 Redirects and import or manually configure your redirects.
This is one of the most important SEO tasks during a website migration because it ensures that the SEO authority and rankings built by your previous URLs are passed to their new counterparts, helping minimize any negative impact on your search performance.
4. Make Sure the Noindex Meta Tag Is Removed
We’ve seen this mistake happen many times. When a website is developed in a staging or testing environment, it’s common to add a noindex meta tag to prevent search engines from indexing the development site. Unfortunately, this setting is sometimes carried over to the live website after migration.
If this happens, your new website may not appear in Google, Bing, or other search engines.
While it’s still unclear how a noindex tag affects AI visibility, it’s reasonable to assume that pages blocked from search engines are also less likely to appear in AI-generated search experiences.
After launching your new website, verify that the noindex tag has been removed from any pages you want indexed.
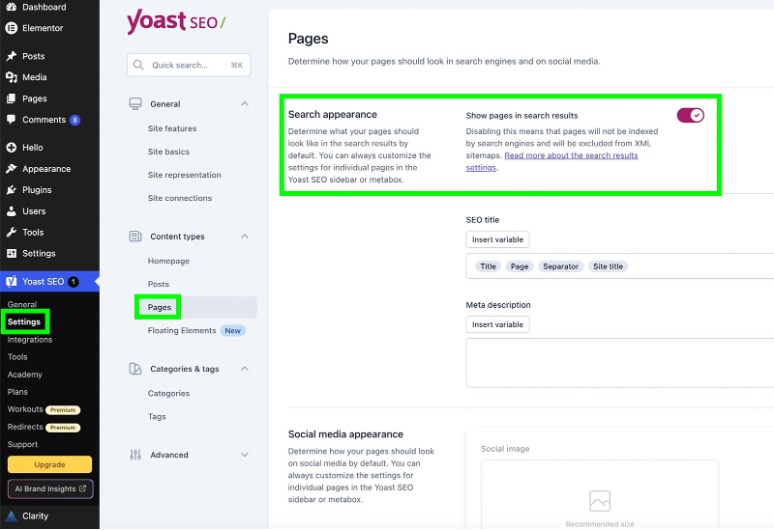
If you’re using an SEO plugin such as Yoast SEO or Rank Math, review your SEO settings to ensure that pages and posts are set to index rather than noindex.
If there are specific pages you don’t want search engines to index, you can leave the noindex setting enabled for those individual pages.
5. Submit XML Sitemap to Google Search Console and Bing Webmaster Tools
Google Search Console and Bing Webmaster Tools are free tools provided by Google and Microsoft that allow you to monitor, maintain, and troubleshoot your website’s visibility in search results. Both platforms are also beginning to include AI-related search insights and reporting.
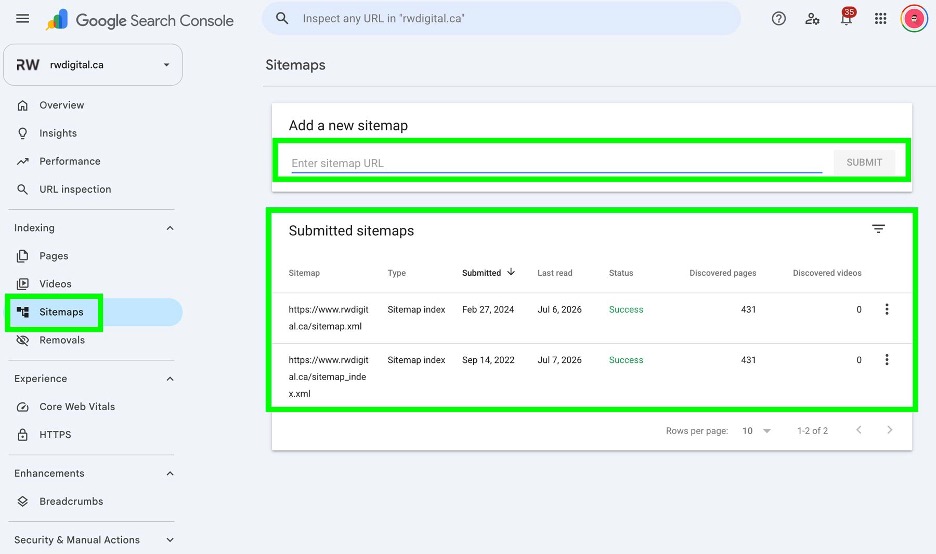
One of their key features is the ability to submit your XML sitemap. This helps Google and Bing discover and crawl your pages more efficiently.
After your website migration is complete, submit your updated XML sitemap to both Google Search Console and Bing Webmaster Tools so that Googlebot and Bingbot can crawl and index your new website as quickly as possible.
6. Use a Dedicated WordPress Website Hosting
Website page speed plays a significant role in both user experience and SEO. Faster websites are easier for search engine crawlers to crawl and index, and the same is true for AI crawlers.
If you want to improve your search rankings, enhance your AI visibility, and provide a better experience for your visitors, invest in fast, dedicated WordPress hosting such as Pagely.
A WordPress website migration doesn’t have to result in lost traffic or lower search rankings. With proper planning, thorough testing, and the right SEO migration strategy, you can move your website while preserving the visibility and authority you’ve worked hard to build.
Before launching your new website, take the time to verify your redirects, review your indexing settings, submit your XML sitemap, and test your site’s performance. These small but important steps can help minimize SEO risks and ensure search engines and AI-powered search platforms continue to find and understand your content.
RW Digital is a Vancouver-based digital agency specializing in Google Analytics 4, Google Tag Manager, SEO, and Google Ads. The agency works closely with mid- to large-sized organizations in industries such as legal, real estate, government, higher education, automotive, self storage, hospitality, and non-profit.