If you are starting a food blog, or you just want to share the occasional recipe with your readers, then installing a plugin that stylishly formats your recipe posts is a great idea.
By installing a plugin built for this purpose, you can not only simplify the process of adding recipes to your website, but also increase the chances of people finding their way to your content.
Recipe Card is one such plugin and it’s a free option that adds a recipe template to your WordPress website. As well as giving you lots of options for how your recipes are presented — thanks to the inclusion of a selection of professional looking recipe themes — the plugin also ensures your recipe content is fully optimized for inclusion in the Google Recipe View search engine.
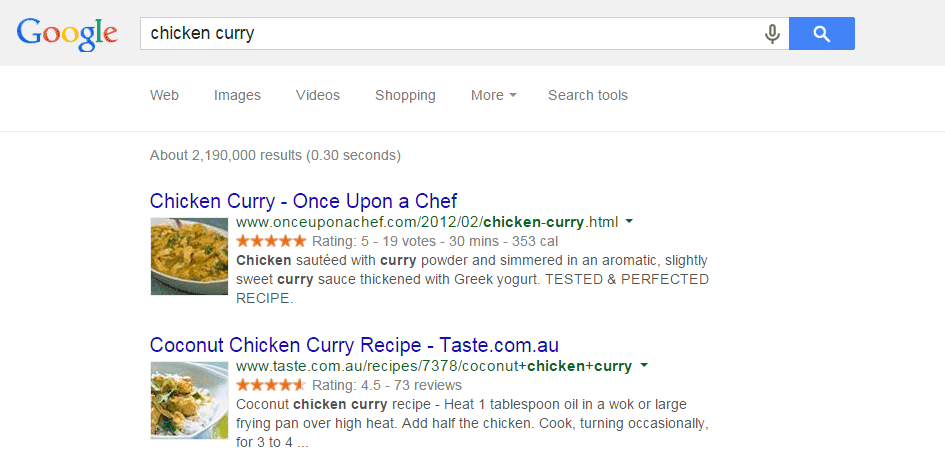
By adding the necessary code to make your recipes schema.org compliant, your content will not only be included in the recipe search engines, but searchers will be able to quick see additional information about your dishes from the search engine results pages.
So if you like the idea of using a template to publish recipes on your website in a consistent and reader-friendly way, complete with save and print buttons, then the Recipe Card plugin is a great choice.
How to Use the Recipe Card Plugin on Your Website
As the Recipe Card plugin is free to use, it can be installed on your site directly from the WordPress plugin directory
To do so, log into your site’s admin area (http://yoursite.com/wp-login.php) and then navigate to Plugins > Add New using the sidebar menu.
From the Add Plugins screen, enter ‘Recipe Card’ in the search field and then install the first item listed in the results.
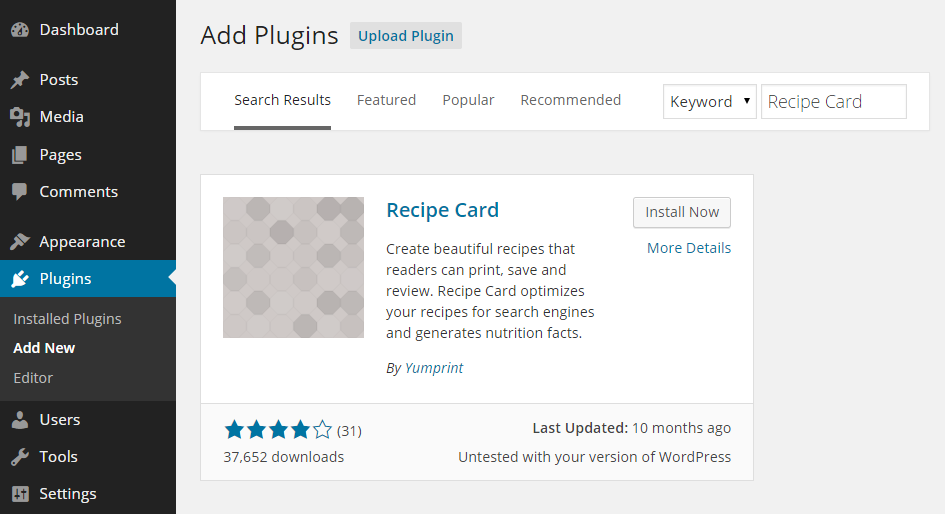
Once the plugin has been installed and activated the settings can be accessed from the newly added sidebar menu item.
Setting Up the Recipe Card Plugin
From the settings page the for Recipe Card plugin you can choose a theme for your recipes that is used to set their appearance. There is a great selection of available options on offer for customizing the appearance of your recipes.
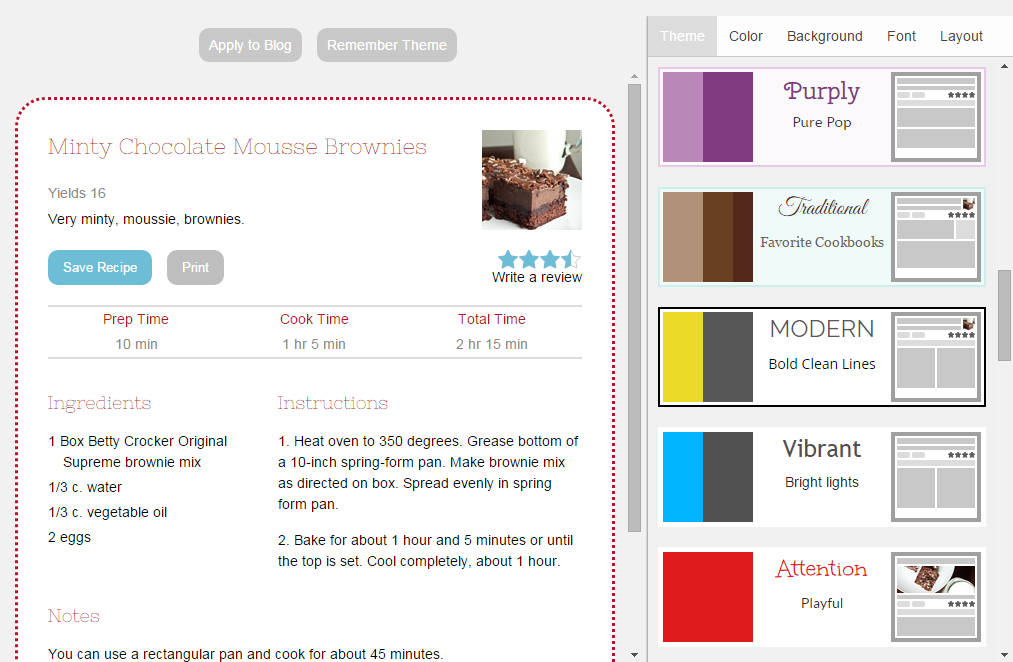
As well as choosing the overall theme for your recipes, you can also modify them by changing their colors, fonts, and layout arrangement. Once you are happy with your theme you can get started and publish your first recipe.
Publishing Your First Recipe
To add the first nicely formatted recipe to your WordPress blog, create a new post and then click on the Recipe Card button which the plugin has now added to the editor controls.

After you’ve pressed the button, the form is displayed which allows you to input the details of the recipe. This includes the title, author, ingredients list, directions, and all the other information you would expect to see on a professional food blog.
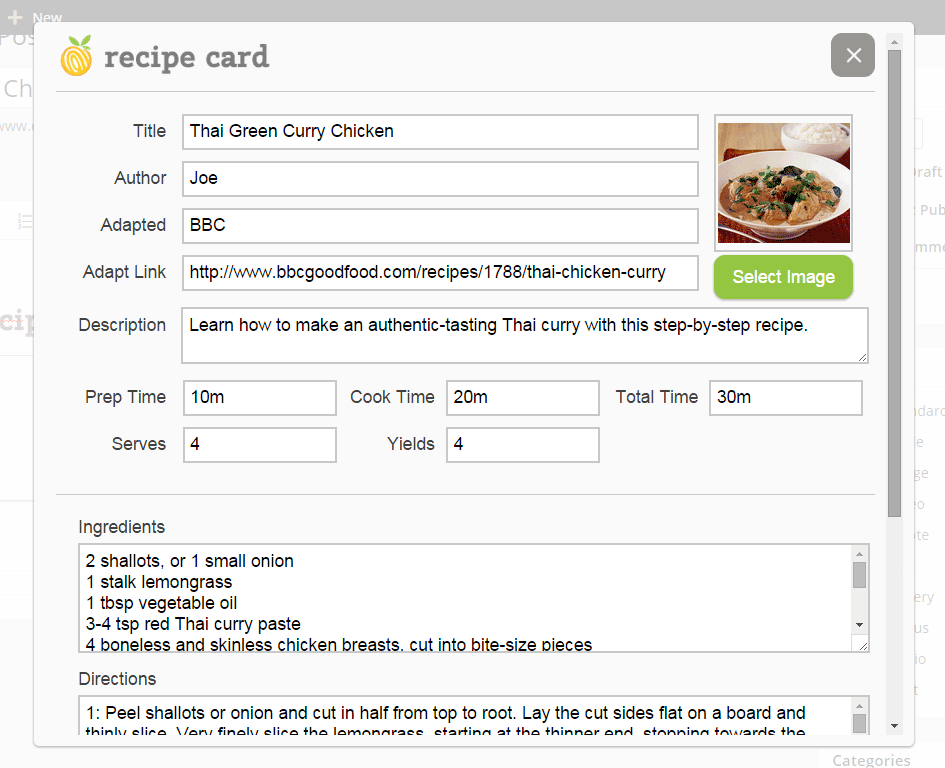
Once you’ve entered all the necessary information, you can save the form to add the recipe to your post. You can also add additional content to your recipe post by clicking on the insert line buttons on the recipe card.
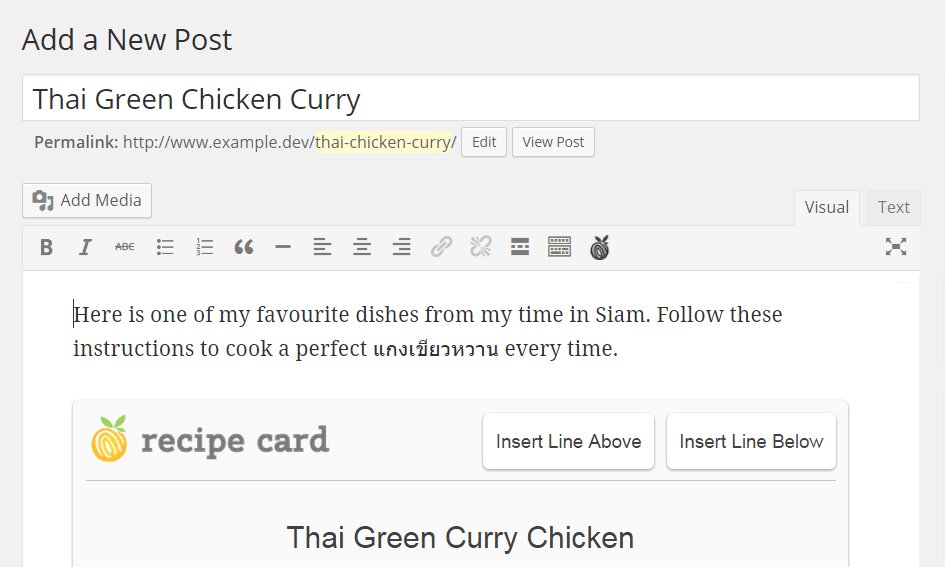
Clicking the Preview buttons displays your post as your visitors would see, complete with the recipe you just added. If you need to make any changes, simply switch back to the post editor and click on the edit button.
When your recipe is ready to go live, simply press the publish button as usual for it to be added to your blog.
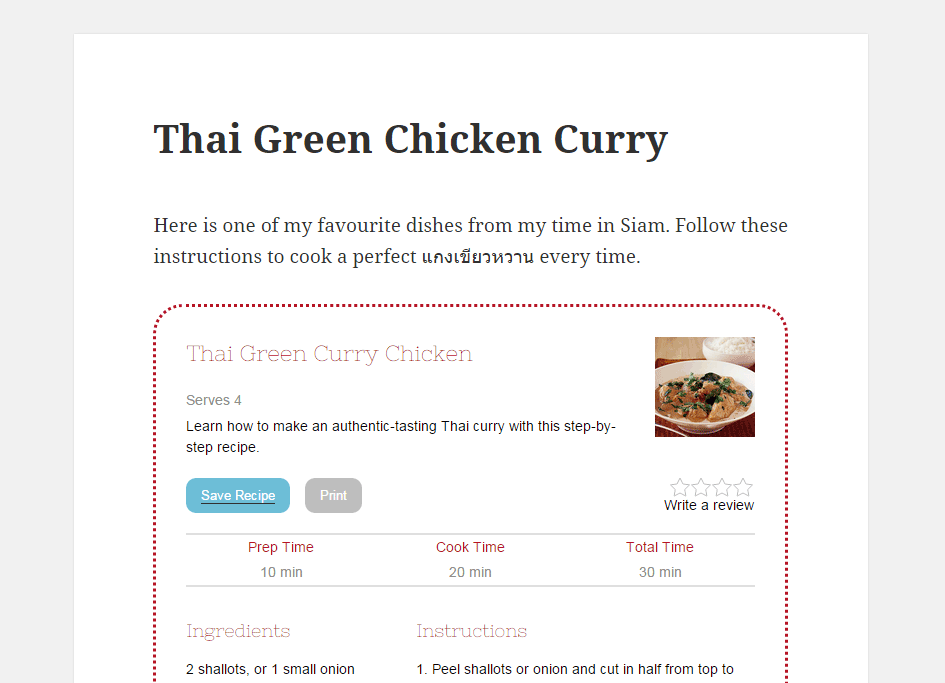
Now your visitors can easily follow along with your recipes, with the option of saving or printing them for future reference.
Conclusion
By using the free Recipe Card plugin you not only get an easy way to publish recipes on your WordPress blog, but you can also ensure that your recipes are fully optimized for the Google recipe search engine.
This should not only make your site easier to use for your readers, but also increase the number of searchers who find their way to your website.
If you have any questions about this plugin, or WordPress in general, please leave a comment below.
