Have you ever wanted to automatically display a piece of content, or specific page element at the of each blog post on your WordPress website? If so then the plugin we are going to be looking at today could be just what you are looking for.
By installing the free Add Widget After Content plugin, a new widget area is added to your website. This widget area displays its contents at the end of the single post template. This means that you can now add any custom content to that widget, causing it to be displayed after the content area, but before the comments section of each post.
As most plugins include their own widget, and you can also use the text widget to enter any custom content you would like displayed after your posts, there really is no limit to how you can use this new feature on your website. From inserting custom HTML content, newsletter sign up forms, or any shortcodes, you now have an easy way to display this content at the end of each post or page.
So if you like the idea of automatically inserting a set of piece of content after the main post body area, read on for our guide to using the Add Widget After Content plugin.
How to Use Add Widget After Content on Your Website
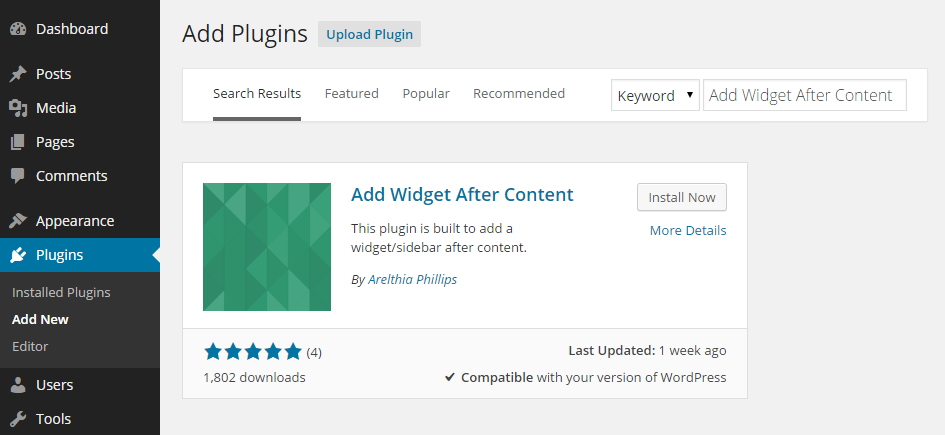
As the Add Widget After Content plugin is free to use, it can be installed on your site directly from the WordPress plugin directory.
To do so, log into your site’s admin area (http://yoursite.com/wp-login.php) and then navigate to Plugins > Add New using the sidebar menu.
From the Add Plugins screen, enter ‘Add Widget After Content’ in the search field and then install the first item listed in the results.

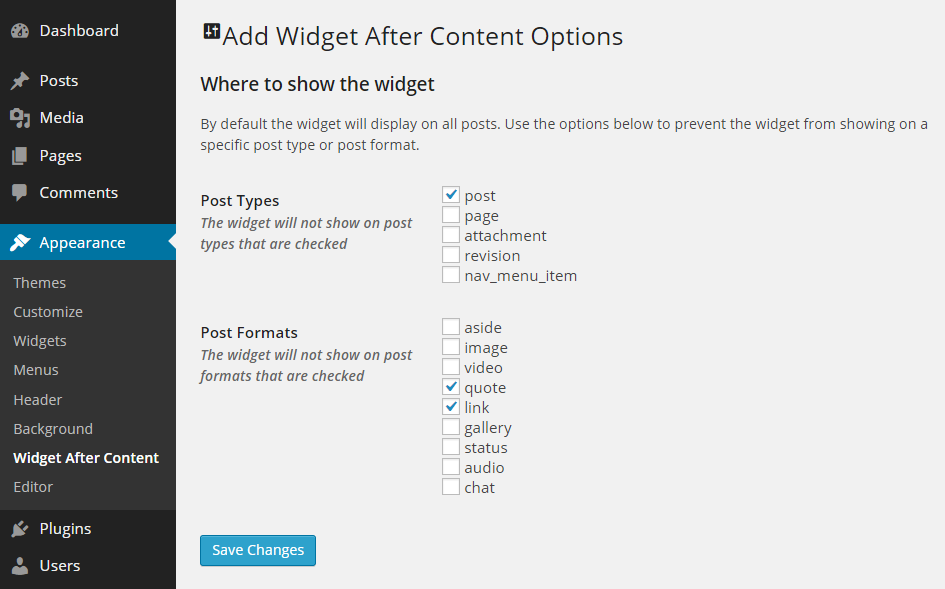
Once the plugin has been installed and activated, it can then be configured from its screen on the Appearance menu.
Using the Add Widget After Content Plugin
From the settings page of the plugin, you can decide which post types to display the widget on. This includes posts, pages, and any others that you might have active on your website.

You can also exclude any individual post formats that you would prefer to not to include the widget contents. Once you’ve made your decisions, you can then head over to the widgets page to add your content.

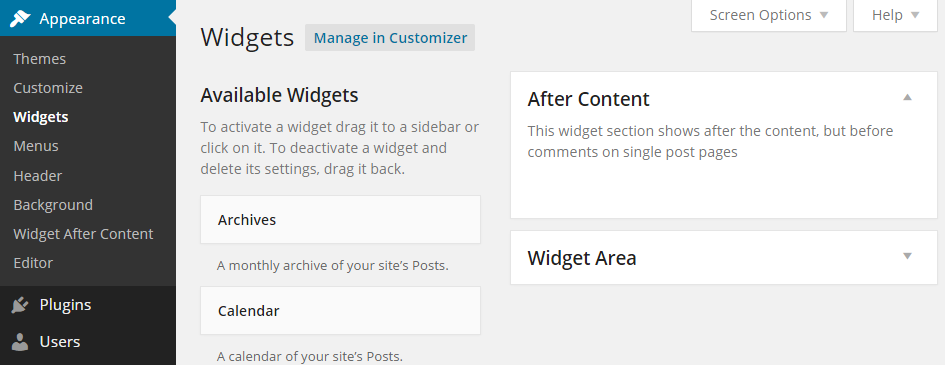
On this screen, you should see a new widget area titled After Content. Any widgets that you add to this widget area, will now be displayed under your posts or pages, depending on how you’ve configured the plugin.
If there are any posts that you would like to disable the widget for, simply check the box on the Widget After Content meta box that is now displayed on the WordPress post editor screen.

Conclusion
Now you can add a custom message or widget to the end of each post that you publish on your blog. Whether you want to include a call to action, an email optin form, or a set of links for your readers to follow, this plugin makes it easy to do so.
If you have any questions about this plugin, or working with WordPress in general, please leave a comment below.
