If you want to keep track of the changes that have taken place on your Hosted WordPress website, then the free Simple History plugin can help you do just that.
After installing this plugin on your website, you can easily view the activity history of the logged in users on your website. Whether you want a simple way to see whether a colleague has complete a task you are waiting on, or you want a quick way to see what the last step completed in a project was, the Simple History plugin gives you access to an easily readable log of events, right on your WordPress dashboard.
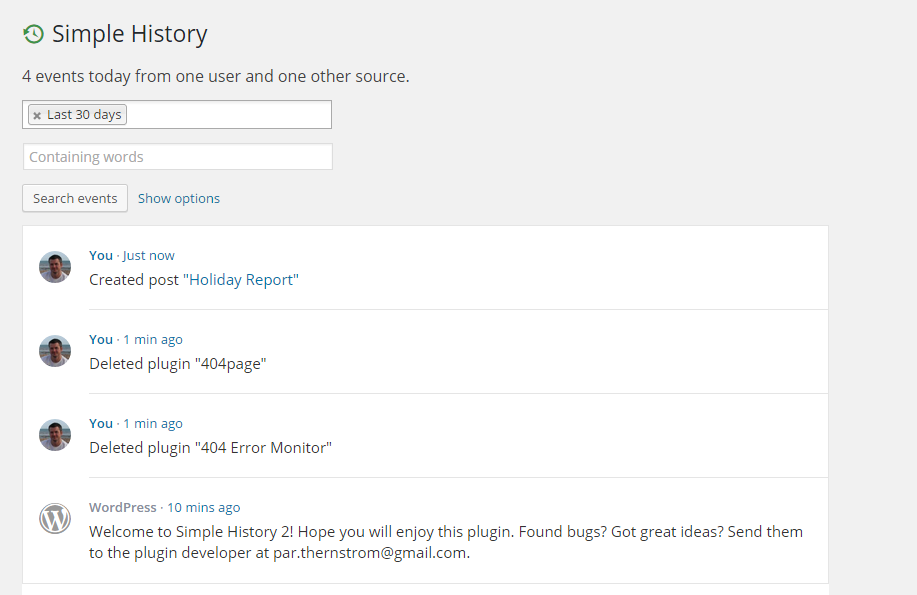
This plugin has lots of practical uses, from keeping an eye what your fellow logged in users are doing, through to troubleshooting and retracing your steps should something go wrong on your website. Out of the box, the Simple History plugin can track and share the details of changes to posts and pages, attachments, comments, widgets, plugins, user profiles, and when users logged in and out of your site. Furthermore, if you are a developer, you can add your own events to the plugin.
Another great feature of the Simple History plugin is that the log is output as an RSS feed, allowing you to subscribe to it and view it from your favorite RSS reader, such as Feely, on your device of choice. This is in addition to being able to view the history log on the dashboard of your WordPress website, as well as a dedicated page in the admin area.
If you think you could make use of this feature on your WordPress website, read on for our guide to using the Simple History plugin.
Please note, Simple History requires PHP 5.3 or higher (Pagely defaults to php 5.5.x).
How to Use the Simple History Plugin on Your Website
As the Simple History plugin is free to use, it can be installed on your site directly from the WordPress plugin directory.
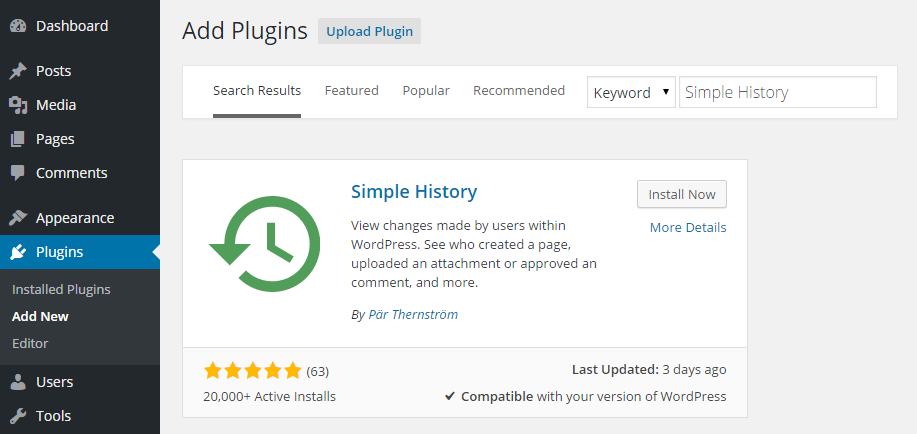
To do so, log into the admin area of your site (http://yoursite.com/wp-login.php) and then navigate to Plugins > Add New using the sidebar menu.
From the Add Plugins screen, enter ‘Simple History’ in the search field, and then install the first item listed in the results.
Once the plugin has been installed and activated, the settings can be accessed from the newly added Simple History item, located under the sidebar Settings menu.
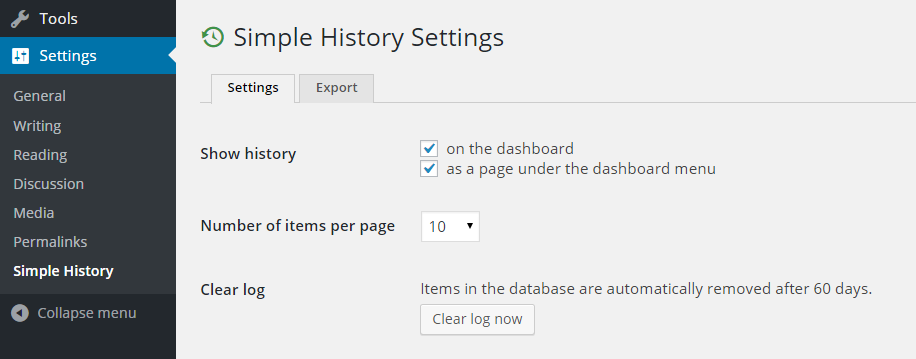
Through the settings page of the plugin, you can choose where the history log is displayed, with the options being the dashboard and its own dedicated page. You can also choose how many items to show per page, as well as the ability to clear the log if you wish to.
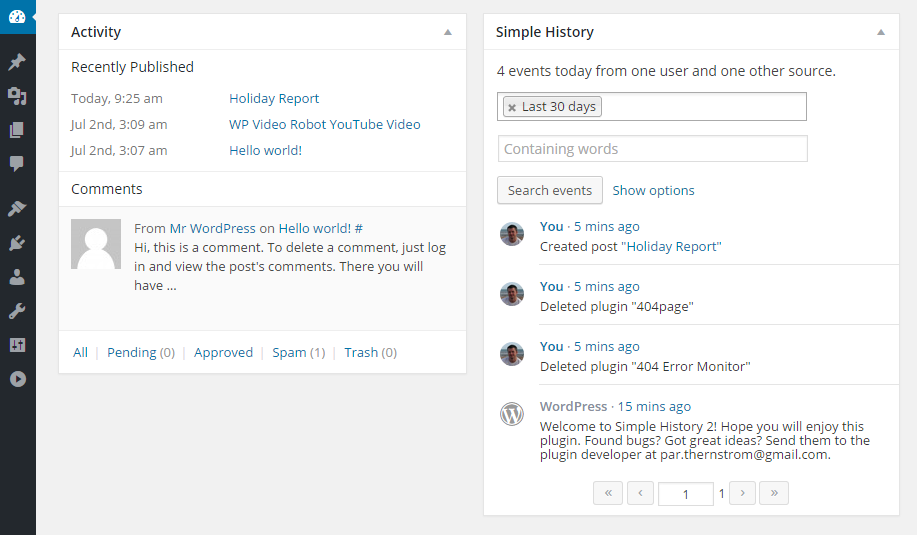
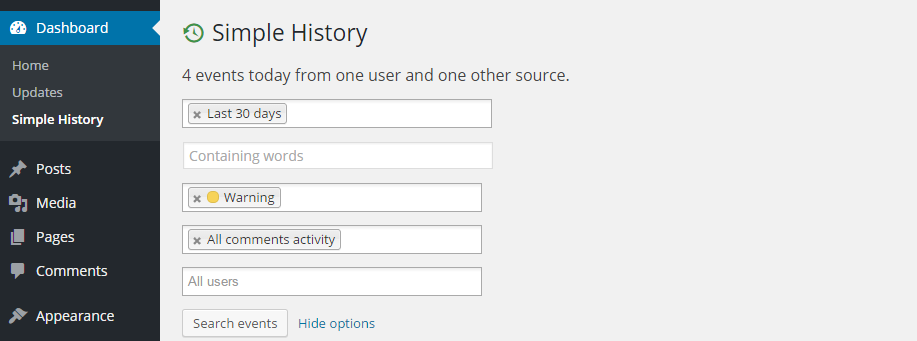
Once the plugin is up and running, you can then view the recent log of events on the dashboard of your website, or through your RSS reader of choice. The log can be easily filtered by date, content, activity, user, or alert level. You can even export the logs for safekeeping or further interrogation.
Conclusion
With Simple History installed on your website, you can now quickly and easily see when a co-author has completed a task assigned to them, or what recent changes have been made to your site that might be causing any current issues.
Thanks to its ability to output the events log as an RSS feed, you don’t even have to be logged into your WordPress website to get a notification that an event has taken place.
If you have any questions about this plugin, or working with WordPress in general, please leave a comment below.
