
If you’ve ever made a tweak to your WordPress theme and felt a little nervous before hitting “Update,” you’re definitely not alone. Themes get updated, files get replaced, and the more you customize, the more you need a safe spot for your changes to live. That’s where a child theme comes in. In this guide, we’ll walk you through what a WordPress child theme is, why it matters, and how to set one up the right way using current best practices.
What is a WordPress Child Theme?
A WordPress child theme is basically a theme that borrows everything from another theme, called the parent theme. Think of the parent as the foundation, with templates, features, and default styles, while the child theme is where you add your own custom touches.
This parent/child setup is the go-to way to customize a WordPress theme. It means you can make changes without touching the parent theme itself. So when the parent theme gets updated, your child theme stays put and your customizations don’t get wiped out.
A child theme can override specific files (like header.php), add its own CSS, and introduce custom PHP via functions.php. Anything you don’t override continues to load from the parent theme automatically.
Why Use a Child Theme? The Key Benefits
Using a child theme is about keeping your site stable while you customize. Here are the big wins:
- Safe customization (your changes survive updates): If you edit the parent theme’s files directly (like
style.cssor template files), those edits can vanish as soon as the theme updates. With a child theme, your changes live in their own space, so updates to the parent won’t erase your work. - Faster development (build on what’s already there): A child theme lets you reuse the parent theme’s templates, functions, and styles, so you don’t have to start from scratch. You can zero in on just the parts you want to change. This is especially handy if you’re working with a solid commercial theme or one of the default WordPress themes.
- Fallback safety (a built-in safety net): If you accidentally break something in your child theme, the parent theme is still there as your backup. Usually, you can just fix or remove the problem in the child theme, and your site goes back to normal. Much easier than if you’d edited the parent theme directly.
How to Create a WordPress Child Theme Step-by-Step
The process is pretty straightforward: you’ll make a new folder, add a style.css file with the right header, set up your styles in functions.php, and then activate the child theme in your WordPress dashboard.
For deeper reference, you can refer to WordPress’s developer documentation.
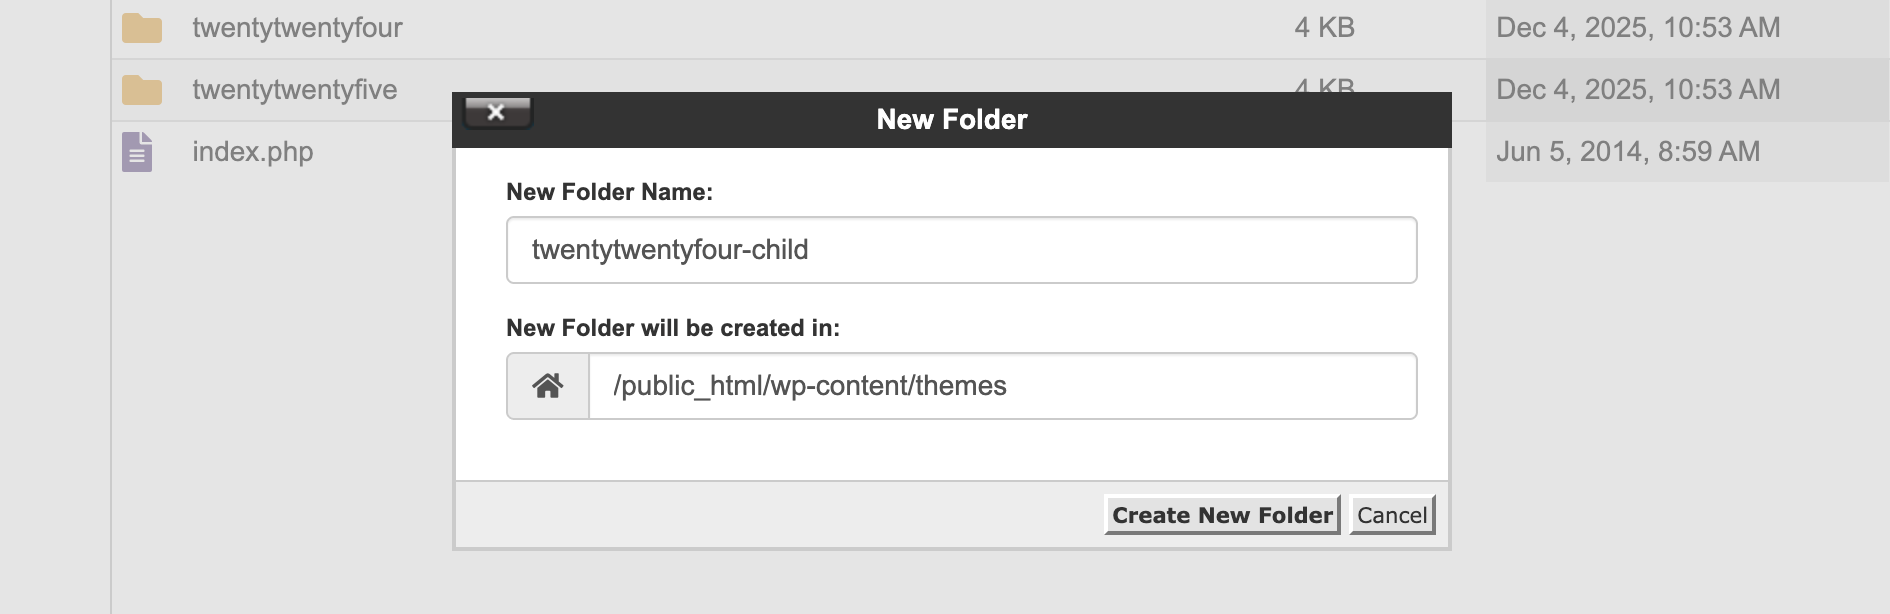
Step 1: Create the Child Theme Folder
First, you’ll create a new folder for your child theme inside your WordPress installation.
To get started, access your site files using SFTP or FTP (most hosts give you these details), or use a file manager like cPanel. Inside wp-content/themes/, you’ll see a folder for each theme you have installed.
Create a new folder for your child theme, and give it a name that makes sense. Here’s a common pattern:
- Parent theme folder:
twentytwentyfour - Child theme folder:
twentytwentyfour-child
So you’d create:
/wp-content/themes/twentytwentyfour-child/
Keeping the folder name obvious will make troubleshooting much easier down the road.
Step 2: Create the style.css File
Inside your child theme folder, create a file named style.css:
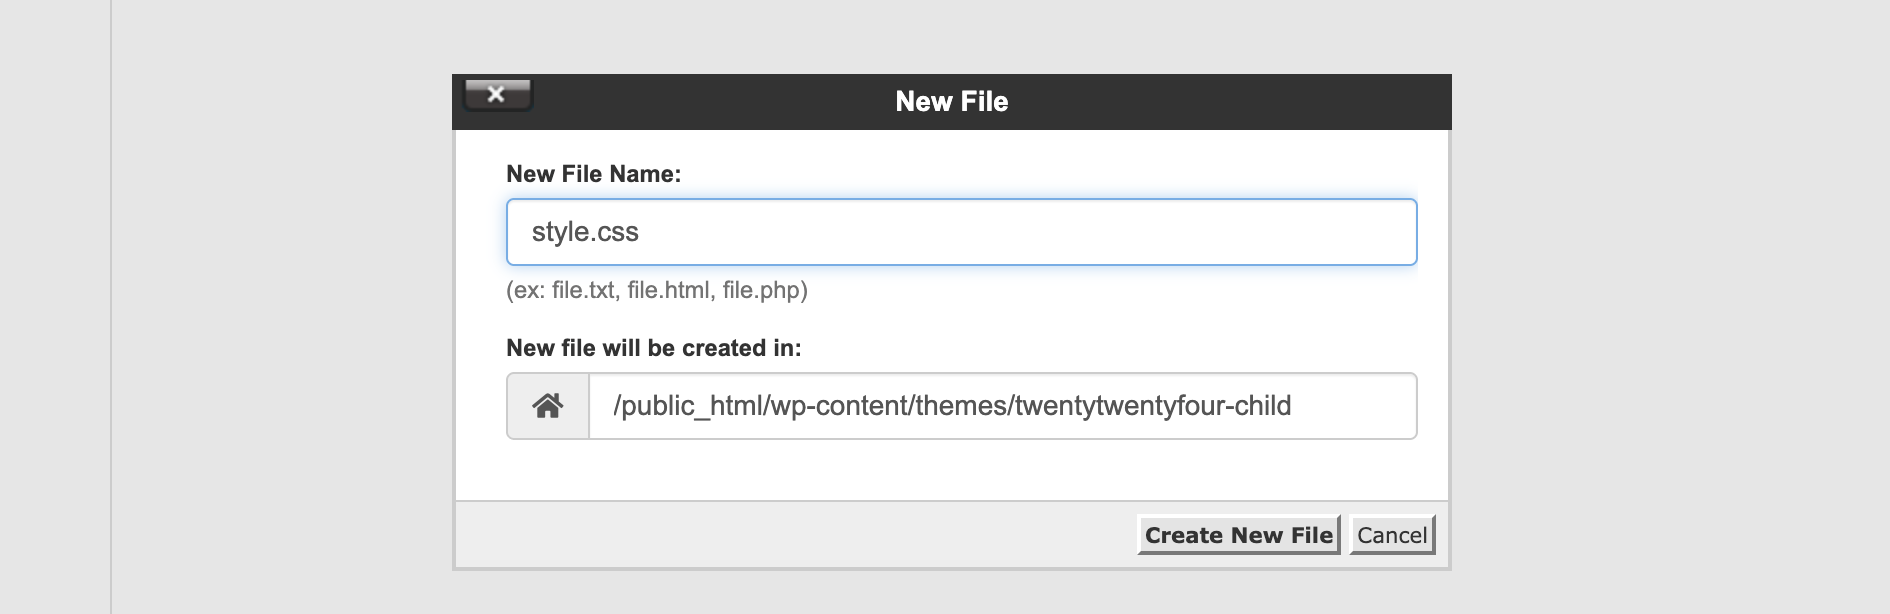
This file needs to start with a special comment block. WordPress uses this as the theme’s info. Here’s a template you can use:
/*
Theme Name:   Twenty Twenty-Four Child
Theme URI:    https://example.com/twentytwentyfour-child/
Description:  A child theme for the Twenty Twenty-Four theme.
Author:       Your Name
Author URI:   https://example.com/
Template:     twentytwentyfour
Version:      1.0.0
Text Domain:  twentytwentyfour-child
*/
The most critical line is Template:. This must match the directory name of the parent theme (not the display name you see in wp-admin). If your parent theme folder is astra, then your Template: must be astra. If this line is wrong or missing, your child theme won’t load.
You can add your own CSS below the header, but don’t use @import to bring in parent styles. That method is outdated and can slow things down. (We’ll cover the better way next.) For the official details, WordPress has a guide on the required header fields.
Step 3: Enqueue Styles with functions.php
Next, add a functions.php file to your child theme. This is how you’ll load both the parent theme’s stylesheet and your own child stylesheet the right way.
Create:
/wp-content/themes/twentytwentyfour-child/functions.php
Then add this code:
<?php
/**
 * Enqueue parent and child theme stylesheets.
 */
add_action( 'wp_enqueue_scripts', 'child_theme_enqueue_styles' );

function child_theme_enqueue_styles() {
 // Load the parent theme stylesheet.
 wp_enqueue_style(
  'parent-style',
  get_template_directory_uri() . '/style.css'
 );

 // Load the child theme stylesheet (depends on parent-style).
 wp_enqueue_style(
  'child-style',
  get_stylesheet_uri(),
  array( 'parent-style' ),
  wp_get_theme()->get( 'Version' )
 );
}
Using functions.php is the modern, reliable way to include styles. WordPress can handle dependencies and load order for you. The array( 'parent-style' ) part makes sure your child CSS loads after the parent, so your overrides work as expected.
Two quick notes:
get_template_directory_uri()points to the parent theme directory.get_stylesheet_uri()points to the active theme stylesheet (your child theme in this case).
If you want to go deeper, WordPress covers the enqueue system in their wp_enqueue_style() guide.
Step 4: Activate the Child Theme
Now you can activate your child theme like any other:
- Log into WordPress.
- Go to Appearance > Themes.
- You should see your new child theme listed.
- Click Activate.
If you’ve set everything up right, your site should look just like it did with the parent theme. That’s because you’re inheriting all the parent’s styles. Now you’re ready to start customizing safely.
How to Customize Your Child Theme
Once your child theme is active, your two main ways of customizing are CSS overrides and template overrides. You can also add functions, hooks, and filters, but we’ll keep it simple for now.
Custom CSS
Any CSS you add to your child theme’s style.css can override the parent theme, as long as your selector is specific enough and your stylesheet loads after the parent’s.
Here’s a simple “before vs. after” example:
Before (parent theme default link styling):
a { color: #0073aa;}
After (child theme override):
a { color: #d54e21;}
Paste the “After” version into your child theme’s style.css, save, and refresh your site. If you don’t see the changes, try clearing your browser cache, plugin cache, or your host’s cache if you have one.
If you’re just making a quick CSS tweak and don’t need a portable codebase, you can use WordPress’s Appearance > Customize > Additional CSS (or the Site Editor). That’s fine for small changes, but a child theme is the way to go if you want version control, staging, or a setup you can reuse.
Template Files
To override a template, just copy the file you want to change from the parent theme into your child theme, keeping the same filename and folder structure.
Say you want to customize the header.
- Find this in the parent theme:
/wp-content/themes/twentytwentyfour/header.php - Copy it to the child theme:
/wp-content/themes/twentytwentyfour-child/header.php - Then, edit the copy in your child theme.
WordPress will now use your child theme’s header.php instead of the parent’s. That’s great! But keep in mind that once you override a file, you won’t get any updates to that file from the parent theme. That’s why it’s best to only copy the files you really need to change, not the whole theme.
(If you’re working with a block theme, you may also override template parts and templates under /templates and /parts, or customize via theme.json, but you should still only override what you need.)
Common Mistakes When Creating Child Themes
Even experienced WordPress developers trip over a few classic child theme gotchas:
- Using
@importin the child theme CSS
It’s outdated and can create a performance hit. Enqueue styles infunctions.phpinstead. - Forgetting (or misspelling) the
Template:line instyle.css
This is the number one reason a child theme doesn’t work. The value has to match the parent theme’s folder name exactly. - Copying all parent files “just in case”
Copying everything defeats the purpose of using a child theme and makes updates a headache. Only copy the templates you actually need to change.
Troubleshooting & FAQs
Why is my child theme not working?
Usually, it’s one of these: the Template: value doesn’t match the parent folder name, the child theme folder is in the wrong spot, style.css is missing the header, or your styles aren’t set up right in functions.php. Also, check for caching since old CSS is a common culprit.
Can a child theme have a child theme?
Not in the way people hope. WordPress effectively supports a single parent/child relationship (one Template: value). “Grandchild themes” aren’t a standard workflow; it’s better to consolidate changes into one child theme or create a new child theme based on the same original parent.
Do I need a child theme if I only edit CSS?
Not always. If the change is small, the Additional CSS feature can work and won’t be overwritten by theme updates. But if you want a maintainable, portable setup for ongoing work, staging, and deployment, a child theme is the cleaner long-term choice.
Wrapping up
A WordPress child theme is about as close as you can get to an insurance policy for your site’s design and features. You get the best of both worlds: the reliability and updates from the parent theme, plus a safe place to make your site your own without losing your work when updates happen.
If you’re gearing up for your next big edit, set up the child theme first. And when you’re ready to treat your theme work like real development with staging, safer deployments, and performance that holds up under traffic, a managed platform lets you focus on building, not babysitting.