Have you ever updated a plugin on your WordPress site and had the screen go white? You didn’t change any code, but the site goes pear-shaped right in front of you, all from one little plugin. Panicked, you try a few things and manage to get it back online, only to see a distorted layout. Not long after that, site visitors start sharing witty commentary about their experience and depending on the nature of your site, you take a hit in the revenue department.
It happens.
Fortunately, website owners can completely avoid situations like this by testing updates and changes on a WordPress staging site.
Also referred to as a development or testing site, a WordPress staging site is an offline clone of your website. You can use this duplicate site to perform testing and make changes in an environment hidden from visitors. Working in a staging site eliminates any downtime that results from plugin malfunctions, page crashes or broken code.
Reasons to Create a WordPress Staging Site
A staging site is often used while building a new website, but it can also come in handy when updating and improving an existing site. By working in a staging environment, you ensure that the experience of your visitors isn’t disturbed as you make edits. The original site continues to work normally until a decision is made to push those changes live.
Other benefits of using a WordPress staging site include:
- It allows you to troubleshoot plugin issues without spreading the problem to your live site
- Having a staging site eliminates the negative impact of a crashed website on conversion and sales
- Website owners are empowered to thoroughly test every element at their own pace without the time constraint of having the actual site in maintenance mode
Despite the many benefits of using a WordPress staging site, you won’t have much leverage unless you know how to set one up. So, let’s move forward and learn to develop a WordPress staging site.
Setting Up a WordPress Staging Environment
There are many options for creating a WordPress staging site, and we’re going to explore a few of the more popular choices below. This way, you can assess the pros and cons of each and pick the one that best suits your needs.
1. Create a WordPress Staging Site Using Your Web Host
Most managed WordPress hosts offer one-click staging environments or command-line tools as part of their packages. The exact steps to set up a staging environment may vary slightly across hosts, but the process is largely similar.
Below, we’ll show you how to create a staging site and use the Pagely Sync tool to clone your current single instance production site over to your new staging environment.
Creating a Staging Site
Creating a new site inside the Atomic control panel is easy. Here’s how to do it:
- Log into your Atomic control panel.
- From the left-side main menu, select Apps.

- On the Apps page, click the New App button in the top right corner.
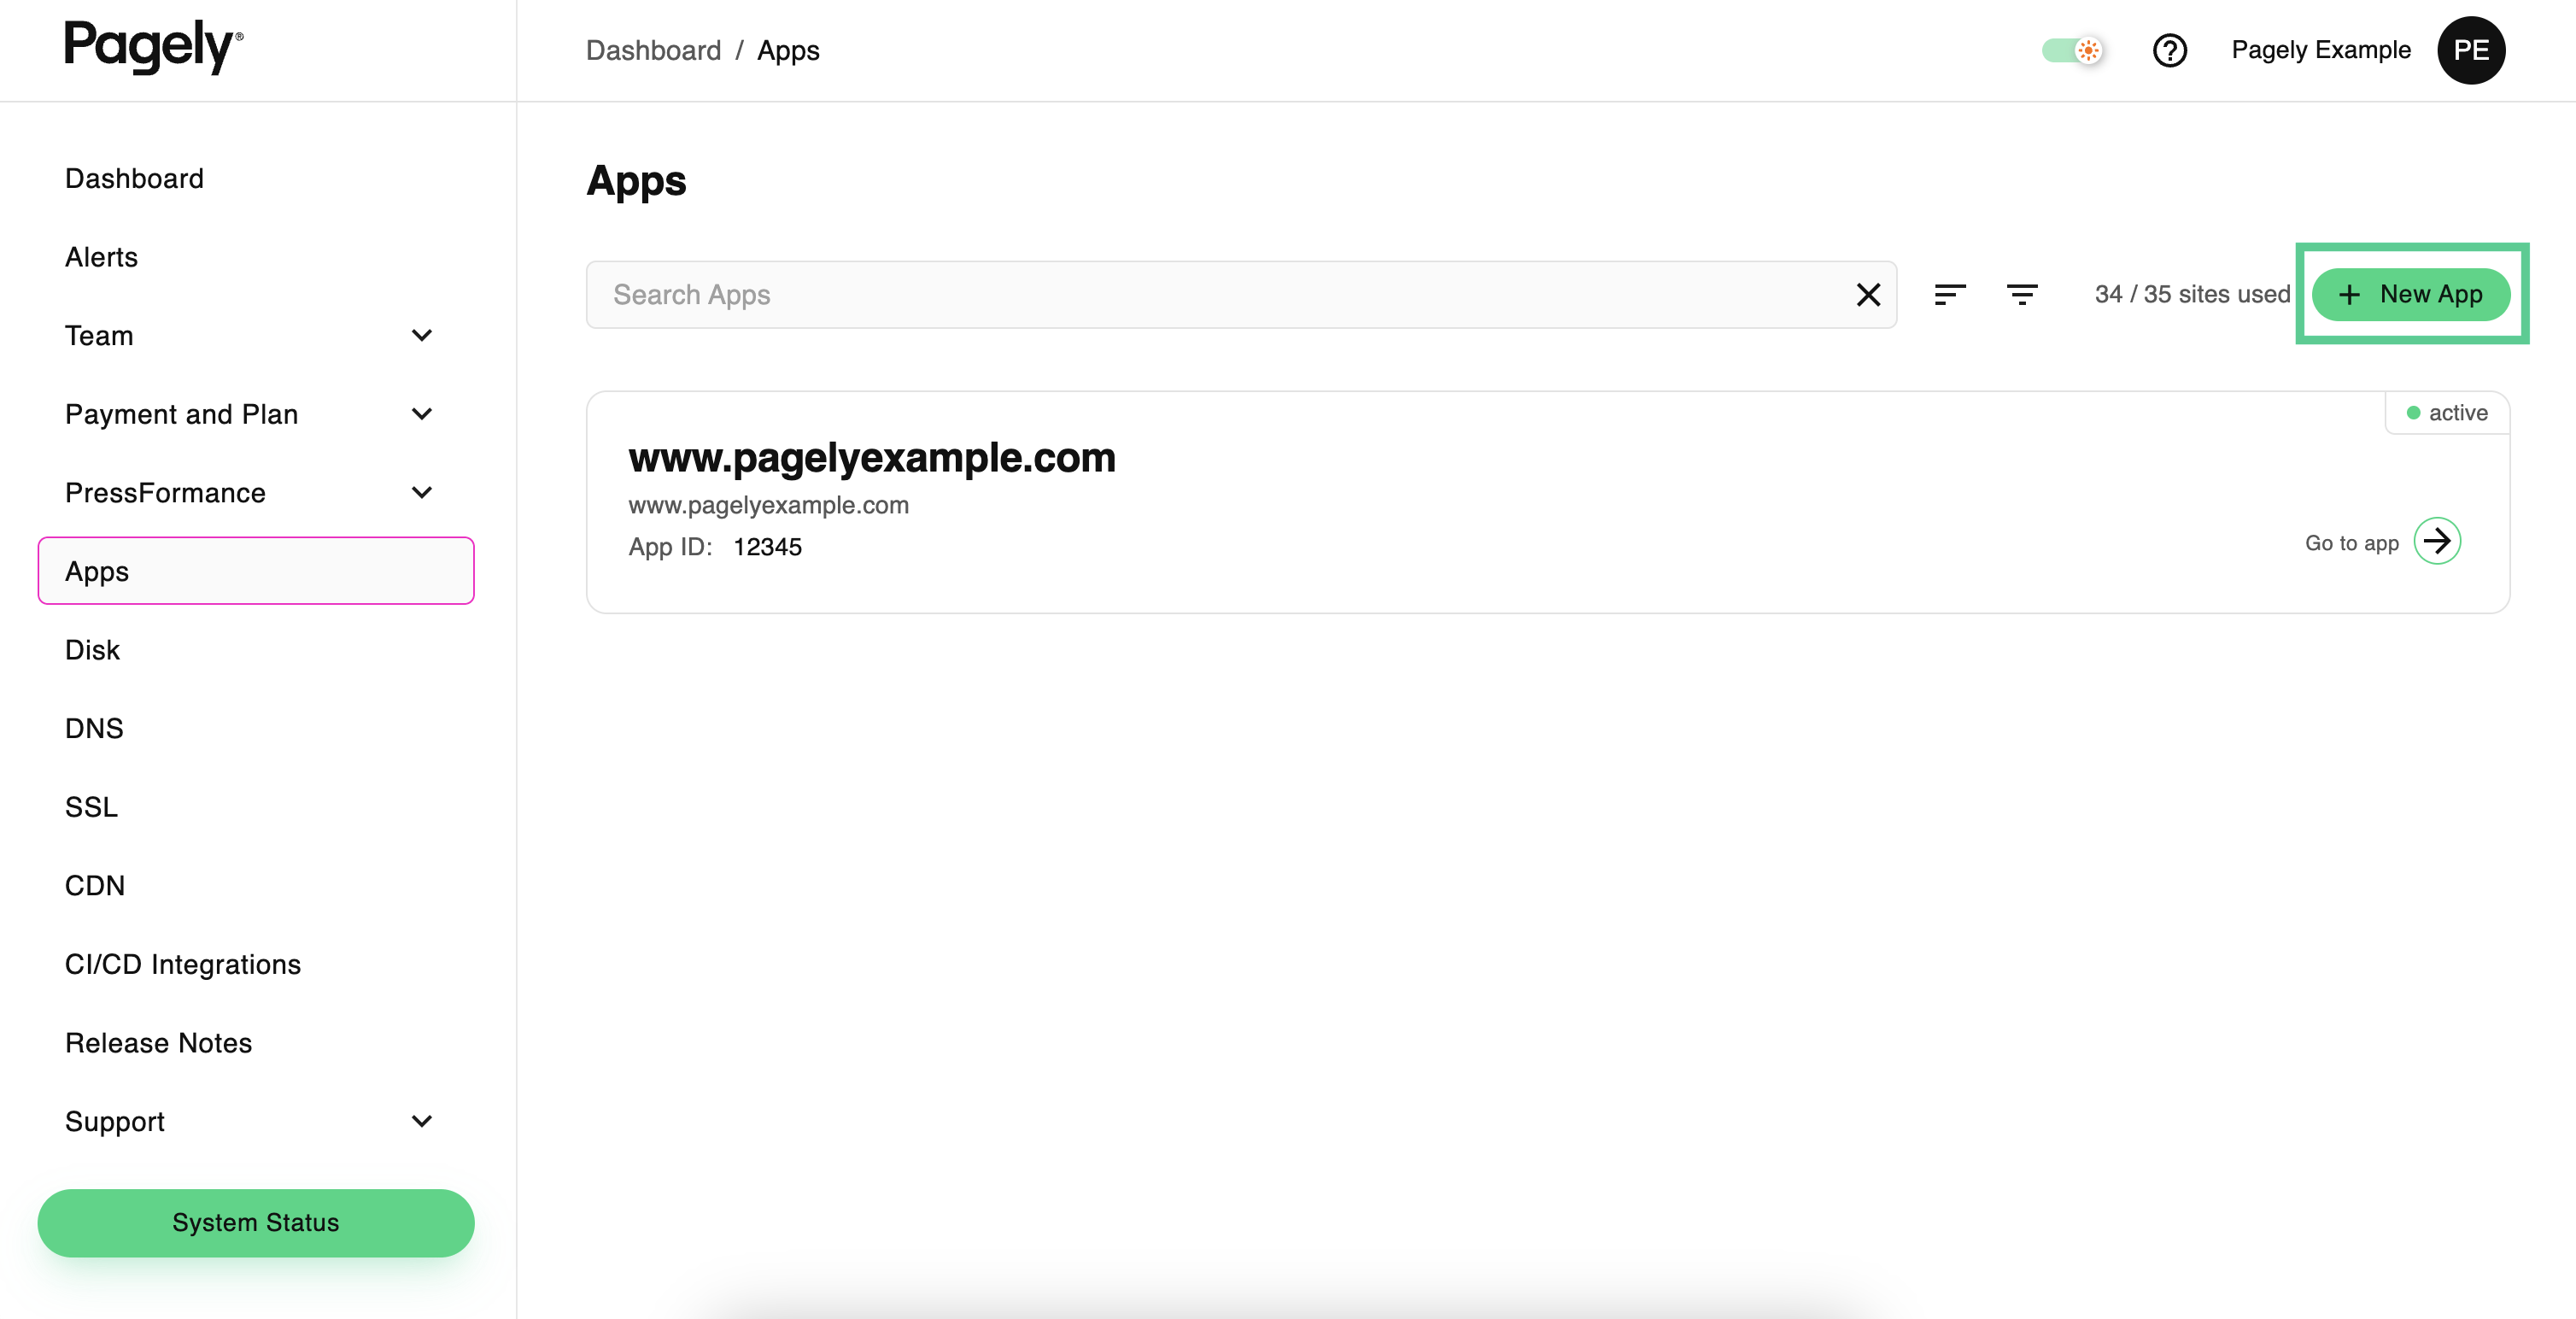
- Enter the desired domain for your staging site in the Primary Domain field (e.g., staging.example.com).
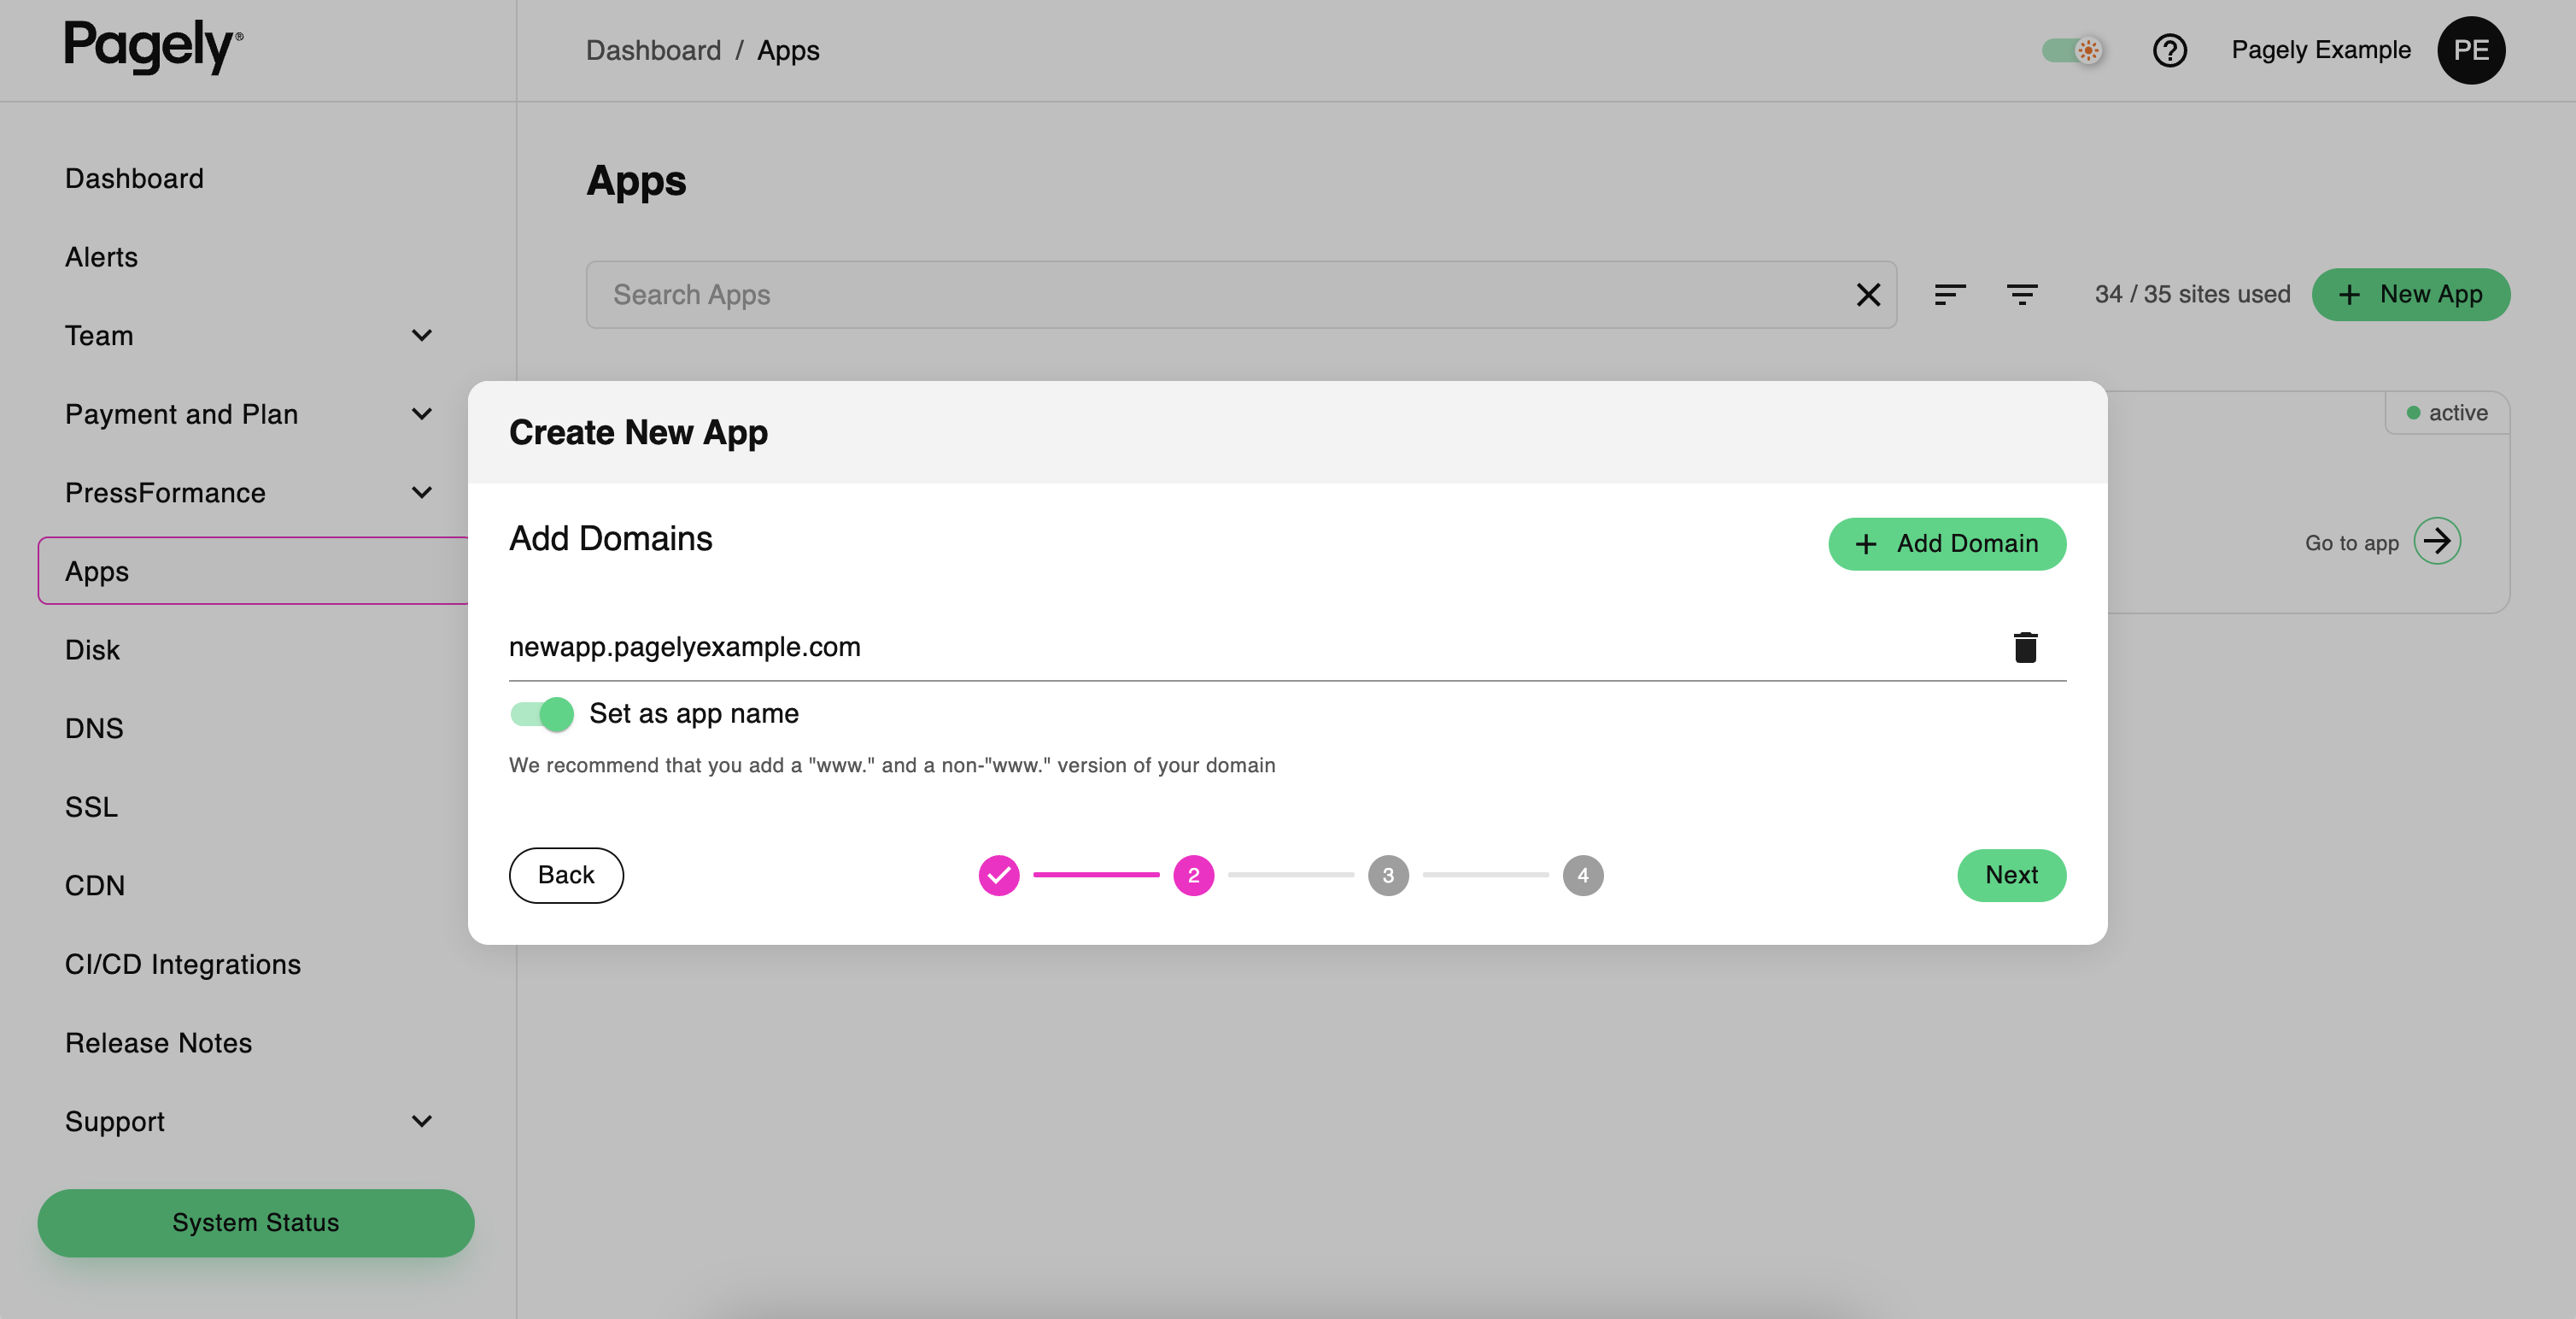
- Click Create App to finalize your new staging site.

Your staging site is now ready. Since it is a new environment, you will need to add your content. The next section will guide you through cloning your existing production site to this new staging environment.
Cloning from Production to Staging
Once your staging environment is ready, the next step is to clone a copy of your production site onto it:
- Log into your VPS using SSH.
- Use the Pagely Sync tool to clone your production site to the staging environment, like this:
pagely sync ~/sites/example.com ~/sites/staging.example.com - If your staging database still contains references to your production domain, you can execute a search and replace operation using WP-CLI. To begin, jump over to the staging site’s directory on the server by running the following:
cd ~/sites/staging.example.com - Verify the value of the cloned siteurl option before using it with search-replace in the next step:
wp option get siteurl - Next, perform a search and replace using WP-CLI with the following commands command:
wp search-replace --all-tables 'http://example.com' 'http://staging.example.com' - While we’re at it, let’s also clear the cache:
wp cache flush
Your files and database should now be successfully copied to the staging environment. You can safely make changes to this new staging site without affecting your live production site.
Next Steps
Depending on your site, you may need to make additional changes to your staging site after cloning. While every site is unique, here are a few examples of things to look out for that should typically only run in a live production environment:
- Automated payments (e.g., subscription renewals, invoicing)
- Automated emails
- Any other process that should not execute on a staging site
For a more advanced cloning setup that includes creating a custom profile, check out the Pagely Clone Tool.
2. Build a WordPress Staging Site Manually
A more hands-on approach involves creating a WordPress staging website manually. Beginners are likely to find this option challenging, and it’s best suited for advanced WordPress users with a knowledge of MySQL database operations. The benefit of adopting this approach is that it gives you total control over the staging setup. For best results, plan access controls up front and keep your staging environment aligned with production (same WordPress/PHP versions) unless you are explicitly testing an upgrade.
Here’s how to create a WordPress staging site manually:
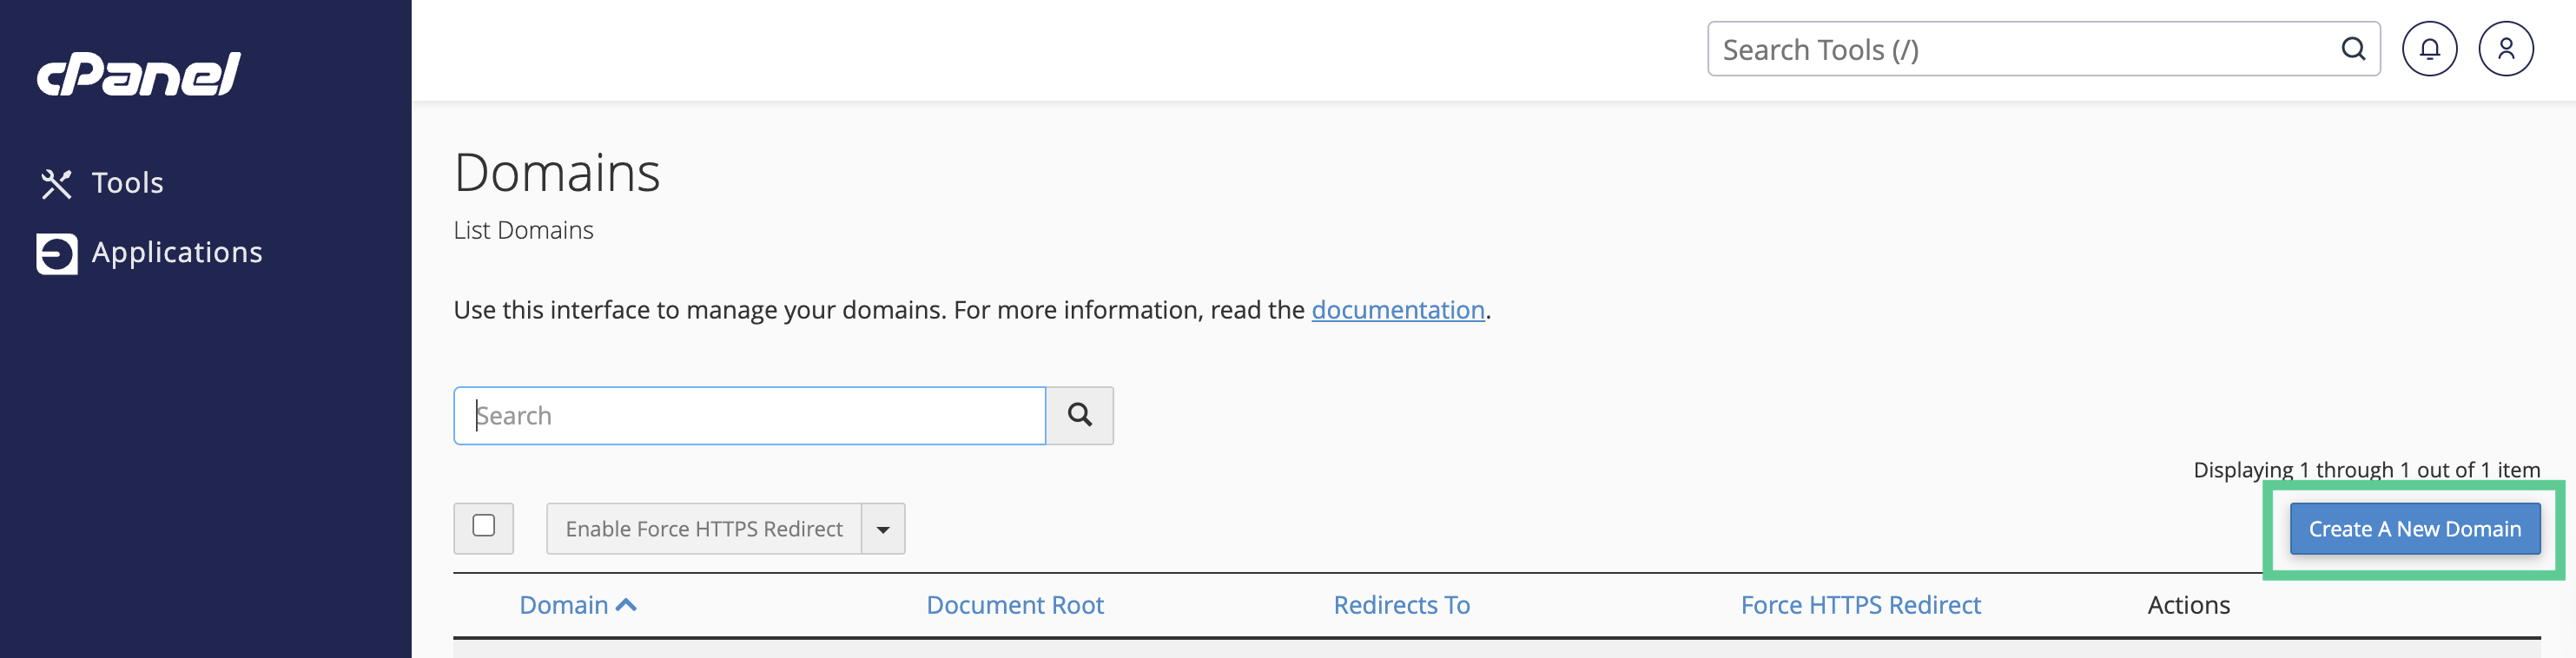
- Log in to your cPanel account via your hosting provider’s login page.
- In the Domains section, click Domains.
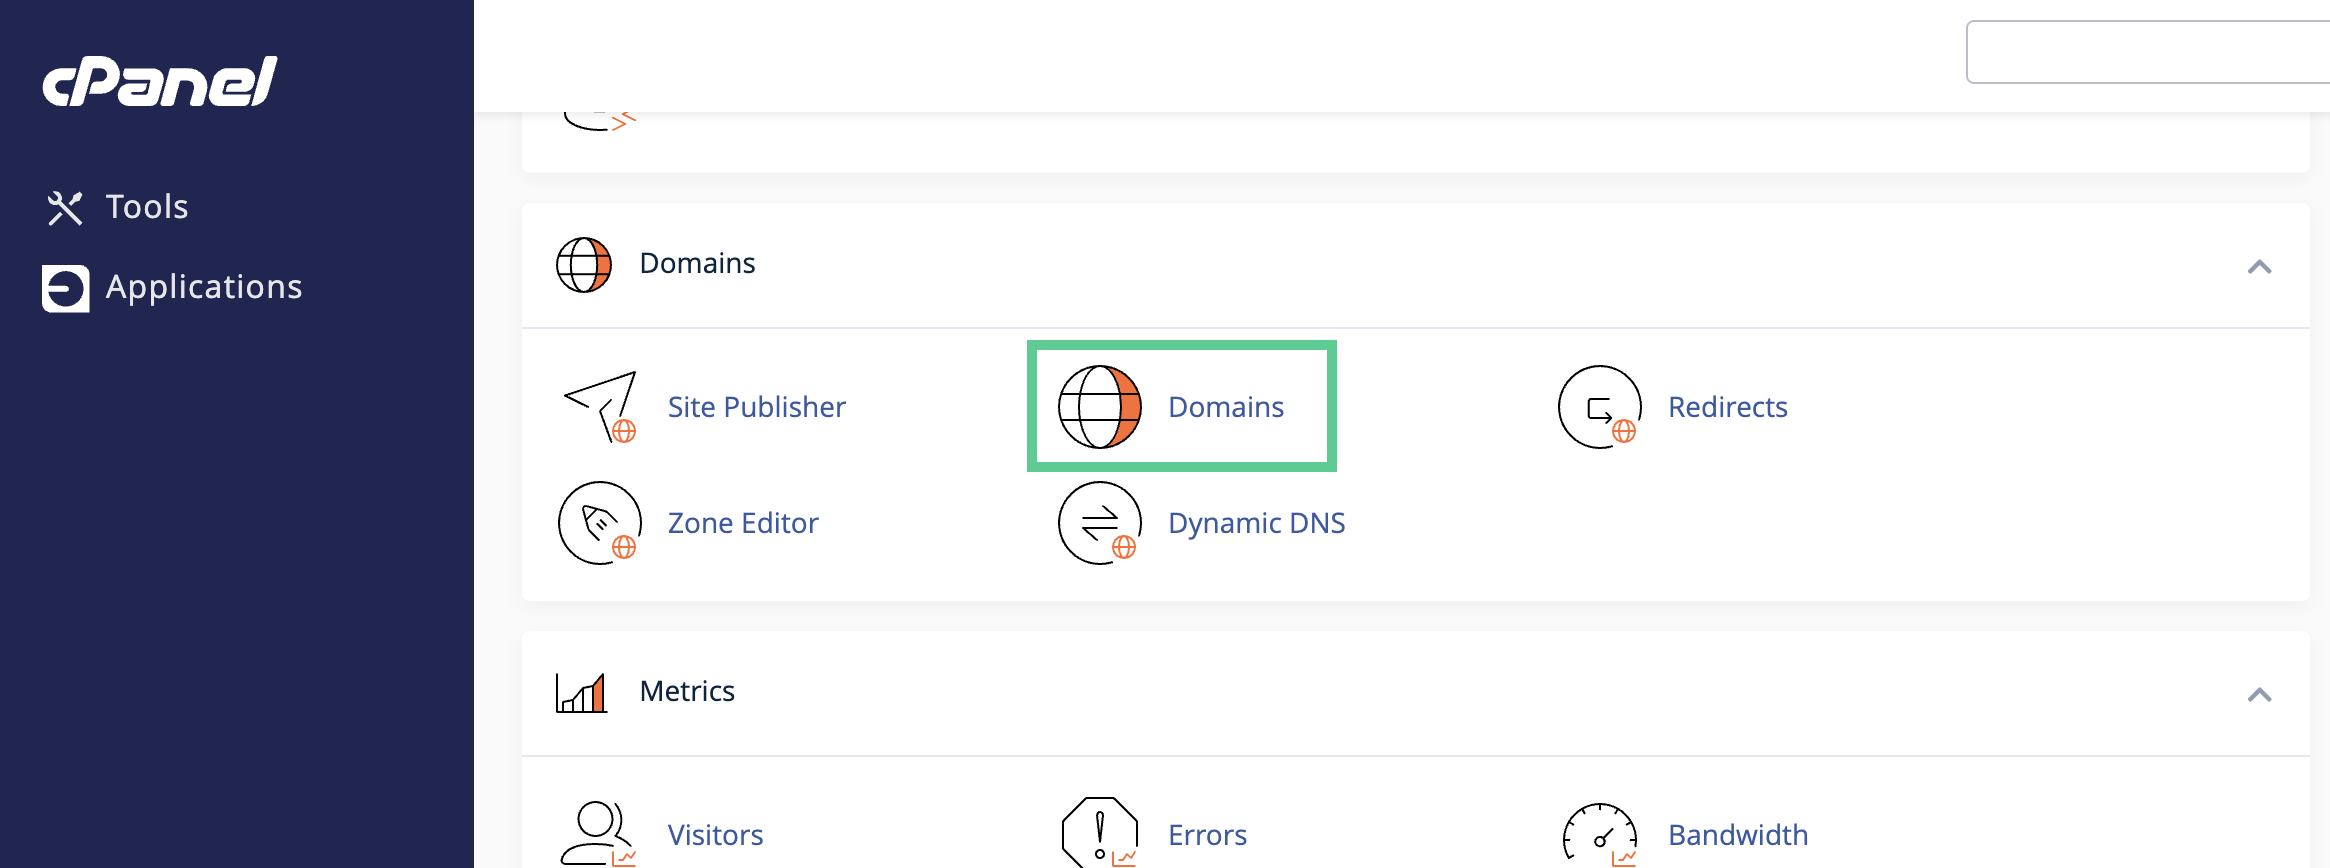
- Click Create A New Domain.
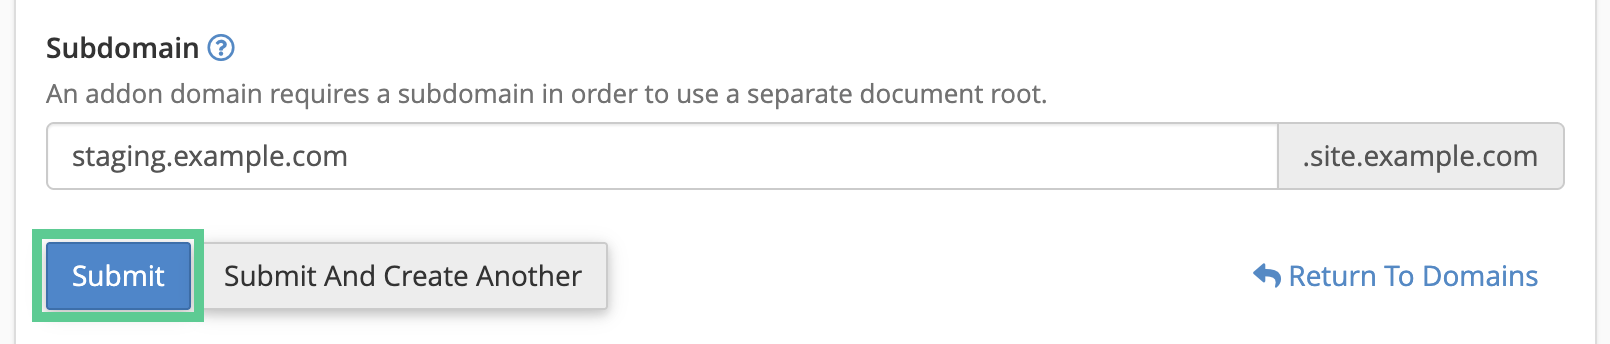
- In the Domain field, enter your desired sub-domain (for example:
staging.yourdomain.com).
- Un-check the option that says “Share document root with…” (if checked). This ensures the sub-domain can have its own separate folder.

- Set the Document Root for the sub-domain. By default it might prefill something like
public_html/staging(or~/public_html/subdomain_name), you can accept it or adjust it as needed. - Click Submit to add the sub-domain.
- After creation, a new folder will appear (if it doesn’t already exist) where you’ll later clone your staging site’s files and database.
Note: DNS propagation may take a few minutes to up to 24 hours, so give it some time. - The next step is to create a dedicated FTP account for the staging site. It will only provide access to the staging environment to secure against accidental modifications to the live site. Scope this account to the staging document root only.
- Go to FTP Account in cPanel and complete the fields in the Add FTP Account section. The Directory should be similar to the directory you selected while creating your sub-domain (for example,
public_html/staging). - Select Create FTP Account to create a brand new account. This will only provide access to the specified directory and not the entire server.
- Before copying any data, create a new MySQL database and user for staging and grant the user All Privileges (cPanel → MySQL Databases).
- After the sub-domain has been created, copy the data from the actual site to the staging one. To do so, go to cPanel and log into phpMyAdmin and choose the database of the live site. Click Operations in the menu bar after doing so.
- Search for the text box named “Copy Database To” and enter the name of the staging database you created in it. If your host supports it, you can check “CREATE DATABASE before copying” to let phpMyAdmin create the DB for you; otherwise, use Export (live) → Import (staging). Both the data and structure needs to be copied and no settings should be changed. Select Go to run the duplicate.
- After the copying of the database finishes, select it from the left of the sidebar. Then the newly copied database will be launched by phpMYAdmin. Afterwards, click SQL tab in the phpMYAdmin menu bar. If you have WP‑CLI available, you’ll run a safer search/replace with it instead of raw SQL in the next step.
- Update URLs safely rather than running blanket SQL across every table. Prefer WP‑CLI; if you must use SQL, keep it targeted and do not modify
wp_posts.guid. Run one of the following:
Preferred (WP‑CLI):wp search-replace 'https://ORIGINAL_URL' 'https://NEW_URL' --all-tables --precise --skip-columns=guid --report-changed-only
(Matches the correct scheme; skips the guid column; preserves serialized data.)
SQL (targeted only):
First query:UPDATE wp_options SET option_value = 'https://NEW_URL' WHERE option_name IN ('siteurl','home');
Second query:UPDATE wp_posts SET post_content = REPLACE(post_content, 'https://ORIGINAL_URL', 'https://NEW_URL');
Do not run globalREPLACE()onwp_options.option_valueorwp_postmeta.meta_value(these often contain serialized data), and do not updatewp_posts.guid.
These queries should replace the following values as you enter them in the SQL query box:
- NEW_URL: the new URL, the one created by your staging site earlier, needs to be filled. Use the exact scheme your staging site uses (e.g.,
https://staging.example.com); do not forcehttp://if your site uses HTTPS. - ORIGINAL_URL: this is the URL of the original site. It can be found through the WordPress Admin area by going to Settings > General > WordPress Address (the URL).
- wp_: Replace
wp_with any custom prefix present on database tables. Use straight quotes'...'in SQL (not curly/smart quotes‘ ’).
Click Go to start queries and wait for the confirmation message saying that the process is complete. Double‑check you are connected to the staging database before running replacements. Once your database is copied, you can proceed with copying things like themes and plugins. Copy your live site’s core files or download the same WordPress version from WordPress.org and upload its contents to the staging environment without running the WordPress installer.
After WordPress is uploaded, you can start copying plugins, themes, and media files. These are the folders that have to be copied:
wp-content/pluginswp-content/themeswp-content/uploads- (Also copy
wp-content/mu-pluginsif present.)
If you haven’t stored a lot of content in these folders, you can also use your FTP client to download them from your actual website and upload them in staging. For folders with a larger amount of content, use the native file manager provided by cPanel because it copies folders on the server directly. These folders need to be copied to the staging folder i.e. /public_html/staging/wp-content/.
Once all that is done, you can connect the WordPress staging installation to the database you copied before. Open the staging environment, through the sub-domain created earlier. If the staging directory is missing a wp-config.php file, your database connection details may be asked for in order to create one. But if there’s one already there, edit it and put in the new staging database connection info. Add helpful flags in wp-config.php such as define('WP_ENVIRONMENT_TYPE', 'staging'); and, if needed, set WP_HOME and WP_SITEURL to your staging URL.
Now enforce privacy so the staging site isn’t public: Use cPanel “Directory Privacy” (HTTP auth) on the staging docroot; in WordPress, enable “Discourage search engines” (Settings → Reading) and/or add a robots.txt with Disallow: /; optionally restrict by IP; and disable outgoing email so the staging site can’t message real users.
WordPress should then connect to the staging database, detect WordPress was successfully installed, and ask you to log in. The login credentials will be the same as on your actual website. You will now have a staging site that’s independent from your live website for testing purposes. After first login, flush permalinks (Settings → Permalinks → Save) and clear any caches to avoid stale content.
3. Use a Plugin to Develop a WordPress Staging Site
The plugin approach is the easiest one among all options. Through the WordPress admin area, you can install a staging plugin that handles the process of copying the database between sites. Here are three recommended plugins:
Creating a Staging Site with the WP Staging Plugin

WP Staging makes it easy to spin up a safe, private clone of your WordPress site for testing changes before they go live. After installing and activating the plugin, navigate to WP Staging → Staging Sites in your WordPress dashboard. Click “Create New Staging Site”, give your clone a name, and choose which database tables and files you want included. For most sites, leaving the default selections is sufficient. When you’re ready, click “Start Cloning” and let the plugin build the staging environment.
Once the process completes, WP Staging provides a secure login link to access your staging site. From there, you can test updates, themes, plugins, or custom code without risking your production site. When paired with the Pro version, WP Staging also supports pushing selected changes back to the live environment.
Creating a Staging Site with WP Stagecoach
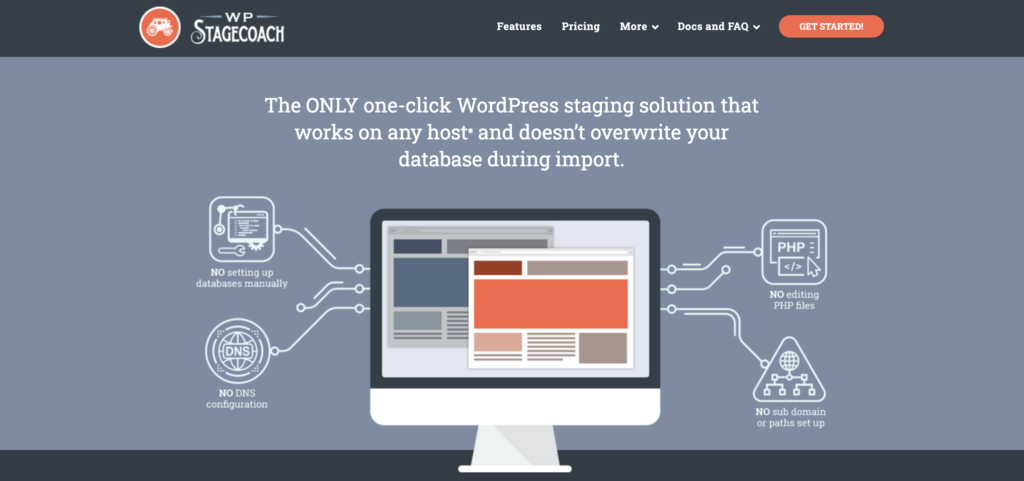
WP Stagecoach provides a quick, hosted staging environment without requiring complex server configuration. After installing and activating the WP Stagecoach plugin, go to WP Stagecoach → Staging in your WordPress dashboard. Click “Ride the Stagecoach!” to begin creating your staging copy. You’ll be prompted to set a staging site name and choose whether to import the entire database or only specific tables. WP Stagecoach also allows you to password-protect the staging site for added security.
Once you start the process, the plugin uploads your site to WP Stagecoach’s servers and generates a temporary URL where you can log in and work safely. Make any theme, plugin, or content changes you like, nothing affects your live site until you’re ready. When testing is complete, use the built-in “Import Changes” tool to selectively merge your updates back into production.
Creating a Staging Site with the BlogVault Plugin
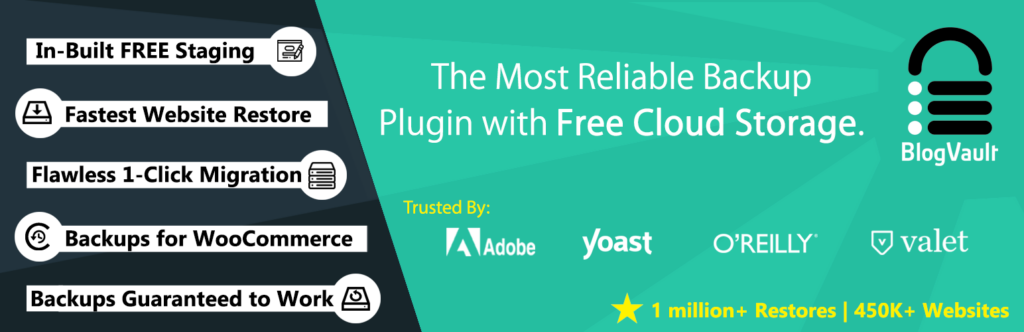
BlogVault includes a built-in staging feature that lets you create a secure test environment on BlogVault’s own servers. After installing and activating the plugin, connect your site to your BlogVault account. From your BlogVault dashboard, select your site and click the Staging option. Choose your PHP version and staging configuration, then click Create Staging Site. BlogVault will copy your site to a private staging URL with password protection enabled by default.
When your staging site is ready, BlogVault provides separate admin credentials so you can log in and test updates, new plugins, or code changes without affecting your live site. Once you’re satisfied, return to the BlogVault dashboard and use the Merge to Live feature to push your staging changes to production. You can choose to merge everything or limit the deployment to specific files and database tables. When finished, you can delete the staging environment with one click to keep your workspaces tidy.
Conclusion
The thought of creating a WordPress staging website can be stressful for many website owners, but there are many options that you can experiment with based on your tech level. If you want to ensure that changes and updates don’t impact your live website, it’s important to conduct all of your testing in a private, offline environment.
What’s your preferred option for creating a WordPress staging website?