
Multisite is a powerful WordPress feature that allows you to create a network of websites running off of a single WordPress core installation. It’s been around since WordPress 3.0 and quite a lot of big sites use it — WordPress.com, the New York Times, Harvard, and Edublogs to name a few. Read on to learn how to set up WordPress multisite.
If you have a WordPress site, you’ve got all you need to set up multisite — you just need to switch it on. So in this post, I’ll walk you through how to set up multisite, configure your settings, and manage your network.
What is WordPress Multisite?
A multisite network is a collection of websites that all share the same single WordPress installation, database, plugins, and themes. The individual sites in a network are virtual sites, meaning they don’t have their own directories on your server, though they do have separate directories for media uploads and separate tables in the database.
Multisite was originally added to WordPress as a feature back in 2010. It replaced WordPress MU (multi-user), a feature that enabled users to set up a network of blogs. Multisite took this a step further, enabling users to host different sites on a single WordPress installation, i.e. one site on a network might be a blog and another an online shop.
With multisite, you can have as many websites as you want in your network. To give you an idea of how multisite can scale, WordPress.com has more than 37 million websites while Edublogs hosts more than 4.3 million sites.
There are a few key differences between a standalone version of WordPress and a multisite network:
- Super Administrator: On a regular WordPress installation, the highest level of permissions is “administrator.” With a multisite installation, on the other hand, the highest level is “super administrator,” which has access to every site on the network.
- Network Admin: Each sub-site on a multisite network has its own dashboard, just like a standalone version of WordPress. But there is another admin dashboard called the “network admin” where super admins can manage network-site settings.
- Plugins and Themes: In multisite, themes and plugins are installed in the network admin and are available to use on any site in the network. However, there are two ways in which a theme or plugin is activated: super admins can “network enable” a theme or “network activate” a plugin, making the theme or plugin available network-side; and plugins and themes can be activated on individual sub-sites just as you would for standalone WordPress sites.
- Files and Folders: When you enable multisite, your site’s wp-config.php file will have some extra lines of code added, which activate multisite and let WordPress know it’s up and running. Your wp-uploads folder will also contain a sub-folder for each site in the network, with the site’s numerical ID as its name.
- Database: The database for a standalone WordPress installation has 11 database tables for storing a site’s content and settings. With multisite, nine of these tables are duplicated for each site.
Why use Multisite? The Pros and Cons
You may understand what the Multisite feature does, but be unsure if it’s the right solution for you. That’s a difficult question for an article like this to answer for you but you should consider Multisite if you are planning on having a network of blogs and foresee it being difficult to manage them all with the traditional approach of separate installations with separate logins for each site. In that situation, Multisite can make it easier to manage those blogs by giving you a single login for the WordPress admin panel, allowing you to easily update themes, manage users, etc.
That being said, Multisite has some notable downsides you should be aware of:
- Editing a theme will cause those updates to appear throughout your entire network of sites. That may be exactly what you want, or it may be a hassle.
- All users will be added as guests onto your entire network of WordPress websites. However, there are WordPress plugins available that allow you to modify user roles by sites.
- There is no way to restrict plugins to certain sites on your network.
- There are some plugins and widgets that aren’t compatible with Multisite.
- There can be additional technical challenges involved with hosting a Multisite network. For instance, changing hosts can be difficult. However, if you’re working with an experienced WordPress host, they can help you migrate smoothly.
If you think Multisite is the right solution, the steps to getting it set up and running are surprisingly fast and easy…
What You Need to Get Started with WordPress Multisite
If you’re running a WordPress website, you already have all you need to get started with multisite. But more specifically you need:
- Hosting: Make sure your web server is capable of hosting multisite. Shared hosting isn’t always a great idea as a multisite network is more resource-intensive than a standalone WordPress site. As a WordPress host, we’re a bit biased but we strongly recommend that you start your Multisite network using a WordPress hosting provider who has experience supporting a WordPress network.
- Knowledge: You’ll need to know how to edit WordPress files.
- Access: You’ll need to edit some WordPress files, so you’ll need access to your site directory via FTP, cPanel or some other method.
Choosing a Domain Structure: Subdomains vs. Subdirectories
One more thing to consider before activating multisite is whether you want to use subdomains or subdirectories, and this will mostly depend on whether you’re creating a new website using multisite or adding multisite to an existing WordPress installation.
- Subdomains: Each sub-site in your network will have an URL like subsite.yourmultisitenetwork.com, where “sub-site” is the individual site and “yourmultisitenetwork” is the domain name of the main site of your network. If you want to allow your network’s users to create their own sites, you’ll need to have wildcard subdomains activated for your hosting.
- Subdirectories: Each sub-site in your network will have an URL like yourmultisitenetwork.com/subsite. It’s worth noting that you can’t use this option if you’re setting up multisite on an established WordPress installation as it may cause clashes with existing URLs.
Activating WordPress Multisite
Now let’s go through the steps needed to enable multisite on a fresh installation of WordPress.
First, you need to edit a file in your site’s directory.
1. Open your wp-config.php file and find the line that reads:
/* That’s all, stop editing! Happy blogging. */
2. Just above that line, paste the following line:
define( ‘WP_ALLOW_MULTISITE’, true );
3. Save your wp-config.php file.
Next, you need to log in to your WordPress site and set up your network.
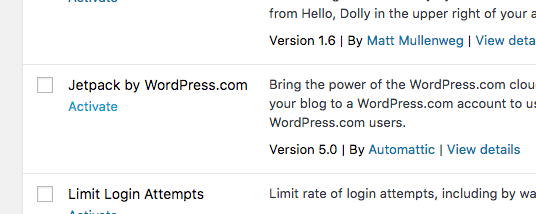
4. Once logged into your site, go to Plugins > Installed Plugins and deactivate all of your plugins. You can either do this for each plugin individually or select all and deactivate in bulk.
5. Go to Tools > Network Setup. You’ll be prompted to choose whether you want to use subdomains or subdirectories. Select the option that works best for you.
6. Give your network a title and enter your email address.
7. Click “Install.”
Lastly, you need to edit two files in your site’s directory.
8. After installing multisite in the last step, you will be taken to the “Enabling the Network” screen.
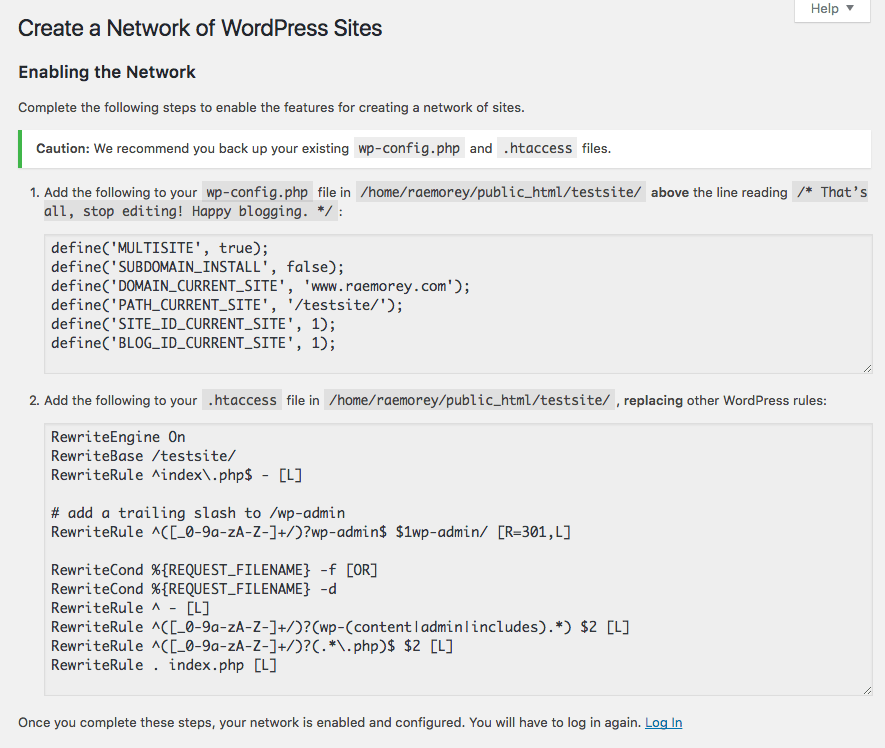
9. In your site’s directory, open your wp-config.php and .htaccess files and edit them according to the instructions on the screen. If you can’t find your .htaccess file, it’s probably because it’s a hidden file so update your settings so you can view the file and edit it. If you don’t have an .htaccess file, simply create a new one.
10. Save both files.
WordPress multisite is now installed. When you refresh your site, you’ll be prompted to log in, and when you do, you’ll see the multisite dashboard instead of the regular WordPress dashboard.
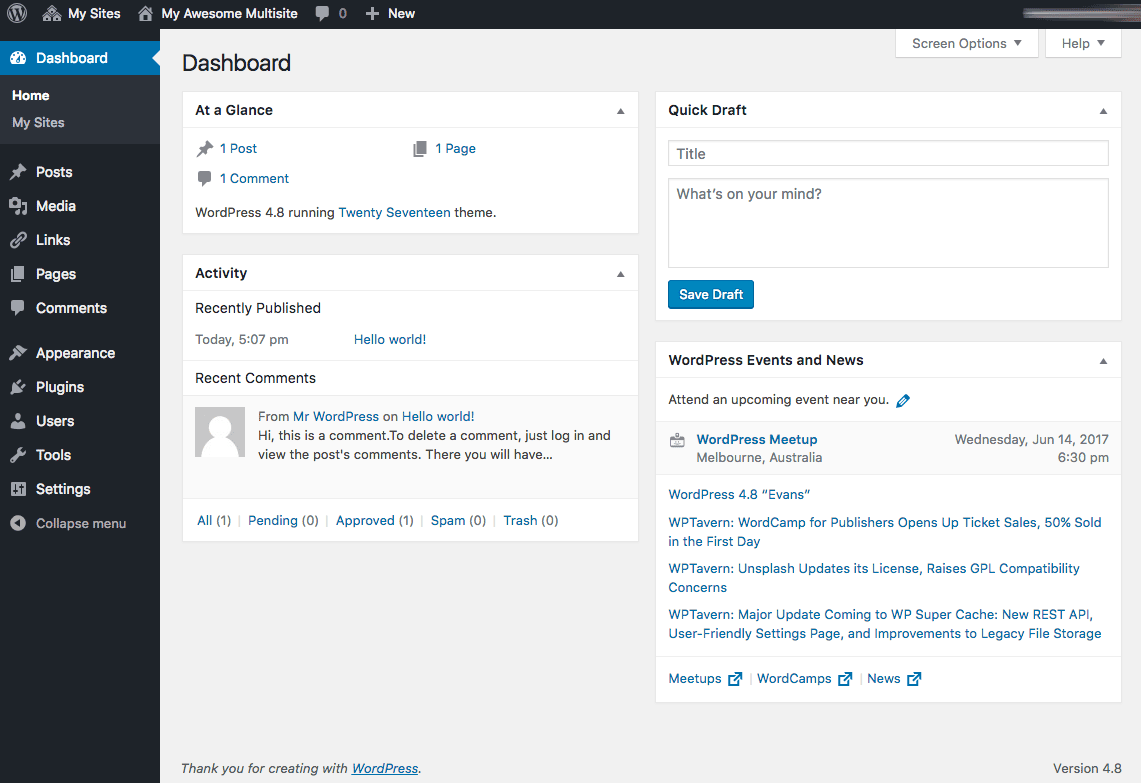
You’ll notice a few small differences compared to the regular WordPress dashboard: there’s a “My Sites” link in the top right, which you can click to return to the network admin dashboard; there’s also a “My Sites” sub-menu item under “Dashboard,” which, when clicked, will display a list of sites in your network.
Adding New Sites to Your Multisite Network
To add a new site to your multisite network:
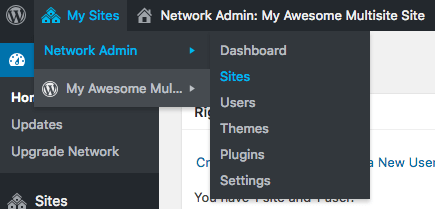
1. Click on My Sites > Network Admin > Sites, then click “Add New”.
Alternatively, if you’re already in the Network Admin dashboard, you can click on “Sites” in the sidebar.
2. Enter the site address you want for your new site, give it a title, choose a language, and enter an admin email.
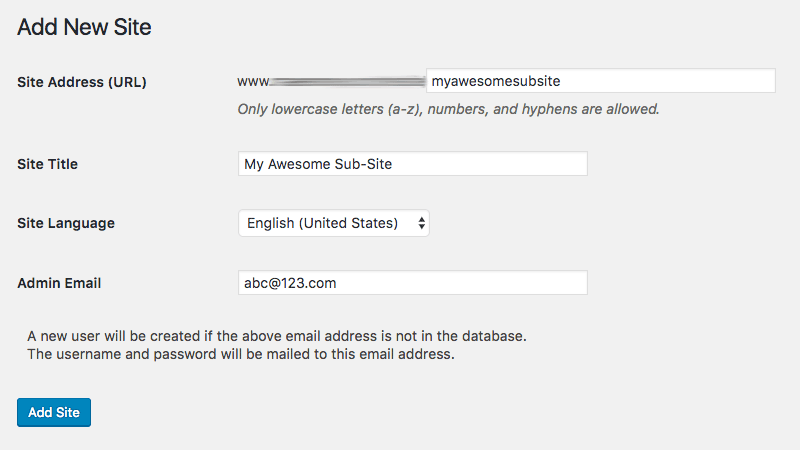
3. Click “Add Site” to create your sub-site.
When you go to Sites > All Sites, you’ll see all of your sub-sites displayed.
Adding Themes to Your Multisite Network
As I mentioned earlier, only users with super admin privileges can install themes and plugins and make them available for sub-sites.
To install a theme:
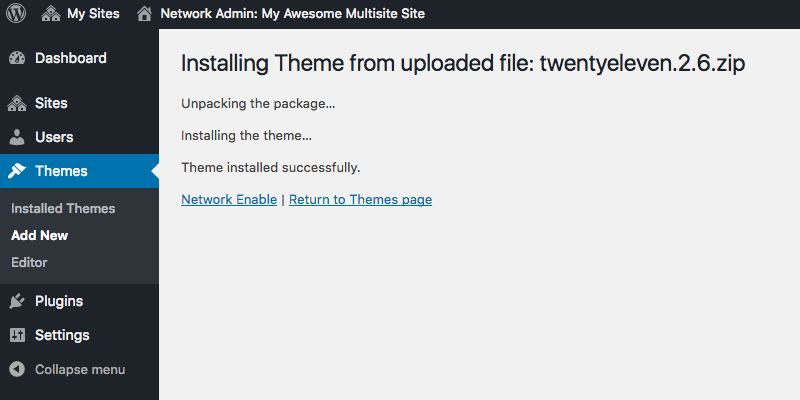
1. Go to My Sites > Network Admin > Themes and click “Add New”. Click “Upload Theme” to upload your own theme, or search for a free option on the “Add Themes” page.
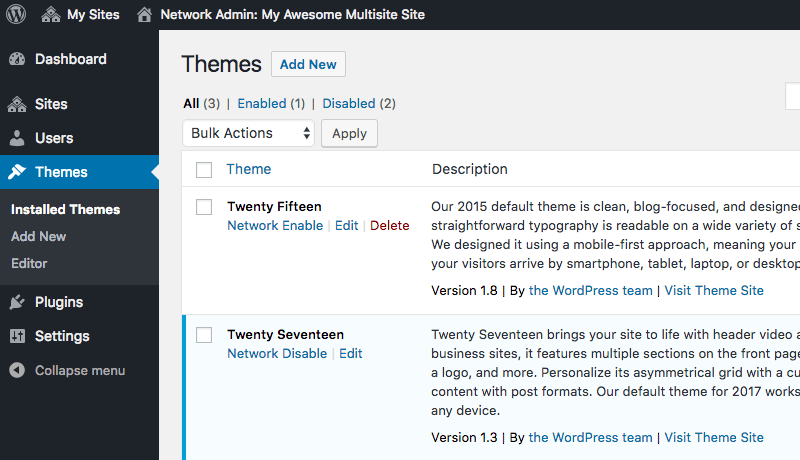
2. On the “Installing Theme” screen, click “Network Enable” to enable the theme for use on any sub-site in your network.
You can also enable themes on individual sub-sites. To do this:
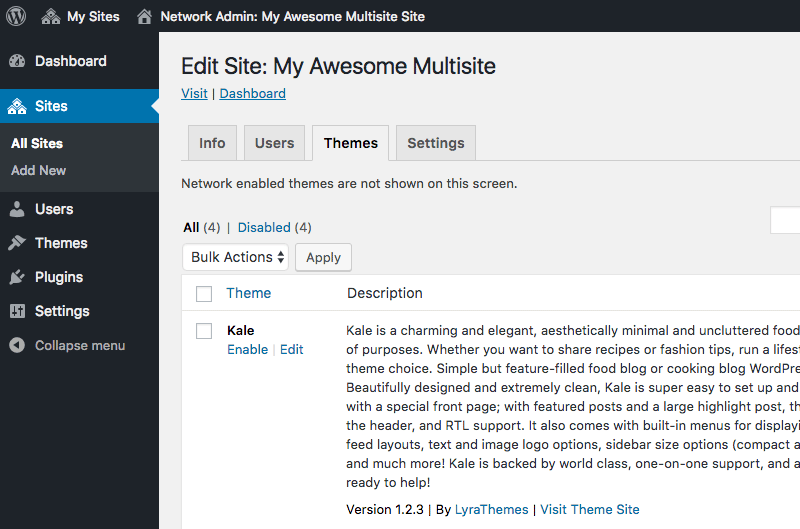
1. In the network admin, click on “Sites” and underneath the site you want to enable a theme for, click “Edit.”.
2. Click the “Themes” tab and under the theme you want to enable, click the “Enable” link.
3. When you go to the admin screen for the sub-site and click Appearance > Themes, you’ll see the theme you just enabled included in the list of themes available for activation.
Adding Plugins to Your Multisite Network
Like themes, plugins are installed by a super admin. But unlike themes, you can’t enable a plugin from the Network Admin screen to run on an individual sub-site. Instead, you can network activate a plugin to run on every site in the network, or you can go to a sub-site’s dashboard and install and activate a plugin there.
To network activate a plugin:
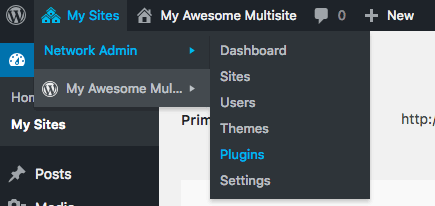
1. Go to My Sites > Network Admin > Plugins.
2. Click “Add New” and install the plugin you want to use as you would on a regular WordPress installation.
3. On the “Installing Plugin” screen, click “Network Activate.”
The plugin will now run on all sites in your network, though admins for individual sites won’t have the ability to disable it.
If you want to activate a plugin for just one site, you can install the plugin as a network admin and then site admins can activate it on individual sub-sites. To do this:
1. Follow steps 1 and 2 above to install the plugin you want to set up.
2. On the “Installing Plugin” screen, click “Return to Plugin Installer.”
3. Go to the admin dashboard for the site you want to activate the plugin for and click “Plugins” in the sidebar.
4. Under the plugin you want to activate, click the “Activate” link.
It’s worth noting that on the “Plugins” screen for individual sub-sites, there’s only the option to activate or deactivate plugins — you can’t delete or update them as only super admins can carry out these actions.
Network Settings
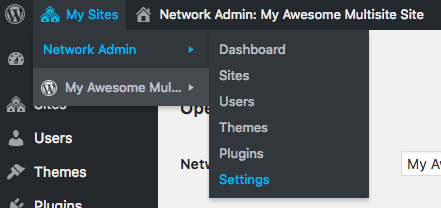
Multisite provides a range of settings you can configure to further customize your network. To access these multisite-only settings, go to My Sites > Network Admin > Settings.
The “Network Settings” screen will appear, which can be divided into six sections:
- Operational Settings
- Registration Settings
- New Site Settings
- Upload Settings
- Language Settings
- Menu Settings
Operational Settings allow you to update the name of your network as well as the network admin email.
In the *Registration Settings* section, you can choose to enable new registrations for your network and allow your users to create their own sub-sites. By default, registration is disabled.
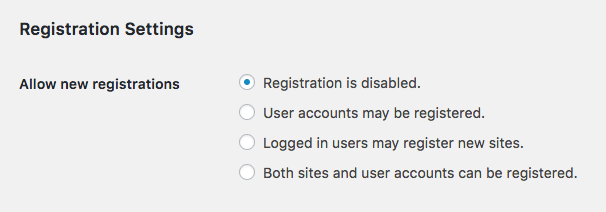
In this section, there’s also the option to limit email registrations, i.e. limit site registrations to certain domains. This is a useful option if you want to keep registrations to a certain organization or business, like a school or sports club. There’s also a further option to ban emails from certain domains.
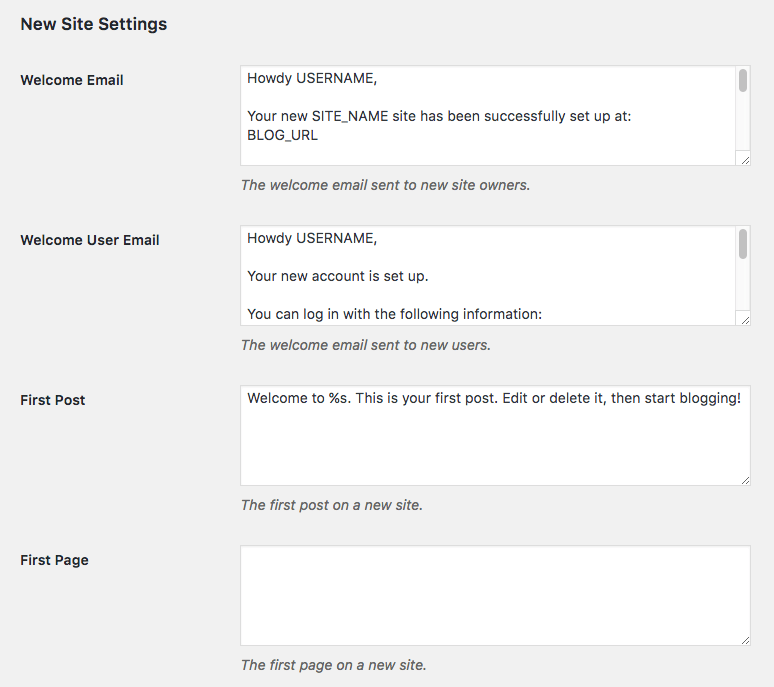
Under New Site Settings, you can modify the welcome emails that are sent out to new users on your network and even the contents of a user’s first post, page and/or comment.
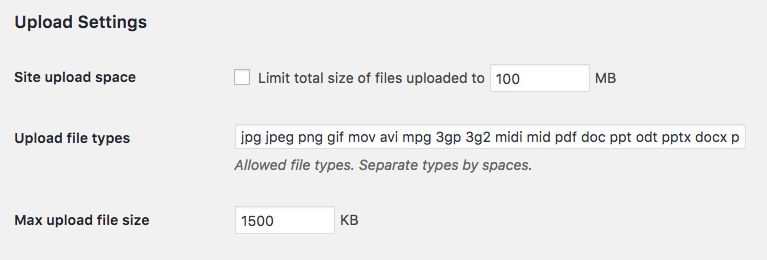
The Upload Settings section allows you to control user resource usage on your site, including the total amount of space a sub-site can use for uploads. The default is set at 100MB. You can also specify upload types and the maximum file upload size.
The Language Settings option lets you set the language for your network, while under Menu Settings you can choose whether to enable administration menus for plugins. When enabled, the plugins menu is displayed in the sidebar for sub-site admins, and they will be able to activate or deactivate a plugin, but won’t be able to install new plugins.
Conclusion
I hope you’ve found this guide to multisite useful. You now know how to set up multisite, add new sites, themes and plugins, and configure network settings, but that’s just the start. While it looks and works just like a regular standalone version of WordPress, there is so much more you can do with multisite.
If you take care of multiple client sites, multisite can help you manage all of your sites in one hit. I’d also highly recommend you check out plugins that can help you extend how multisite works, like Domain Mapping or even Pro Sites, if you want more advanced options for monetizing your network.
If you want to learn more about how multisite works, check out these resources in the WordPress Codex:
- Before You Create a Network: A few things to keep in mind — such as whether or not multisite is the right solution for you — before setting up a multisite network.
- Multisite Network Administration: A useful guide to advanced administration for multisite networks.
- Configuring Wildcard Subdomains: A straightforward guide on how to set up wildcards for a subdomain multisite configuration.
If you’re interested in hosting for your new WordPress Multisite, we’d love to talk. Pagely has over a decade of experience specializing in high-demand WordPress sites for some of the world’s biggest brands. See our knowledgebase for answers to specific questions about how we support Multisite.