
If you run a large website, a membership site, or simply need to give other people access so they can manage, edit, or contribute to your site, WordPress user roles and permissions let you control what users can and can’t do.
WordPress provides six default user roles, each with its own set of permissions and capabilities. And there’s good reason for this – you don’t want just anyone to have open access to your site.
While some users, such as site owners, will have overarching access to do practically anything they want, other users only need limited access to options and settings. After all, in the name of keeping your site secure, you wouldn’t give a casual blog contributor access to your plugins, or allow users who’ve register on your site to leave comments additional access to the post editor.
In this post, I’ll explain the different WordPress user roles and their capabilities. Then I’ll walk you through how to manage users in the WordPress admin, the best plugins for customizing roles, along with best practices when dealing with user permissions.
WordPress User Roles
The WordPress user management system is based on two concepts: roles and capabilities.
A role is essentially a set of permissions, called capabilities, that you assign to a group of users on your WordPress site.
A capability is a specific action that a user is permitted to complete. For example, editing a post is one distinct capability while publishing a post is another capability.
WordPress has six default user roles:
- Admin
- Editor
- Author
- Contributor
- Subscriber
- Super Admin
There are many types of capabilities, including writing and editing posts, creating pages, defining links, creating categories, moderating comments, managing plugins and themes, and managing other users, just to name a few.
To give you a clearer picture of how all this works, let’s look at each of the roles and their associated capabilities in more detail.
Administrator
The administrator is the most powerful user role with the most capabilities. As a site owner, when you create a new instance of WordPress you’ll be automatically assigned this role.
Administrators, usually referred to as “admins,” have unrestricted access. They can install, configure, and remove plugins and themes, as well as create, edit and delete new and existing pages and posts. Admins can also manage other users, including adding and removing users, updating user information (such as names and passwords), and even delete other admins.
Since this role provides full control over a WordPress site and all its settings- including security, privacy, and editing code- it’s usually reserved for site owners. However, it’s not unusual for site owners to assign this user role to developers and maintenance services that require a higher level of user permissions.
On WordPress Multisite networks, admins have different user permissions. More on this below.
Editor
As the name suggests, this user role assumes responsibility for managing content.
Editors can add, edit, publish, and delete any posts and media, including those written by other users. Editors can also moderate, edit, and delete comments, and also add and edit categories and tags.
While editors have unrestricted access to editing content and overseeing the work of authors and contributors, they don’t have access to site settings, such as plugins, themes, and users.
Author
The author role has far fewer permissions than editors. They can create, edit, and publish their own posts. They can also delete their own posts (even when they’re already published), but they cannot edit or delete posts written by other users.
Authors can’t create or edit categories, but they can choose from existing categories and create new tags to add to their posts. They can also upload images and other media files. Like editors, authors don’t have access to settings, plugins, themes, or user profiles other than their own. Unlike editors, authors can’t moderate comments, approve, or delete comments.
Authors are responsible for creating and editing their own content and nothing more. While it is a fairly low-risk role, it’s important to keep in mind that users assigned the author role can delete their own published posts, which might be a concern if you hire writers for your blog.
Contributor
The contributor role is basically a stripped-down version of the author role. Users who are assigned this role can perform three main tasks on your site: read all posts, create and edit their own posts, and delete their own posts. However, contributors can’t publish their posts.
While this role is ideal to assign to writers who contribute content to your site, it does have one major drawback – contributors can’t upload media. This means that if writers want to add images or other types of media to their posts, they’ll need a user with media library permissions to do it for them.
Like authors, contributors can’t create new categories but can add existing ones to their posts. They can also create and add tags to their posts. Contributors can view comments, even those awaiting moderation, but they can’t approve, edit, or delete them.
Contributors don’t have any administrative permissions, such as access to settings, plugins, and themes.
Subscriber
The subscriber role is the default role assigned to new users if you enable registrations on your site. This role has the least number of permissions of all the roles. Basically, subscribers can update their own user profile, read the content on your site, and leave comments.
Subscribers don’t have any administrative permissions (i.e. they can’t access site settings, plugins, or themes), and they can’t edit or delete content.
This user role is useful if you require users to log in before they can leave a comment on a blog post.
WordPress Multisite Role: Super Admin
The super admin role is only available for Multisite networks. Super admins have overarching permissions to manage networks, including making high-level changes such as adding and deleting sub-sites.
Super admins can also manage the network’s users, themes, and plugins, and have unrestricted access to settings, security, privacy, and code.
The administrator role is somewhat modified on Multisite networks. They can no longer install, upload, and delete themes and plugins, or modify user profiles. While super admins can decide what plugins and themes to install on a network, individual sub-site admins can only choose whether or not to activate them.
Extra Option: “No Role for This Site”
There’s a seventh option worth highlighting- “no user role for this site.” This option is useful if you want to keep an inactive user’s profile information on your site and not delete it.
For example, say a writer or staff member has left your business and no longer needs permissions for your site. Obviously, you don’t want to continue giving them access to your site settings and content. But if they’ve contributed content, such as blog posts, you might want to keep their byline and author profile. In this case, you could reassign the user the “No user role for this site” option.
Creating New Users and Assigning Roles
There are two ways to add new users to your site: by enabling site registration or adding new users manually.
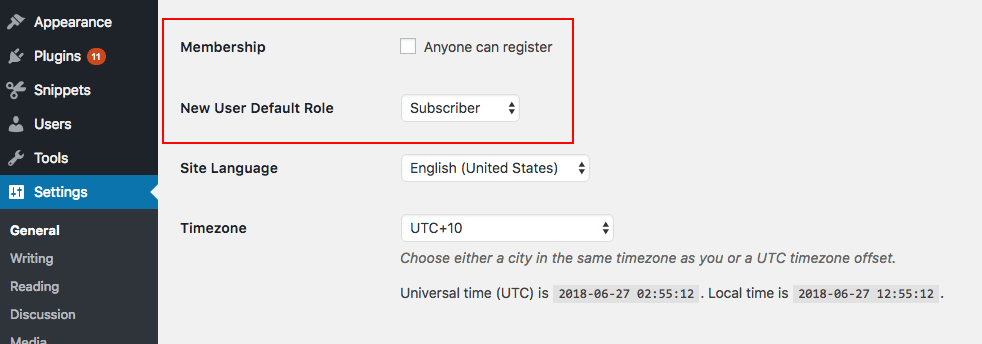
Enabling site registration is useful if you run a membership site and want to allow users to register to create their own account. You can enable this option by going to Settings > General and checking the option “Anyone can register.”
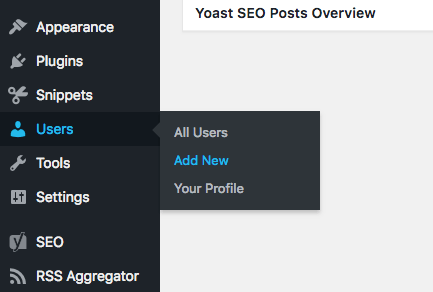
Alternatively, you can add a new user manually. To do this, go to Users > Add New.
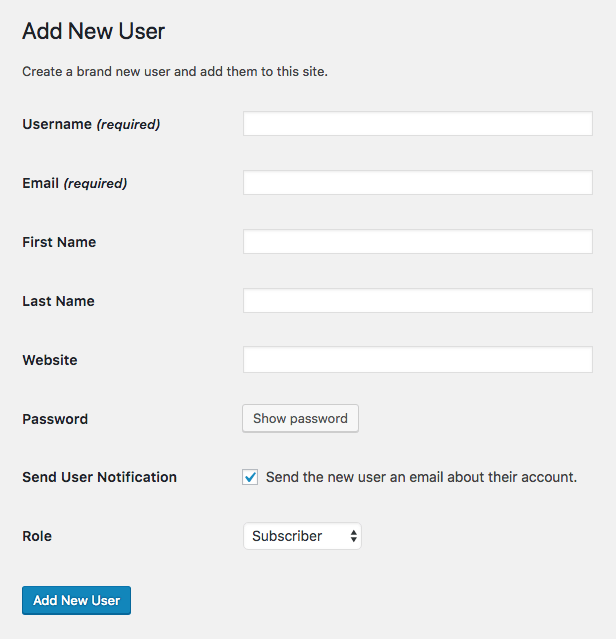
A new screen will appear where you can fill in all the necessary details for the new users, including their name, email, and website. You can also choose to set their password, send a notification with details of their new account, and assign the user a role other than “subscriber.”
Once you click “Add New User,” the user will be added to your WordPress database and their details will appear under All Users.
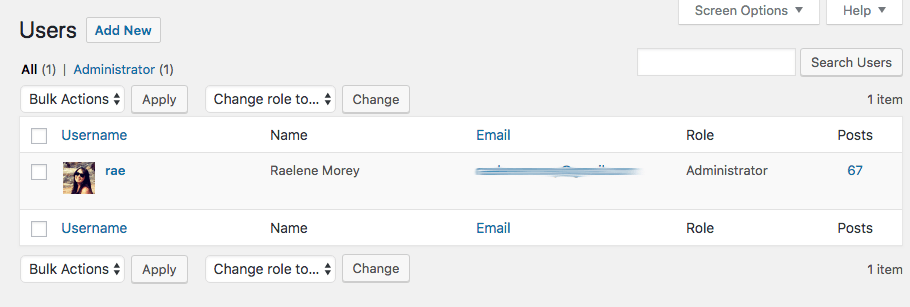
As you can see above, there’s only one user for my site. Since I’m the site owner, I have the administrator user role.
In order to edit your user profile, simply go to Users > Your Profile where you can update your name, email, website and author biographical info, as well as your profile picture and password, among other details.
If you have the admin or super admin role and want to modify another user’s profile information, go to Users > All Users and select the user you want to edit.
The Case for Custom User Roles
Big brands such as Facebook, Microsoft, Wired and Quartz rely on WordPress to power some of their publications. So having appropriate user roles is crucial when assigning editors, authors and contributors to produce and manage content.
But while the default WordPress user roles have been designed to have capabilities that fit the requirements of modern websites, they don’t meet the needs of all websites.
One common example of why you might want to create custom roles is related to adding guest or staff writers to your blog.
If you want to add a new user to your blog to contribute content, then you might assign them the author or contributor role. However, by default authors have the ability to publish posts, which is a capability you might not want to give a new member of your team right off the bat. Users with this role can also edit and delete published posts.
With that in mind, you might think the contributor role would be a better option since it has more restricted access. However, contributors, while not being able to publish or edit existing content, can’t upload files to the media library, including images for their own posts.
So when assigning roles to new writers, this puts you in somewhat of a quandary: do you give them access to do their job with added permissions to make far-reaching changes to your published content, or play it safe with the result of not giving them enough access to complete their tasks, while potentially creating more work for others with access to the media library?
This is where being able to customize and create new user roles on your WordPress site becomes a useful ability to have. But since WordPress doesn’t provide options out-of-the-box for customizing user roles, you’ll need to use a plugin to modify user roles and permissions.
How to Create and Customize User Roles in WordPress
There’s a WordPress plugin for just about anything you can think up, and user roles are no exception. Here are 6 options for customizing user roles and capabilities.
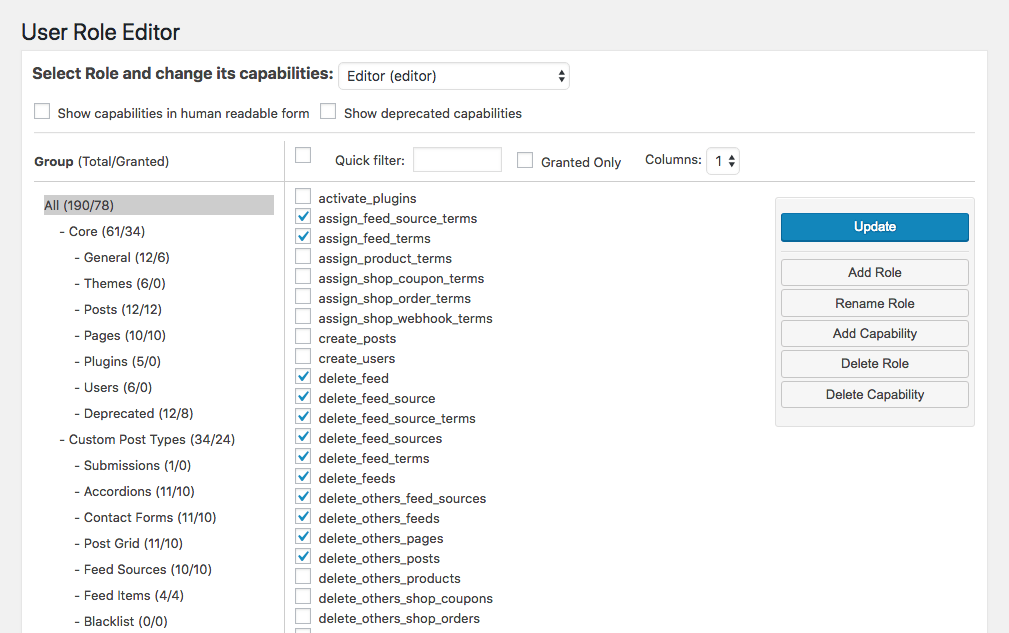
1. User Role Editor
User Role Editor is the most popular way to customize the default WordPress user roles, with more than 600,000 active installations. This free plugin lets you modify user capabilities in just a few clicks. You can also create new roles and assign selected capabilities to existing users.
Once you’ve installed and activated the plugin, a new User Role Editor option will appear in the WordPress admin (Settings > User Role Editor) where you can edit each of the default user roles, create new roles, add capabilities, and delete roles and capabilities.
A new “Capabilities” option will also appear when you hover users on the All Users screen, enabling you to customize capabilities for individual users.
It’s a powerful plugin that gives you complete access to customize roles how you like and is a great option should you need to modify permissions for your site.
2. Members
Members is a powerful user, role, and capability management plugin for WordPress. It puts you in control of permissions on your site by providing a user interface for WordPress’ powerful user management system, which is traditionally only available to developers who know how to code this by hand.
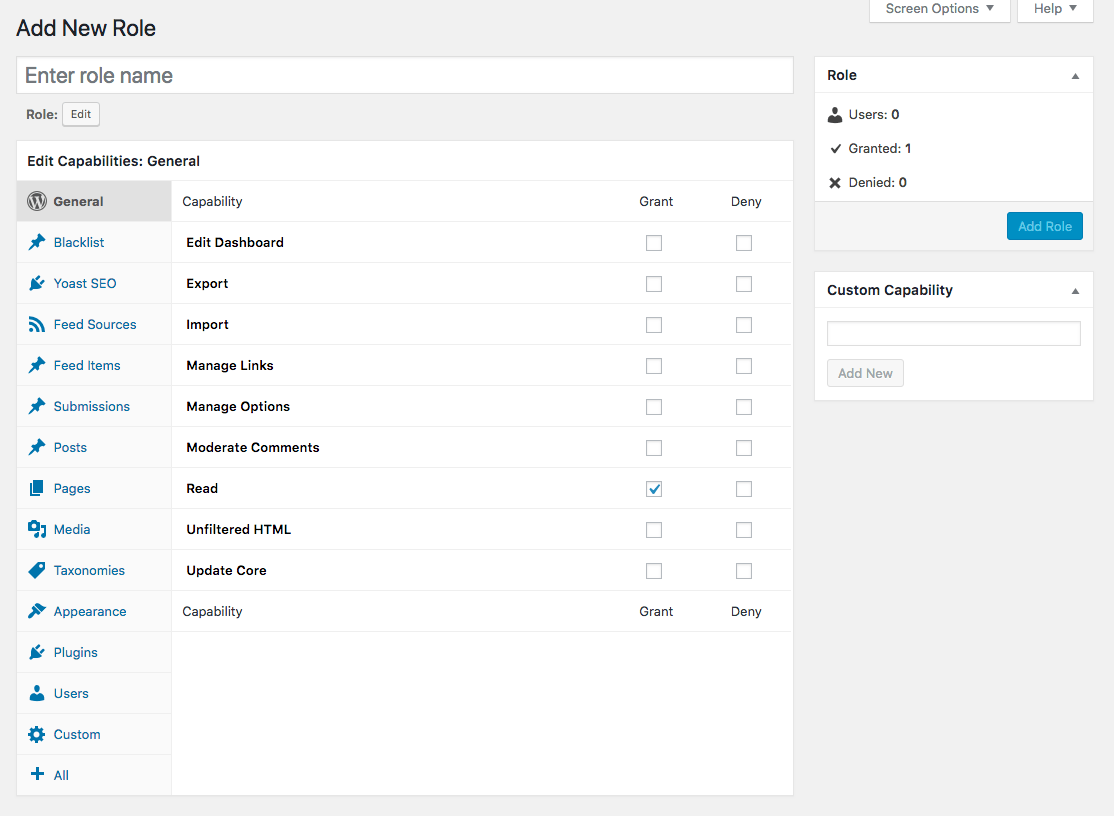
When you install and activate this plugin, it adds two new menu items to the WordPress admin: Roles and Add New Role. Roles displays all the available user roles along with the number of users that have each role.
The Add New Role screen lets you create new user roles. All you need to do is give your role a name and check each of the capabilities you want to assign to the role.
Other features include the ability to assign multiple roles to a user, explicitly deny capabilities, and clone roles. There are also shortcodes available for controlling who has access to content.
3. WPFront User Role Editor
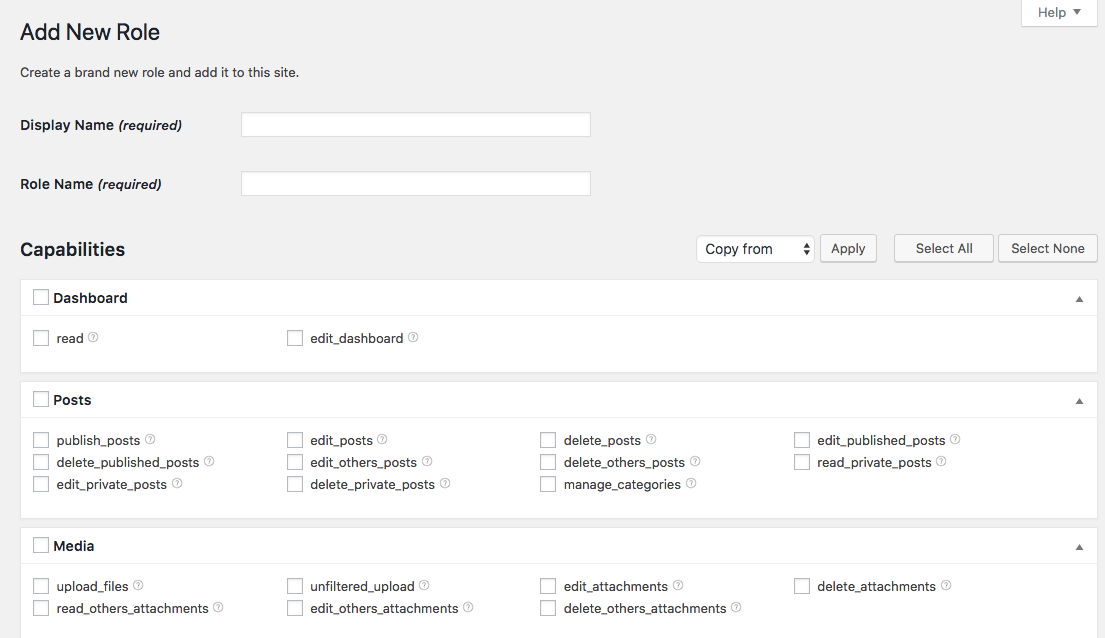
WPFront User Role Editor is another powerful plugin for creating and customizing user roles. Once installed and activated, the plugin adds a new Roles option to the WordPress admin, with options for adding new roles, restoring defaults, adding and removing capabilities, and more.
Like other plugins mentioned in this post, WPFront lets you easily create new roles and assign capabilities via an intuitive interface.
A nice feature is the ability to restore the administrator, editor, author, contributor, and subscriber roles to their default settings after you’ve made modifications. It’s also possible to create redirects for user roles, so after logging in, users will be redirected to different pages of your site, or even different URLs.
There’s a Pro version of this plugin that offers additional features, including media library permissions, Multisite support, custom post type permissions, and more.
4. Capability Manager Enhanced
Capability Manager Enhanced provides a simple way to manage the default WordPress user roles.
After you install and activate this plugin, it adds a new Capabilities menu item to the WordPress admin. From this screen, you can view and change capabilities for any role, add new roles, copy existing roles into new ones, and add new capabilities to existing roles.
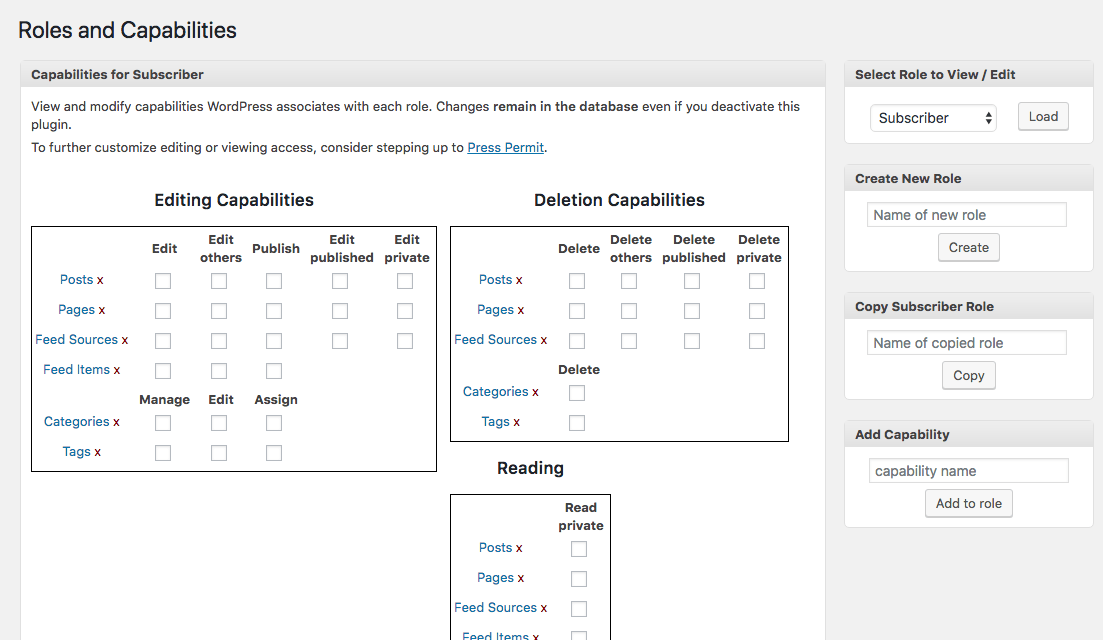
There’s also capability negation, which allows you to set any capability to granted, not granted, or blocked. Other features include the ability to copy any role across all Multisite network sites, mark any role for auto-copy to future network sites, backup and restore roles and capabilities so you can revert your last changes, and reset roles and capabilities to the WordPress defaults.
5. Advanced Access Manager
Advanced Access Manager is a simple but straightforward plugin for customizing user roles, creating new ones, and managing user permissions. After installing and activating the plugin, you’ll notice a new AAM menu item in the WordPress admin, which takes you to this screen:
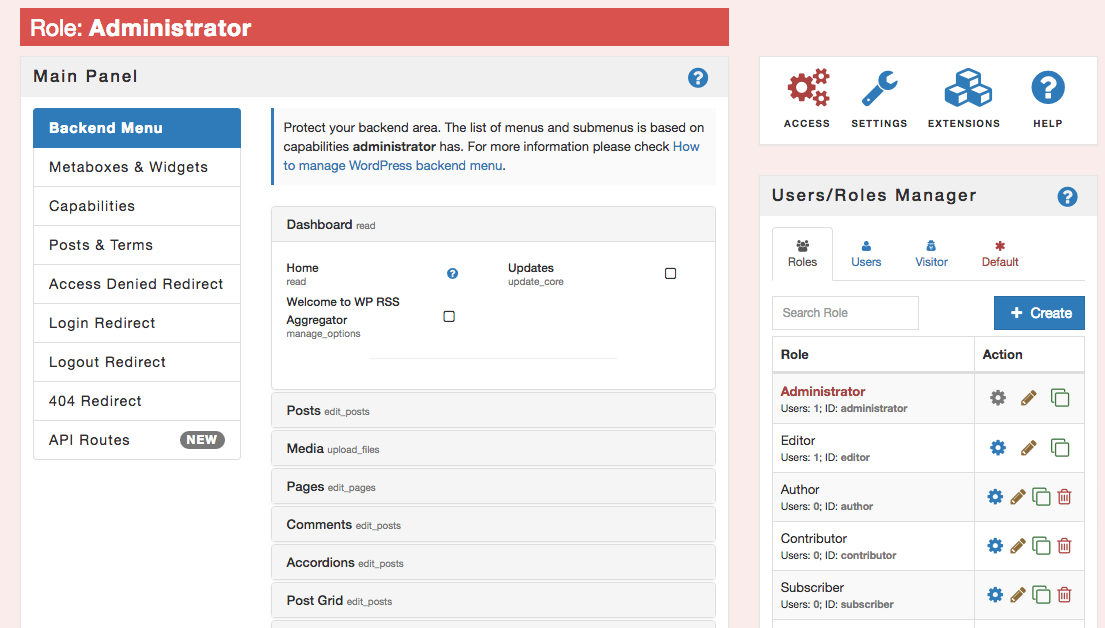
The options in the top-right let you switch between managing roles and capabilities, controlling settings for the plugin, and adding Pro extensions for great functionality.
A unique feature of this plugin is the ability to manage user access to the WordPress admin, as well as create and manage temporary user accounts. This plugin is also developer-friendly, with lots of hooks, WordPress REST API integration, and numerous abstract layers to simplify programmatic access management.
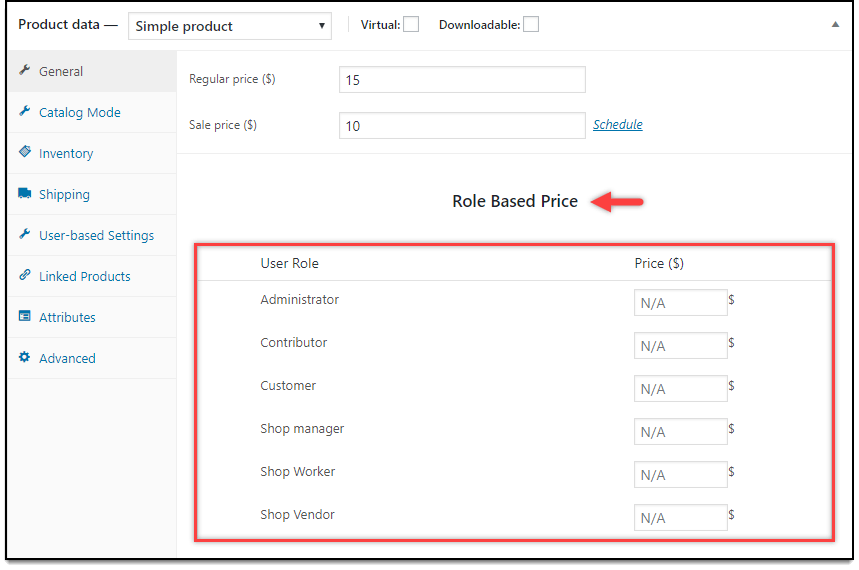
6. ELEX Role Based Pricing Plugin
With a little bit of a different use case, this plugin allows you to create role based pricing on your WooCommerce store, as well as create additional user roles on your site. Based on the roles defined on your store, you will be able to set up prices for each product based on those roles. Particularly useful when managing a wholesale store on WooCommerce, different roles can see pricing based on how you’ve defined it for them.
You can also use this plugin to disable the eCommerce functionality of a Woo store. With a single click you can convert your store into a catalog for all guest users, and allow shopping functionality only to registered customers. You can also configure price adjustments and modify tax display options.
Best Practices for Managing WordPress User Roles and Capabilities on Your Site
Understanding the various user roles and capabilities that WordPress provides is key to managing them effectively- but so is knowing how to apply them correctly and customize where appropriate.
Whether you run a large website or a small blog with only a handful of users, here are some best practice tips to help you manage the user roles and capabilities on your WordPress site:
1. Only give users the level of access they need
This one is key for three reasons: security, to top users making unapproved changes, and to prevent content being accidentally deleted.
Before assigning a user a role, consider what tasks they will need to perform on your site and only assign them the role that gives them the capabilities they need and nothing more.
2. Limit how many users have the administrator role
While some might recommend that you have only one administrator and assign other trusted members of your team the editor role, this isn’t always practical. There will no doubt be times when other people, such as developers and maintenance services, need higher level access to WordPress permissions.
On larger sites, you might find several people are assigned the admin role. If this is the case for you, make sure the people who have this role use strong usernames and passwords (enable two-factor authentication, if possible). Also, regularly review the admins for your site and reassign them a new role or remove users where necessary.
3. Regularly review user roles and capabilities
Whenever you carry out site maintenance, review user roles too. Start by checking how many users you have for each role and reassigning users to different roles if you feel the tasks they perform on your site don’t quite match the capabilities of their role.
For larger sites, this is an important practice if you regularly have new staff members joining your site or former employees who no longer require site permissions.
Customize roles to give users only the capabilities they need
As we’ve covered in this post, the default user roles in WordPress don’t quite meet the needs of all websites. So there might be times when you find a role doesn’t provide the necessary capabilities you need for a particular user. This is where creating a new user role or customizing an existing role comes in handy.
Each of the plugins listed above will let you create and customize user roles and offer added features for better managing the WordPress user management system. If you decide to use a plugin, do your research and choose the tool that best suits what you want to achieve as far as roles and capabilities go for your site.
Conclusion
Whether you run a large website with many users or a membership website with on-site registration, the WordPress user management system provides a solid foundation for managing the many people who use and contribute to your site.
Of course, as an admin, you are free to modify user roles and capabilities how and when you like! So whether you decide to temporarily reassign a user to the admin role, or choose to create a new role with only select capabilities to cover essential tasks, it’s your prerogative- especially when you can simply revert any changes you make and return to the defaults.
For advanced control over user management, be sure to check out the plugins listed above. They will give you greater control and options for customizing roles and capabilities. And follow the best practice tips above to ensure your site remains organized and secure.