
One of the more common ways to manage how WordPress displays content is the ubiquitous column. And while the integration options have changed in recent years, columns remain easy to add to most WordPress websites.
But before we examine the ‘how,’ let’s ask the all-important ‘why.’
Why Add Columns to WordPress?
While it may be true that some users find columns distracting, there are cases where using columns in your posts and pages makes aesthetic sense. For example, say you want to:
- Present content for side-by-side comparison and analysis
- Create a page with data-rich material, and a column-based layout would make for easier comprehension
- Spice up your posts, highlighting and organizing your content with unique, multi-column layouts
How to Add Columns to WordPress
So how do you create columns for your WordPress posts and pages? There are typically four distinct approaches, and which method you select depends on your personal preference and current configuration.
Gutenberg Blocks
If you are hip to the WordPress block editor dubbed Gutenberg, designing custom columns is now a baked-in component of your WordPress experience, and likely the simplest path column nirvana. Gutenberg blocks are also mobile-friendly, meaning this route should produce responsive columns with minimal hassle.
Jeff from the Pagely team produced a brief video walk-through on how to construct both two and three column layouts via Gutenberg:
In summary, the quick guide for creating new columns in Gutenberg:
- While in the post editor, move your cursor between two blocks on your page, and click the ‘Add Block’ button
- Now choose the ‘Columns’ block
- This will insert a 2 column block, and you can adjust the number of columns via the ‘Block Details’ area of the dashboard
Classic Editor + Plugins
For those of us that are the digital equivalent of Charlton Heston and his rifle, Classic Editor has column options sans Gutenberg – they just typically call for a WordPress plugin.
For years, the Column Shortcodes plugin by CodePress was the default choice, but the newer (and more actively updated) version you’ll want to explore is Lightweight Grid Columns from Tom Usborne.
After installing the plugin, you’ll see a new icon in your TinyMCE editor:
![]()
Click that icon to get started, and a pop-up window will appear. This is where you enter the percentage width for each column, and for a 3 column layout, set each column width to 33%, except for the mobile view (in most cases.)
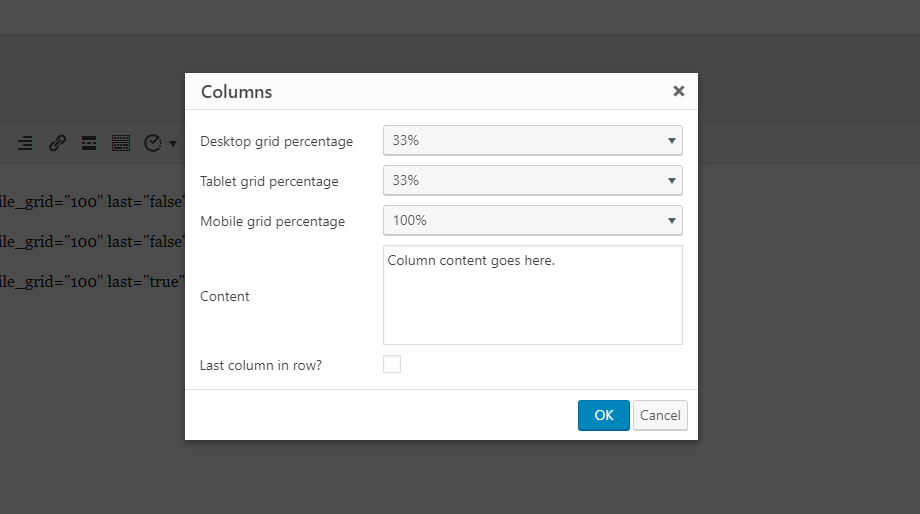
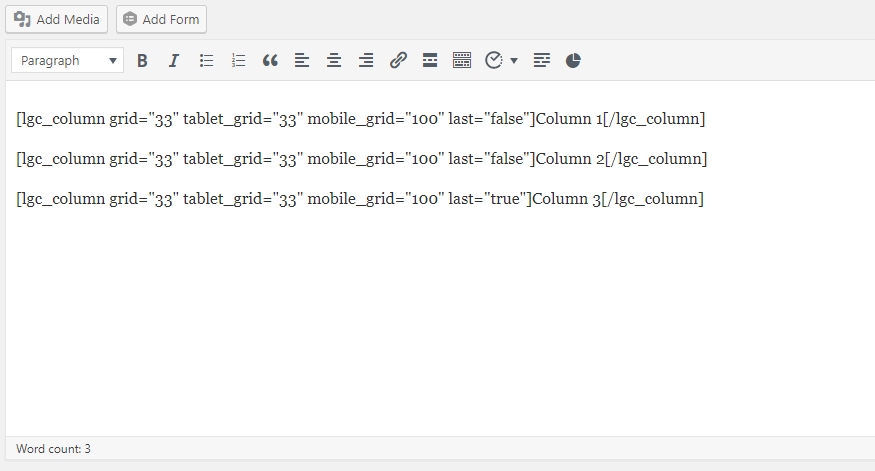
This process inserts the related shortcodes into your post, and be sure to identify the last column using the ‘Last column in row’ checkbox.
Themes and Page Builders
There are several WordPress themes that come equipped with varying options for columns, and every established page builder has column support built-in. Divi, Elementor, Beaver Builder and Visual Composer all implement an assortment of post and page layouts as part of their core functionality.

Check your theme or page builder’s documentation for more detail on how they handle columns. And if you are starting a new WordPress website, add ‘multi-column support’ to your theme search filters.
Custom CSS/HTML
Utilizing HTML with inline styles to create columns in WordPress makes sense if you need to deploy columns sporadically. Put simply: use a plugin if you plan to use columns regularly, and HTML for occasional column action.
It’s worth noting that it does help to be comfortable with CSS properties like width, padding, and float before taking this direction. Remember that most WordPress themes handle inserted HTML & CSS in distinctive ways. Many run with predefined classes, and the padding results you get will vary from one theme to another. Be sure to check your theme’s documentation or support if you run into any style-related troubles.
To create a three-column layout, use the following code:
<div style="width:30%;padding:0 10pt 0 0;float:left;">

First Column

</div>

<div style="width:30%;padding:0 10pt 0 0;float:center;">

Second Column

</div>

<div style="width:30%;padding:0 10pt 0 0;float:right;">

Third Column

</div>
The values for width, padding and float will vary depending on your theme’s layout and the number of columns you want. Need more help? Refer to the CSS-specific documentation for these styles: width, float, and padding.
Bonus: Add Columns to the WP Dashboard
WordPress columns can do more than help style your posts. One example is the Admin Columns plugin, which allows you to add and sort columns in the WP dashboard.

That should cover it – the why and how of rocking columns in your WordPress website. Which is your preferred method to create columns in WordPress? Let us know in the comments below.
And for more tips like this one, check out our compilation of WordPress Tutorials.