
A brand new business might shell out $3K on a website and think it’s getting a bargain. However, when prospective customers start running away in droves because the site is:
- Slow
- Buggy
- Confusing
- Frustrating
- Unsafe
- Broken
Well… It’ll quickly prove to be one of those “you get what you paid for”-kind of situations.
I guess what I’m saying is that if you want a WordPress site for your business or for your clients’ businesses that’s going to knock visitors socks off and become a conversion generation machine, then a quality assurance plan is a must. And you’re not going to get that by rushing through a site or spending very little money or effort on it.
By adhering to a strict schedule, referring to rock-solid documentation, and testing your site from every angle, only then can you ensure a top-notch experience for every visitor. This is what a quality assurance plan will do for you.
Everything a WordPress Quality Assurance Plan Needs
Look, there’s absolutely nothing wrong with trying to get a WordPress site built on the cheap. The cost of a really well-done website can be daunting if your business isn’t generating revenue yet.
That said, there’s no excuse that justifies cutting corners once you’re on the verge of or even in the middle of your business booming. There’s just too much at risk to not have an experienced and talented developer handling your build and a team of QA experts ensuring that all the i’s are dotted and t’s crossed. Just one too many broken links, too many seconds of wait time, or an outdated or irrelevant photo could send your visitors to the competition.
If you want to ensure that your site provides a stellar experience from the very second it launches, then you need to get a solid quality assurance plan in place. Mind you, this is not for the faint of heart. You and your team will need to review the site from every angle–and it’s something that should be done mid-development and post-development.
I assure you, though, it’s worth it in the end.
Below, I have broken out the 25 quality assurance plan tasks your website will need.
Things to do before you kick off a new web development project:
1. Prepare Yourself
Before you ever step inside WordPress… Heck, before you even purchase web hosting, have your web development and quality assurance plan all laid out. Whether you’re building one website for your enterprise or you’re in the business of building dozens of websites for clients every year, you need to know exactly what you intend to do before you go into the project.
This will include:
- A set of goals for the website and a rough plan of how you intend on meeting them through design and development.
- A checklist that encompasses every project-related task and its associated deadline. This includes things like storyboarding and wireframing to reduce the chances of discovering issues further on in the QA process.
- A QA step built into every major milestone.
- Clearly defined roles for team members and the tasks they will be responsible for.
- Delegation of QA tasks to the people responsible for vetting work done by others. (No one should be “reviewing” their own work. It’s too risky.)
- A schedule that bundles tasks based on involved personnel and task type. Too much jumping around can increase the likelihood that something gets missed.
- Define (and purchase, if needed) the tools you’ll be using to manage your project and test the website for quality assurance purposes.
Of course, this action plan needs to be fully documented. Even if you don’t intend on developing any other WordPress sites, having a written copy of everything done, every tool used, and every team member responsible for each task will help account for problems that may arise post-launch.
In the past, I’ve used a project management system like Basecamp to create my system of checklists, store my documentation, and templatize the whole thing so it’s easy to replicate for future projects.
2. Purchase Managed WordPress Hosting
Managing your quality assurance plan is going to be a lot of work. To save yourself the trouble caused by using performance-plagued web hosting plans, sign up for Managed WordPress Hosting.

Not only will your site be off to a good start by residing on a fast and secure platform, but you’ll have the added benefit of working with WordPress experts who help you maintain speed, security, backups, and manage updates going forward.
3. Create a WordPress Staging Site
There are a number of reasons to create and use a WordPress staging site after launch. However, you should also be using a staging platform to do the initial build.
Why?
Well, it gives you the freedom and flexibility to develop away from prying eyes. When a website is being built and so much attention paid to quality, disruptions and feedback from key stakeholders not involved in development can compromise the plan. So, if you can keep the site away from them until you’re ready to show them progress, that would be best.
If you have a managed WordPress hosting account with Pagely, you can easily create a staging site thru them.
4. Schedule Backups
There are many ways in which something could go wrong during development: data gets lost, code is accidentally deleted, a bad plugin is installed, etc. With so many people involved in the process, you’ll want a scheduled backup system to ensure that a recent copy of your WordPress site is always available. This will make rolling your site back to a safe and vetted version much easier.
Your web host should be able to help you set up these backups.
5. Install All Necessary Optimization Plugins
A WordPress website needs to be optimized for speed, security, and search. If you can get those tools in place before any testing takes place, you can ensure that you’re QAing the site while it’s running at its best.
These are the plugins you should install:
- Security
- Caching (focus on the other speed optimization features)
- Image compression
- SEO
There may be other WordPress plugins you need as you go about developing your site, but those can be tackled once you reach those steps.
Things to do during the development of a WordPress site:
6. Review the Design with End Users
This is what’s known as a cognitive walkthrough. Basically, you want to experience the completed website as an end user.
For testing purposes, this is something your WordPress developer should do on their own, something you (or the main stakeholder in the project) should do, your dedicated QA person should take a stab at it, as well as a number of people who’ve had no hand in the project up until this point. Consider reaching out to clients, employees that work in other departments, or invite random users from the web to test the site out.
Through your staging site, you can create temporary login credentials for your users. Other than that, leave them to it. Don’t explain what the site is about, what it’s selling, or anything else. Just ask them to step into the website and work their way around it.
Here is what you should be looking for:
- Is it clear what the brand behind the site is and what they do? Will the logo leave a lasting impression? Does the messaging accurately explain the story, goal, and unique selling proposition?
- Are there any issues with the navigation? Was it easy to find? Easy to use? Do the labels clearly explain their intended destination?
- How does search work? Are results relevant? Does it work fast enough?
- Were there any impediments within the design itself that kept users from getting around the site? Colors? Typography? Images? Distractions?
- Did the natural path users take drive them directly to conversion?
If you’re left with more questions and confusion after new users have taken it for a whirl, then you’ll need to take this back to the drawing board. Hone in on the specific areas that caused the most friction and iron those out before giving the design another test run.
7. Test the CTA
The call-to-action (CTA) will be an essential part of the conversion funnel on your website. While your end users will encounter it during the cognitive walkthrough–and you’ll want to get their opinions on it–you need to test this out for yourself as well. Since CTAs are an actual design element that need to be written, formatted, placed, and linked, there is a lot that can go wrong.
Verify that each CTA:
- Is easy to find.
- Is located in the most logical spot on the page. This is usually right after you’ve explained the “why”, leaving users to want to click the button to find out “how”.
- Is styled in a way that complements your branding and design, but also boldly stands out against the rest of the page.
- Is large enough to click on without issue (especially important for mobile).
- Is succinctly and simply worded.
- Links to the page it promised to link to.
8. Test Contact Forms
Every contact form on your website needs to be tested. It doesn’t matter if the form is identical from page-to-page. If there is a new instance of it, you need to verify that it works as promised.
Check your forms for the following:
- Placement on the page. Like the CTA, it should appear in a location where it’s expected.
- Wording. This pertains to any directions given above the form as well as labels placed inside and outside of the fields. Do they make sense?
- Size of the fields. This might not be a big deal for the average user, but for mobile as well as accessibility-impaired users it will.
- Steps. Some contact forms are more complex than others, so only include the number of fields and steps that are necessary.
- Button. The CTA of a contact form needs to be reviewed the same as all other buttons on the site.
- Confirmation. There are three kinds of confirmations to verify: 1) Did the end user receive a confirmation message on screen or be directed to a thank you page?, 2) Did the end user receive a complementary confirmation email?, 3) Did the admin of your site receive a confirmation email regarding the form submission? And did the messages make sense?
Be sure to do this for all contact forms, even for ones with a single field for people to subscribe to your newsletter or blog.
9. Test Checkout
The same process needs to happen if your website has an e-commerce checkout. The testing process for the contact form and confirmation will be the same as with a standard contact form. What will differ, however, is the following:
- Testing the login, if you allow users to sign in with a saved account, social media, or Amazon.
- Testing the payment gateway to ensure that it captures the right details and completes the transaction.
- Confirming the purchase was registered on your end and that the delivery of the product, subscription, or service was initiated.
10. Force Errors to Occur
Obviously, the whole reason you have a quality assurance plan is to prevent errors from occurring. That said, it’s inevitable. A link might break without you knowing. A user may try to go to an old page that doesn’t exist anymore. Or a contact form could be filled out improperly.
Take each of these potential scenarios into consideration and force them to happen during your QA phase.
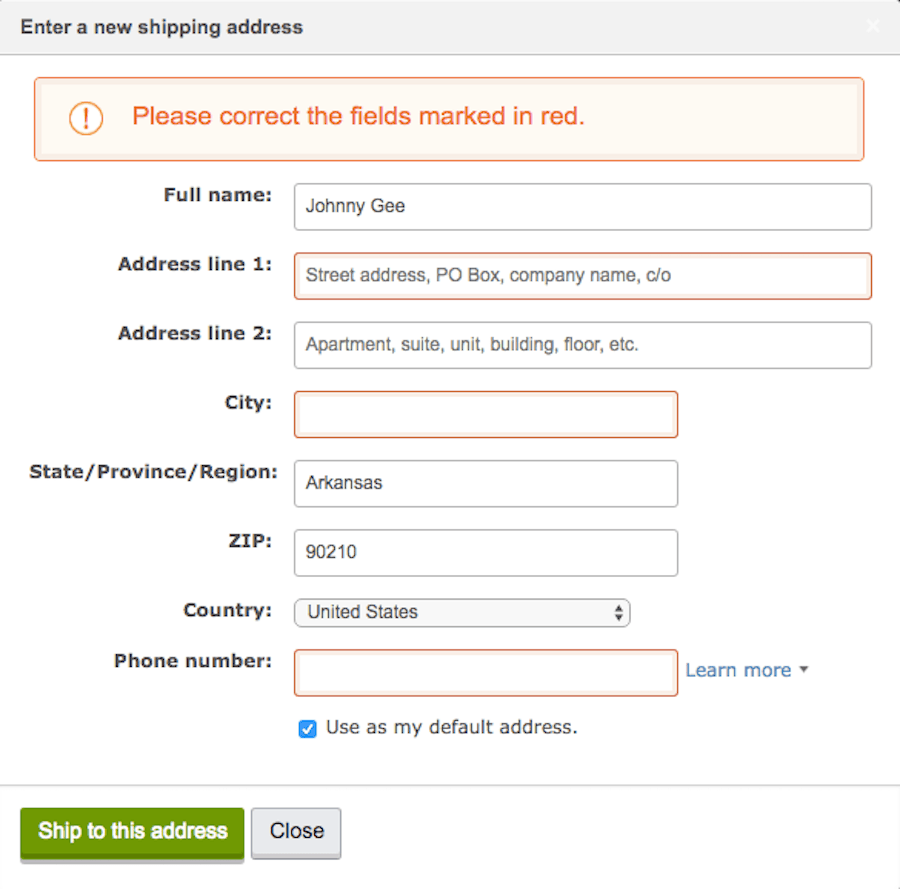
With an incomplete or incorrectly filled out form, verify that the error message indeed shows up. Also, make sure that it’s clear why there was an error. Did someone miss a required field? Was the right kind of text inputted? Is there something else wrong with the form?
With a bad URL request, review how that looks to the end user. Is any sensitive database information exposed in the error message (which can happen)? Is the resulting message too cold or unclear? You may want to give users testing the design a look at the error message. They might be more comfortable if you instead redirected them back to the home page.
11. Play Around with Interactive Elements
Any interactive elements you’ve included on your site will need a thorough QA round, too. These could be things like:
- Pop-ups
- Calculators
- Image galleries
- Video or audio players
- Downloadable content
- Live chat
- Social media links or shares
Look at how they show up on the page, review the design, read the wording, and make sure they’re only triggered to show up or animate when and where they’re supposed to. And don’t forget to review them on mobile. For many of these interactive elements, they’ll be too overwhelming on mobile and you’ll want to remove them entirely from that experience.
12. Read through the Copy
This QA task is best left up to your site’s proofreader and editor. Ideally, this will be done before any copy is put into WordPress.
The proofreader can start by using a spelling and grammar checking tool like Grammarly.
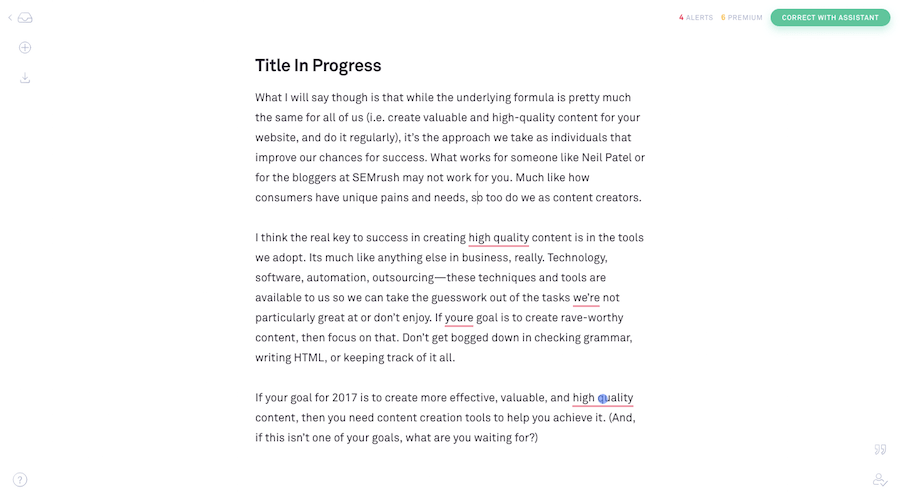
Each page can be popped in here and the proofreader can run a check to quickly take care of glaring errors. This’ll reduce the amount of time spent on cleaning up the rest.
The editor will then need to read through each page carefully to ensure it’s been written to align with the site’s original goal, that it stays on topic, and the language is strong and clear.
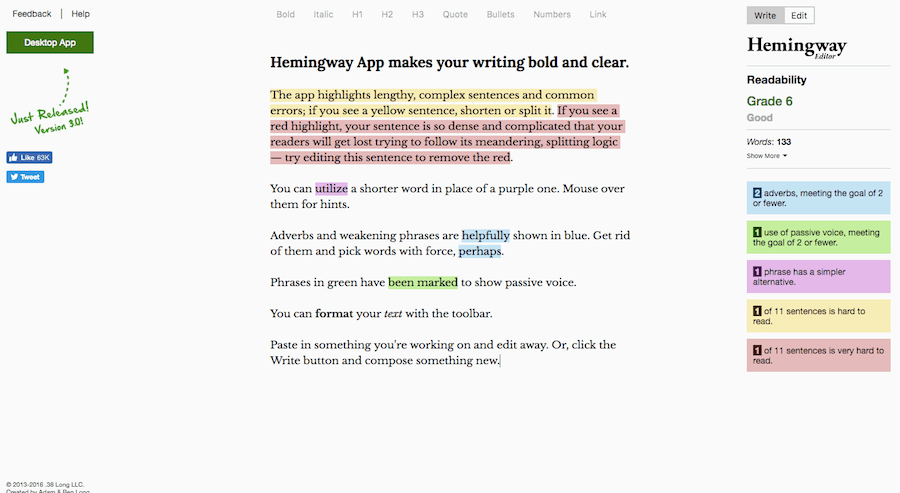
The Hemingway Editor is a tool I’d suggest editors use to clean up clunky language and ensure the text is readable.
Of course, the editor should be well-versed in proper structuring and formatting of text, too. Your pages need to be scannable with bold and well-written headers, bulleted sections, and good spacing.
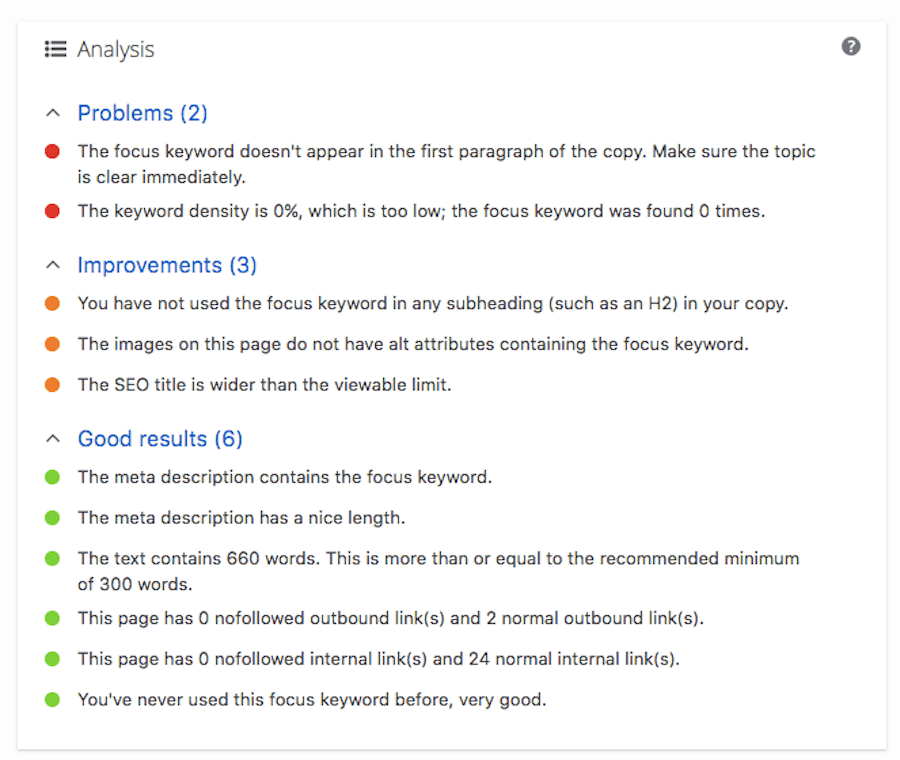
13. Confirm with the SEO Plugin
Once you’ve let your people read through and edit the content, it’s time to test it in WordPress. The plugin I prefer to use for this is Yoast SEO.
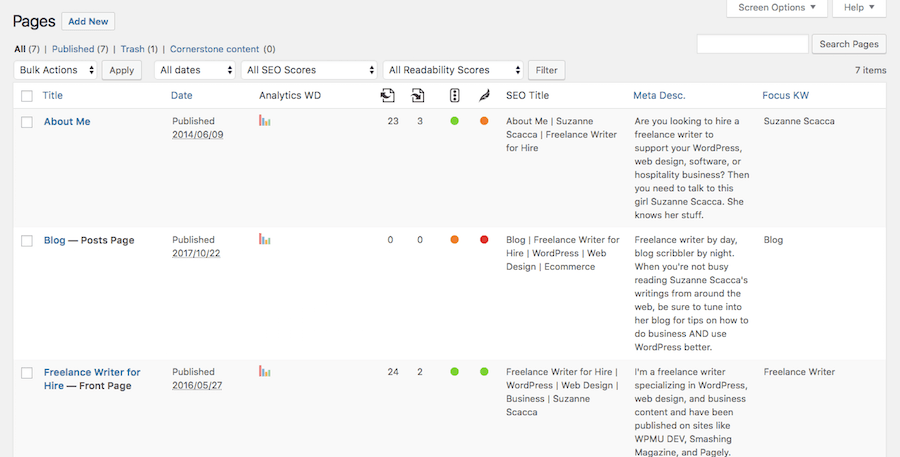
It provides me with instant and clear feedback about:
- The readability of my pages.
- My SEO optimization score.
- The number of internal links the page has.
- The number of external links that point to the page.
- What I can do to improve the SEO friendliness of the page.
Keep in mind that these are just the basics of SEO; that is, writing good copy and optimizing it around a keyword. There’s much more to SEO than that, so make sure you follow your SEO checklist before launching a new site.
14. Test Every Link
I know this one is a pain, but it needs to be done as broken links can get annoying real fast if visitors are excited about your site, but continue to encounter dead ends.
First, install the WP Broken Link Status Checker plugin. Once all your content is in place, run a scan on the links to uncover any that are broken. If you find any, repair them. Then, when you’re done, delete the plugin from WordPress. You don’t want it draining resources while your site is live.
Next, set up a system of 301 redirects to handle any future broken links. This will help keep users on your site and away from the dreaded 404 error page.
Finally, you’re going to need to do a sweep of all anchor text used in your links. The best person to assign this to is the editor or SEO as they’ll be familiar with the kinds of keywords internal links should be connected to.
15. Look Over Your Images
By now, you already have an image optimization plugin like Smush in place. This will take some of the work out of making images lean and mean.
What you need to do now is verify that:
- Images appear when they’re supposed to.
- Placement on the page makes sense.
- Alt tags are used for users with accessibility issues.
- Images are consistently sized around the website when they appear in the same location or for the same function.
- Every image appears crystal-clear.
- The colors within the image don’t conflict with the rest of the page.
- The content of the image is relevant to the message of the page.
- Any text displayed on top of the image can be easily read, even if scrolling over a parallax image.
- Any captions provided for images correctly match them.
16. Check for Coding Compliance
Even if you only have one WordPress developer building your site, or you’ve relied heavily on a theme and plugins to build it, you should still check the quality of the coding for issues. You can do this with W3’s Validator tool.
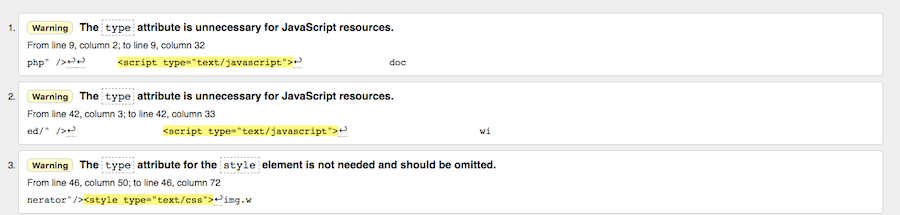
It will reveal any issues detected with your HTML and give you a chance to clean those up before you push your site live. In the end, that’ll help your site run more efficiently.
17. Check for Accessibility Issues
Accessibility, in general, is a pretty complex matter, so I won’t cover all the points you need to focus on here. However, I do want to stress how important it is for your site to cater to impaired individuals now that websites are being held legally liable for accessibility issues.
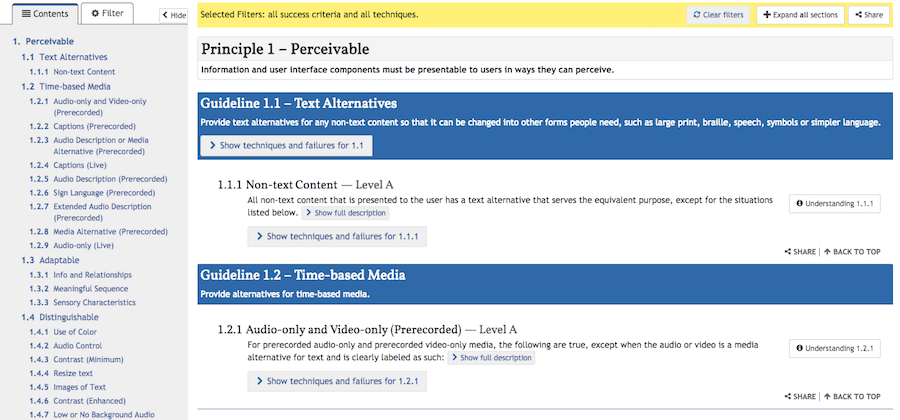
The WAI keeps a set of Web Content Accessibility Guidelines updated on its website at all times, so I would suggest using that as your accessibility checklist.
Things to check once during development and again after the launch of your WordPress site:
18. Test Browser and Device Compatibility
Mobile-first indexing is here, so this quality assurance test is not optional.
There are four tools and methods you will need to use to test your website’s cross-browser and device compatibility.
The first is to review each page of your site within WordPress.
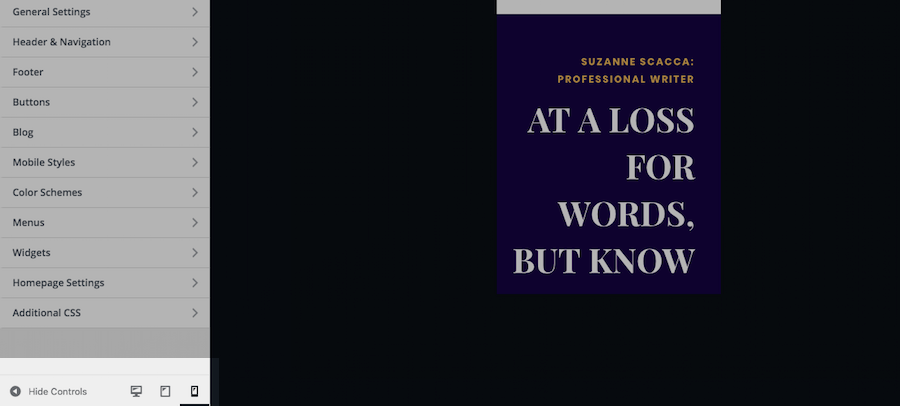
If you want to check the whole site at once, you can do this by opening your Appearance menu and navigating to Customize. This will take you to your theme’s settings. In the bottom-left corner, you can select the generic device size and then scan through how your website looks on the right. It won’t be exact, but it’s a good place to start.
If you’re using a page builder tool or a theme with a visual builder, you can review your on-page compatibility with tablets or mobile devices when developing in real-time, too.
Next, you’ll need an app like Browser Stack to test your website on all major devices and browsers.
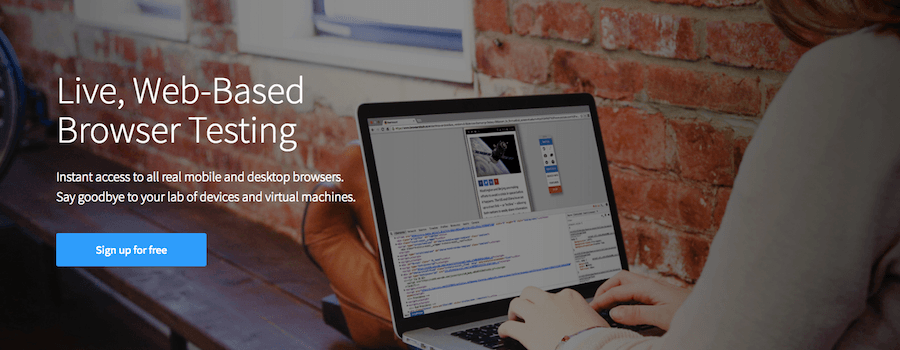
Like WordPress, tools like these have their limitations. Use what you learn here as a reference point, but not as the final say on your site’s responsiveness.
Next, test your site’s cross-browser compatibility manually. I know, I know… It sucks. But it’s the only way to know for sure that everything looks good and works as it’s supposed to on smaller screens.
And, finally, once your site is live, run it through Google’s Mobile-Friendly Test.
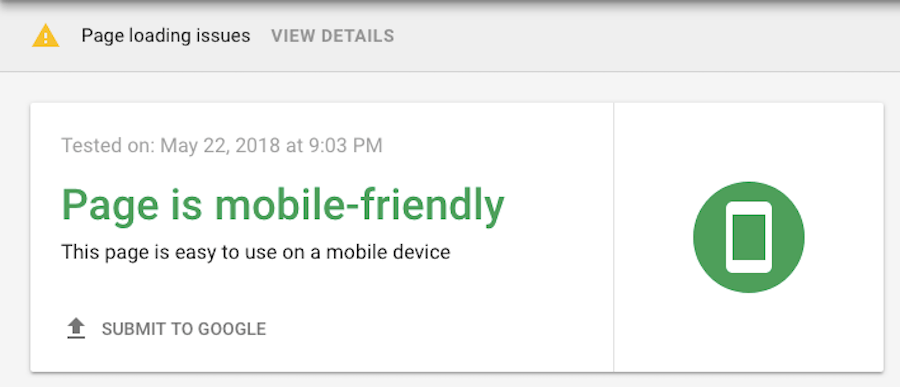
Google will give you the all-clear and may also give you tips on how to fix rendering issues.
19. Test for Speed
There are a number of free online speed testing tools you can use, but I prefer Google’s PageSpeed Insights.
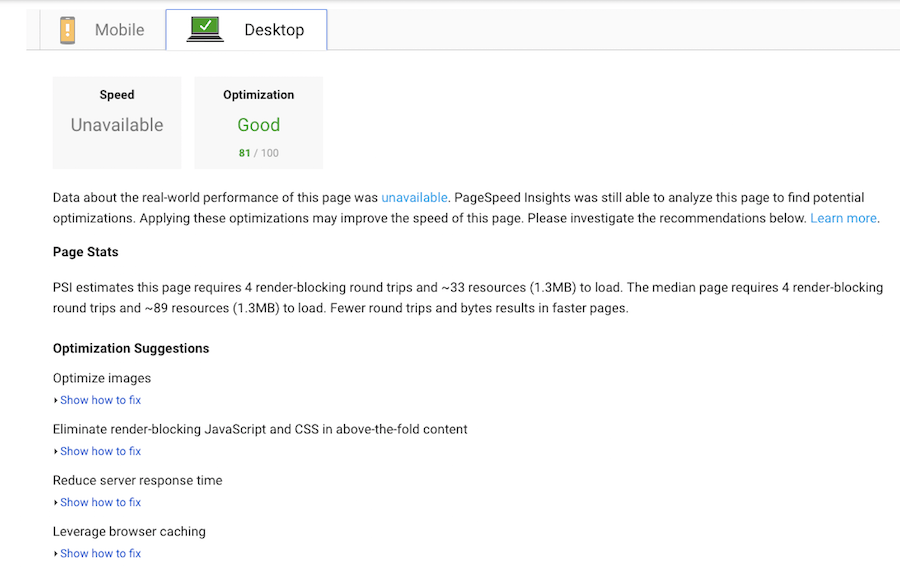
I like that Google not only provides me with a speed score for both the desktop and mobile experience, but it also provides me with tips on how to fix issues with coding or images that are impacting performance.
20. Test for Stress
While speed testing is good to get a sense of what your WordPress site’s baseline is, it won’t tell you what will happen in the case of a traffic spike. When your site and server are put under a lot of stress, you need to ensure that your resources are capable of handling it.
Rather than seek out stress-testing tools on your own, though, work directly with your web hosting company on this one. Pagely recommends that its customers use LoadImpact to run their tests but to work in conjunction with Pagely to monitor performance.
21. Test for Security
Security is a major concern for every website owner. Once you have all security measures in place at the WordPress and server levels, you need to be able to put them to the test.
Sucuri SiteCheck is the tool I prefer to use for this.
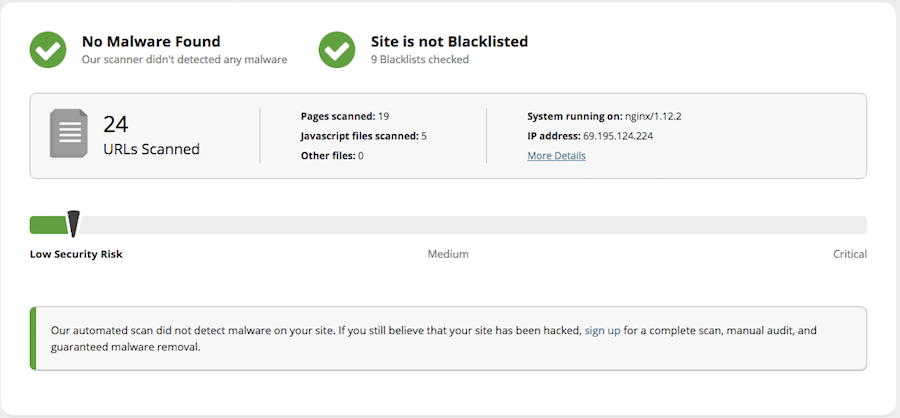
It lets me know if there’s any malware or spam detected, if any of my WordPress software is out of date, if there are issues with the firewall, or if (gulp) my site has been blacklisted in search. You can also use your WordPress plugin to run a scan and check for vulnerabilities.
22. Test Google Analytics
Google Analytics is a critical piece of every WordPress site. Without this tool, it’ll be near impossible to make any type of well-informed strategic decisions for your website in the future.
To start, confirm that it’s been added to your site. The easiest way to do this is to log into your Analytics account and make sure there’s traffic coming in.
Next, configure any additional modules you need to track for. Like Ecommerce. Google Analytics can be a really powerful tool if you configure it to pull in the right data.
Also, enable Goals for your site. This way, if visitors aren’t following the right sales funnel, if sales are slow, if any other milestones aren’t being hit, Google Analytics can let you know.
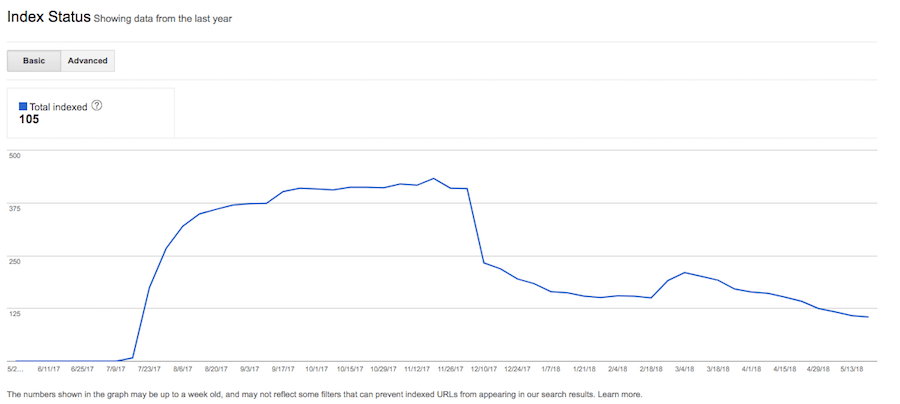
23. Verify Your Site Is Being Indexed
Once your site has been live for about a week, go to Google and search for your domain name. While a week is way too soon for your site to be indexed and ranking on the first page, a direct search for your website will let you know if there are any problems in general with indexing.
In the meantime, you can use Google’s Search Console to verify that your entire website has been indexed.
If you discover any issues, check these two files from your website:
- robots.txt – which will tell search engines whether or not to index your site or certain pages within it
- sitemap_index.xml – which will provide search engines with all the indexable pages on your site
If either of these are missing or contain erroneous information, fix them and resubmit your site to Google. If you’re using an SEO plugin, it can do that for you. If not, just do it through the Google Search Console.
24. Test Third-Party Integrations
With your website live, you’ll need to test your third-party integrations the way you tested your on-site contact forms. So, if you’ve connected WordPress to any of the following, test out those processes to ensure they do what was intended.
- Email marketing
- CRM lead generation
- Landing page campaigns
It would be a shame to give an app access to your site, only to find out they weren’t working right, so keep this in mind any time you add a new tool to your site.
25. Amend Your Quality Assurance Plan on an Ongoing Basis
What I’ve given you here is a list of the basic elements a WordPress quality assurance plan should contain. However, that doesn’t mean you can’t or shouldn’t take this and make it your own. If you develop websites for a particular industry and find that there are other elements that need testing (like reservation systems, product pages, push notifications, etc.), add them to this checklist.
Wrapping Up
With so much at stake when a user’s experience is disrupted, you can’t afford to leave your WordPress site without a comprehensive quality assurance plan. The 25 tools, tips, and tests above will get you started. But also be sure to sign on with a managed WordPress hosting provider like Pagely to help you address the security, performance, and backup piece of the puzzle.